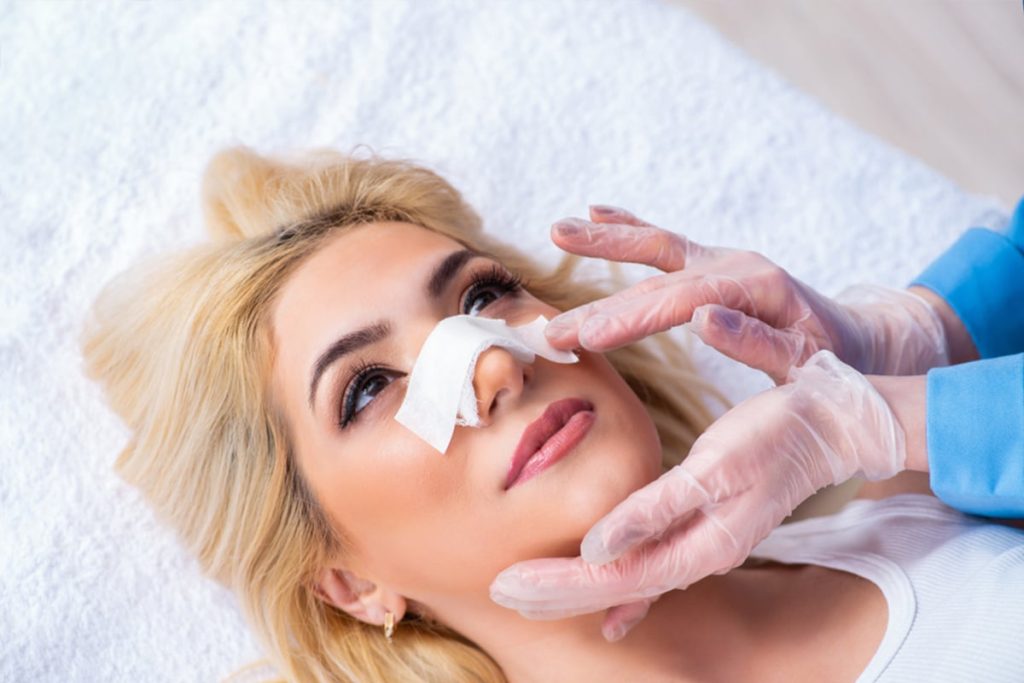
Did you know that nearly 70% of adults struggle with stubborn fat despite various body shaping methods like weight sculpting fitness regimens, body contour techniques, and SculpSure? Trusculpt ID radiofrequency offers a game-changing solution. This innovative treatment targets unwanted fat without surgery. It uses advanced technology to contour your body effectively. Many people are achieving their dream shapes through fat thickness reduction and sculpting with minimal downtime, targeting subcutaneous fat and id treatment.
Trusculpt ID is not just about aesthetics; it boosts confidence and well-being. This non-invasive procedure sculpts by heating fat cells, leading to natural elimination by the body. Results are noticeable and can last long-term. If you’re tired of diets and workouts failing to sculpt and deliver, this could be your answer. Discover how trusculpt ID radiofrequency transforms lives and reshapes bodies.
Understanding truSculpt iD Technology
Monopolar RF Technology
Monopolar radiofrequency (RF) technology is at the core of truSculpt iD. This method uses a single electrode to sculpt and deliver energy deep into the skin. It sculpts by heating the fat cells while leaving surrounding tissues unharmed. This targeted approach ensures effective body sculpting. Patients experience minimal discomfort during the procedure.
The energy penetrates through different layers of skin. It sculpts the fat layer, causing thermal damage to fat cells. This process leads to fat cell apoptosis, which means the fat cells sculpt and die off naturally. The body then metabolizes these dead cells over time. This results in a slimmer appearance.
Real-Time Temperature Control
Real-time temperature control enhances the safety and effectiveness of truSculpt iD. This feature monitors skin temperature throughout the treatment. It ensures that the heat sculpt remains at optimal levels for fat reduction without harming other tissues.
The system sculpts energy delivery based on feedback from sensors. If temperatures rise too high, the device automatically sculpts and reduces power. This keeps patients comfortable and safe during their sessions. The controlled environment leads to more consistent sculpt results across different body areas.
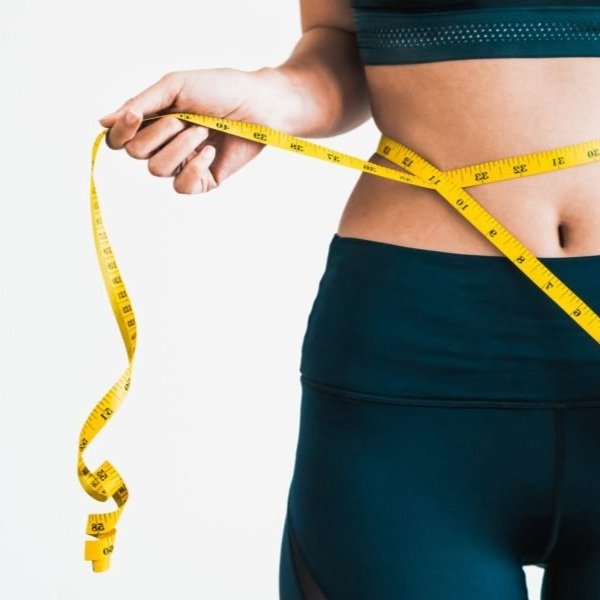
Fat Reduction Results
Studies show that truSculpt iD achieves an average of 24% fat reduction. This percentage indicates how effectively it sculpts and targets the entire fat layer in treated areas. Patients can see noticeable changes within weeks after treatment.
Results vary by individual, depending on factors like body type, lifestyle, and how one sculpt their routine. Many people report feeling more confident after their sessions. They appreciate how truSculpt iD helps them achieve their desired body shape without invasive surgery.
Patients typically undergo multiple sessions for optimal results. Each session lasts about 15 to 30 minutes, sculpting convenience for busy schedules. Most individuals return to normal activities immediately after treatment.
Treatment Areas
truSculpt iD can treat various areas of the body effectively. Commonly treated regions include:
-
Abdomen
-
Thighs
-
Arms
-
Back
-
Love handles
Each area responds well to RF technology, sculpting tailored solutions for patients based on their needs.
How Radiofrequency Energy Works
Energy Delivery
Radiofrequency (RF) technology uses energy delivery to sculpt and target fat layers effectively. It sends energy deep into the skin to sculpt, reaching the fat layer. This process involves using 2 MHz Monopolar RF technology.
This specific frequency helps sculpt and deliver heat evenly throughout the entire fat layer. While it sculpts the fat, it keeps the skin at a comfortable temperature. Maintaining this balance is crucial for patient comfort during treatment.
Heat Selectivity
Heat selectivity is essential in this process. The system ensures that therapeutic temperatures exceed 45ºC within the fat layer. This temperature is effective for reducing fat pockets. At the same time, the skin remains cooler to avoid discomfort or injury.
The design of truSculpt iD allows for precise targeting of unwanted fat. By controlling heat distribution, it minimizes risks and maximizes results.
Pockets of Fat
Fat often accumulates in specific areas, forming pockets. These can be challenging to eliminate through diet and exercise alone. truSculpt iD addresses these stubborn areas directly.
By penetrating deep into the fat layer, RF energy disrupts fat cells. This disruption leads to a reduction in the size of these pockets over time. Patients may notice improvements after just one session.
The ability to treat multiple areas at once makes truSculpt iD efficient. This treatment can cover larger zones without compromising safety or effectiveness.
Treatment Experience
Patients typically experience a warm sensation during the procedure. The device adjusts to ensure comfort while delivering effective results. Most find the treatment tolerable, with minimal side effects.
Sessions usually last about 15-30 minutes, depending on the area treated. Many people return to their daily activities immediately after treatment.
Results Timeline
Results from truSculpt iD are not instant but develop gradually. Patients may start seeing changes within a few weeks. Full results often appear around 12 weeks post-treatment.
Regular follow-ups can help maintain results and address any concerns. Many clinics provide guidance on post-treatment care and lifestyle adjustments.
Application of RF in Body Sculpting
Abdominal Lipolysis
Single RF treatment is effective for abdominal lipolysis. This method reduces fat thickness and targets the abdominal area. Research shows that patients experience a significant reduction in abdominal circumference after treatments.
Monopolar RF technology applies deep dermal heating. This process specifically targets subcutaneous adipose tissue. The heat penetrates the skin layers, causing fat cells to break down. Studies indicate that this technique can lead to a noticeable decrease in fat layer thickness.
Treatment Areas
The use of MHz monopolar RF allows for precise treatment. Each session focuses on a cm² treatment area. This precision helps optimize results in specific body regions, such as the abdomen and flanks. Patients often report satisfaction with their slimmer appearance after undergoing these procedures.
Consultation with a professional is essential before starting treatment. Operators must refer to the Operator Manual for approved indications. Different geographies may have varying regulations regarding RF treatments. Understanding these guidelines ensures safe and effective application.
Fat Tissue Reduction
RF treatment leads to significant fat tissue reduction. The energy emitted during the procedure effectively disrupts fat cells. As a result, patients can achieve a more contoured body shape without invasive surgery.
Skinfold thickness reduction is another benefit of RF technology. Measurements taken before and after treatment show a marked decrease in skinfold thickness. This outcome enhances overall body aesthetics and encourages patient confidence.
Comparison with Lasers
While lasers are also used in body sculpting, RF offers unique advantages. RF technology heats deeper layers of skin compared to lasers. This depth allows for more comprehensive fat reduction and skin tightening effects.
Patients often find RF treatments less painful than laser options. Minimal discomfort makes the procedure appealing for many individuals seeking body sculpting solutions.
Proven Effectiveness and Results
Clinical Studies
Clinical studies show that trusculpt id radiofrequency treatments provide effective results. Research indicates an average fat reduction of 24%. This measurement comes from ultrasound evaluations after treatment sessions. Patients can expect visible changes in their body contours.
Studies demonstrate clinical histology results as well. Inflammation and fat necrosis occur up to 1.5 cm deep in treated areas. These findings confirm the device’s ability to target fat effectively.
Patient Outcomes
Patients report satisfaction with their treatment outcomes. Many experience noticeable tightening of the skin after procedures. The heating process causes irreversible damage to targeted fat cells. This damage leads to fat removal over a 12-week period.
The versatility of trusculpt id allows it to treat various body areas. Common treatment areas include the abdomen, thighs, and arms. Each session is designed for patient comfort and safety.
Safety Measures
Safety is a priority during trusculpt id procedures. The device uses controlled heat to minimize risks. Medical professionals monitor patients throughout the treatment. They ensure that the temperature remains at safe levels.
No significant side effects have been reported in studies. Some patients may experience mild redness or swelling, but these symptoms usually resolve quickly. Overall, the treatments are well-tolerated by most individuals.
Treatment Procedures
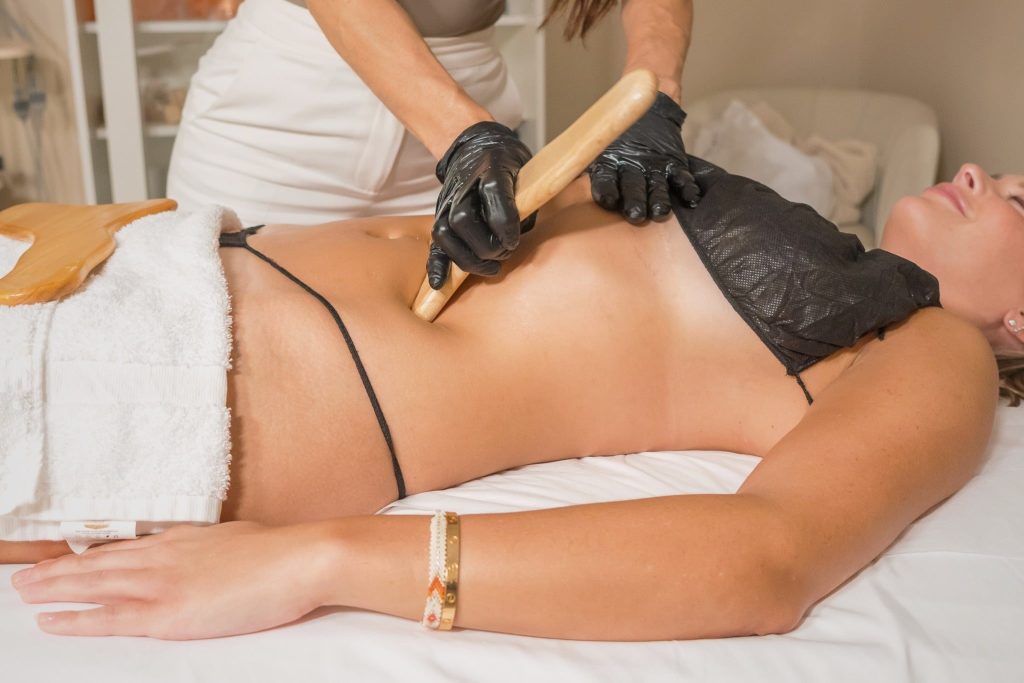
The procedure itself is straightforward. A technician applies a handheld device to the targeted area. Heat penetrates the skin layers, reaching the adipose tissue beneath. This process destroys fat cells while promoting collagen production in the skin.
Each session lasts about 30 minutes to an hour, depending on the treatment area. Most patients require multiple sessions for optimal results.
Long-Term Results
Long-term results show significant improvements in body shape and firmness. After completing a series of treatments, patients often notice lasting changes in their appearance. Fat loss continues even after treatments end, thanks to the body’s natural processes.
Following up with healthy lifestyle choices enhances these results further. Regular exercise and a balanced diet help maintain the changes achieved through trusculpt id treatments.
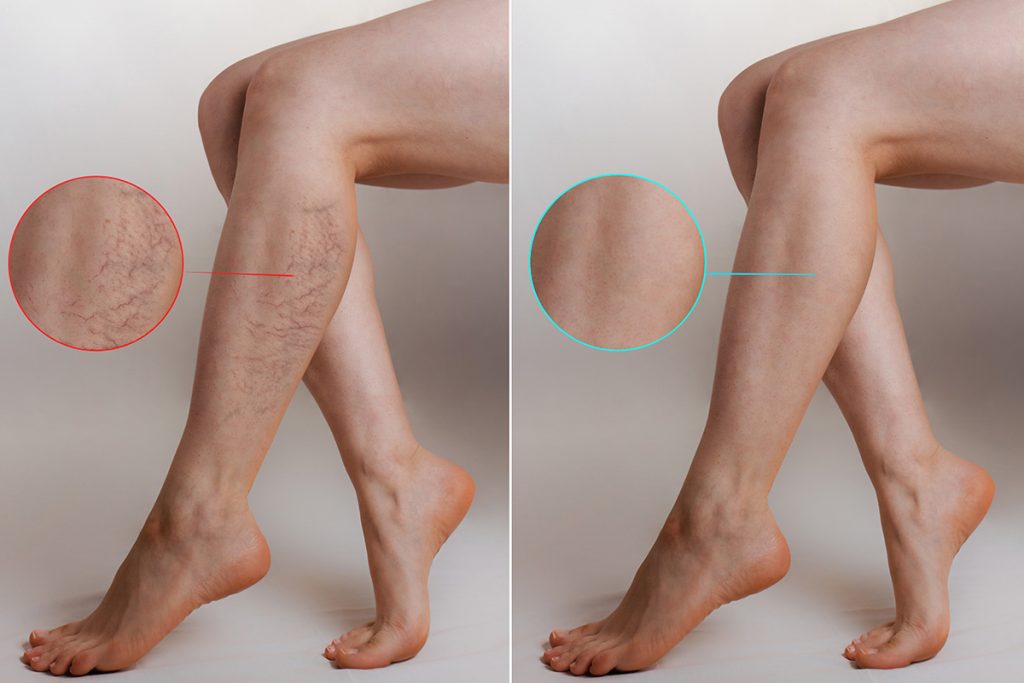
Before and After Comparisons
Visible Reduction
Patients often notice a visible reduction in treated areas after trusculpt id radiofrequency sessions. This treatment focuses on specific body areas, like flanks and abdomen. The average reduction can be seen within weeks following the procedure. Many patients report seeing changes as early as one week post-treatment.
Before and after images highlight these transformations. These images show significant fat layer reduction. Patients can compare their photos to see the effects of the treatment clearly.
Ultrasound Evidence
Ultrasound imaging provides another layer of evidence for effectiveness. Clinicians use this technology to measure fat layer thickness before and after treatment. The data demonstrates a clear decrease in fat volume in targeted areas.
For example, a study showed an average temperature of 43 degrees Celsius during the procedure. This temperature helps break down fat cells effectively. The results are visible in ultrasound images that depict the change over time.
Patient Testimonials
Patient testimonials add personal experiences to the conversation about trusculpt id. Many individuals share their journeys through social media or clinic websites. They express satisfaction with their results and the overall process.
One patient shared, “I lost inches around my waist within weeks.” Another mentioned how they felt more confident wearing fitted clothes again. These stories resonate with others considering the treatment.
Photographic evidence complements these testimonials well. Side-by-side comparisons illustrate real-life results from various individuals. Patients feel empowered by their transformations, reinforcing the treatment’s credibility.
Treatment Applications
Trusculpt id radiofrequency has multiple applications across different geographies. It can target various body areas beyond just flanks and abdomen, including arms and thighs. Each session typically lasts about 15 minutes per area, making it convenient for busy lifestyles.
The operator manual outlines the recommended number of sessions for optimal results. Most patients benefit from three to four sessions spaced a few weeks apart. This schedule allows for gradual fat reduction while monitoring progress.
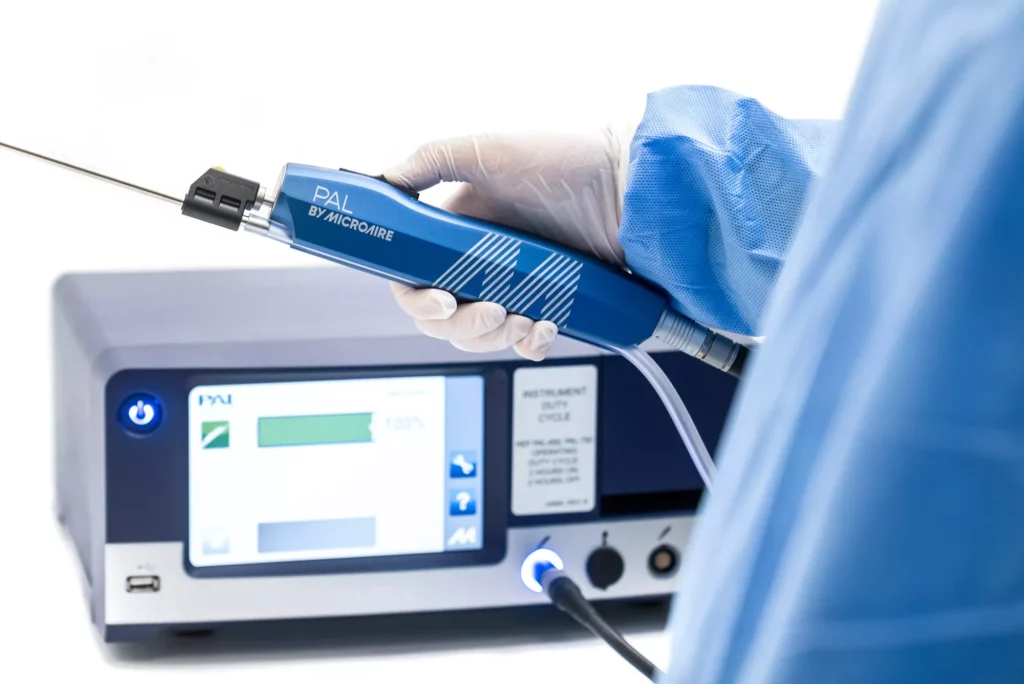
Design Features of truSculpt iD Handpieces
Handpieces Overview
truSculpt iD offers three types of handpieces. These include hands-free 2 MHz 40 cm², hand-held 2 MHz 40 cm², and hand-held 1 MHz 16 cm² options. Each handpiece serves a unique purpose. The hands-free option allows for continuous treatment without needing constant supervision. This feature makes the procedure more efficient.
The hand-held options provide flexibility. Practitioners can easily maneuver them to target specific areas. The different frequencies also offer various treatment depths. The 2 MHz frequency penetrates deeper than the 1 MHz frequency. This allows for customized treatments based on patient needs.
Versatility in Placement
Placement of the handpieces is crucial for effective treatment. The design allows for versatile positioning on the body. Practitioners can adjust the angle and location during sessions. This adaptability enhances treatment effectiveness.
Customization is key in truSculpt iD procedures. Each patient has unique body types and fat distribution. The ability to place handpieces in various positions helps address these differences. Patients benefit from tailored treatments that focus on their specific concerns.
Treatment Protocols
The truSculpt iD system includes 15-minute protocols tailored to individual patients. Quick sessions are designed to fit into busy lifestyles. Patients can receive effective body contouring in less time than traditional methods.
These protocols ensure that each treatment is efficient yet thorough. Practitioners assess patient needs before starting. They decide which handpiece and technique will work best for each case.
The short duration of treatments does not compromise results. Many patients notice changes after just one session. Follow-up sessions can enhance results further, depending on individual goals.
Advantages of truSculpt iD Handpieces
Customized Treatments
truSculpt iD handpieces allow for customized treatments. Each handpiece targets specific areas based on the patient’s needs. This flexibility makes it suitable for various body types and goals. Practitioners can adjust settings to focus on stubborn fat pockets. Patients receive a tailored experience, leading to better outcomes.
This technology enables precise control over treatment parameters. Different handpieces can treat different areas effectively. For example, smaller handpieces work well on the chin or arms, while larger ones target the abdomen or thighs. This versatility enhances treatment effectiveness.
Enhanced Comfort
Comfort is crucial during any medical procedure. truSculpt iD addresses this by offering controlled temperature settings. The device warms the skin gradually, minimizing discomfort. Patients often report feeling relaxed throughout their sessions.
The handpieces also have ergonomic designs. They fit comfortably in the practitioner’s hands. This design reduces strain during long procedures and allows for better maneuverability. As a result, patients experience a smoother treatment process.
Efficient Treatment Sessions
Time efficiency is another significant advantage of truSculpt iD handpieces. Each session lasts about 15 to 30 minutes, depending on the area treated. This quick turnaround makes it easier for patients to fit treatments into their busy schedules.
Practitioners can perform multiple treatments in a day due to the short session times. This efficiency benefits both patients and clinics. It allows clinics to serve more clients without sacrificing quality.
The versatile handpieces accommodate various body shapes and sizes efficiently. They adapt quickly to different treatment areas, ensuring that each session is productive.
Versatile Handpieces
The truSculpt iD system includes several handpiece options. Each one serves a unique purpose, allowing practitioners to address diverse patient needs effectively. From contouring to fat reduction, these tools provide comprehensive solutions.
Using multiple handpieces within a single session is possible as well. Practitioners can switch between them seamlessly as needed. This adaptability enhances the overall treatment experience for patients.
Personalized Body Sculpting Benefits
Tailored Treatments
Body sculpting treatments are designed to fit individual needs. Each person has unique body contours and goals. Personalized approaches enhance the effectiveness of the treatment. For instance, truSculpt iD allows practitioners to customize sessions based on patient body types. This helps target specific areas for fat reduction.
Patients may seek different outcomes. Some desire a more toned appearance, while others aim for overall weight sculpting. Tailoring treatments ensures that each session aligns with these personal objectives.
Enhanced Patient Satisfaction
Targeted fat reduction improves patient satisfaction significantly. Clients often report noticeable changes after just a few sessions. This method effectively reduces stubborn fat in multiple body areas, such as the abdomen, thighs, and arms.
Patients appreciate the visible results without needing invasive cosmetic surgery. The focus on individual goals leads to higher success rates. Many clients feel more confident and satisfied with their body shape after treatment.
Non-Invasive Alternatives
truSculpt iD offers a non-invasive alternative to traditional body sculpting methods like liposuction. Patients can achieve their ideal body shape without surgical risks or lengthy recovery times.
This option appeals to those hesitant about cosmetic procedures. It provides effective skin tightening and muscle sculpting without significant downtime. Many individuals can return to daily activities shortly after treatment.
The technology behind truSculpt iD uses radiofrequency energy. This energy heats the fat cells, leading to their natural elimination from the body. The process is safe and effective, making it a popular choice among patients.
Versatile Applications
This body sculpting treatment solution can address various concerns across multiple body areas. Whether aiming for a tighter abdomen or smoother thighs, truSculpt iD adapts to different needs.
Practitioners can also combine this method with other treatments for enhanced results. For example, pairing it with resurfacing techniques can lead to skin revitalization alongside fat reduction.
Clients enjoy the flexibility of this approach. They can select which areas they want to focus on during their sessions.
Closing Thoughts
truSculpt iD technology harnesses the power of radiofrequency energy to provide effective body sculpting solutions. You’ve learned how this innovative approach works, its proven results, and the unique design features that make it stand out. With personalized benefits tailored to your needs, truSculpt iD is a game changer in body contouring.
Ready to take the next step? Consider scheduling a consultation to explore how truSculpt iD can help you achieve your body goals. Embrace the transformation and boost your confidence today. Your journey to a sculpted body starts now!
Frequently Asked Questions
What is truSculpt iD?
truSculpt iD is a non-invasive body sculpting technology that uses radiofrequency energy to target and reduce fat cells, helping you achieve a more contoured appearance.
How does radiofrequency energy work in truSculpt iD?
Radiofrequency energy heats the targeted fat cells, causing them to undergo apoptosis (cell death). This process effectively reduces fat volume without harming surrounding tissues.
Is truSculpt iD safe?
Yes, truSculpt iD is FDA-cleared and considered safe for most individuals. It’s a non-surgical procedure with minimal downtime and side effects.
How long does a truSculpt iD session take?
A typical truSculpt iD session lasts about 15 to 30 minutes, depending on the treatment area. This makes it convenient for busy schedules.
When can I see results from truSculpt iD?
Results typically appear within 6 to 12 weeks post-treatment as your body naturally eliminates the destroyed fat cells, providing a gradual improvement in contour.
Are the results of truSculpt iD permanent?
While the fat cells treated are permanently eliminated, maintaining results requires a healthy lifestyle. Weight gain can still affect overall body shape.
Can anyone use truSculpt iD?
truSculpt iD is suitable for many individuals looking to reduce stubborn fat. A consultation with a qualified provider will determine if it’s right for you.