facebook page instagram account youtube account
Es - En

Stretch Mark Treatment Laser: Benefits and Risks Explained

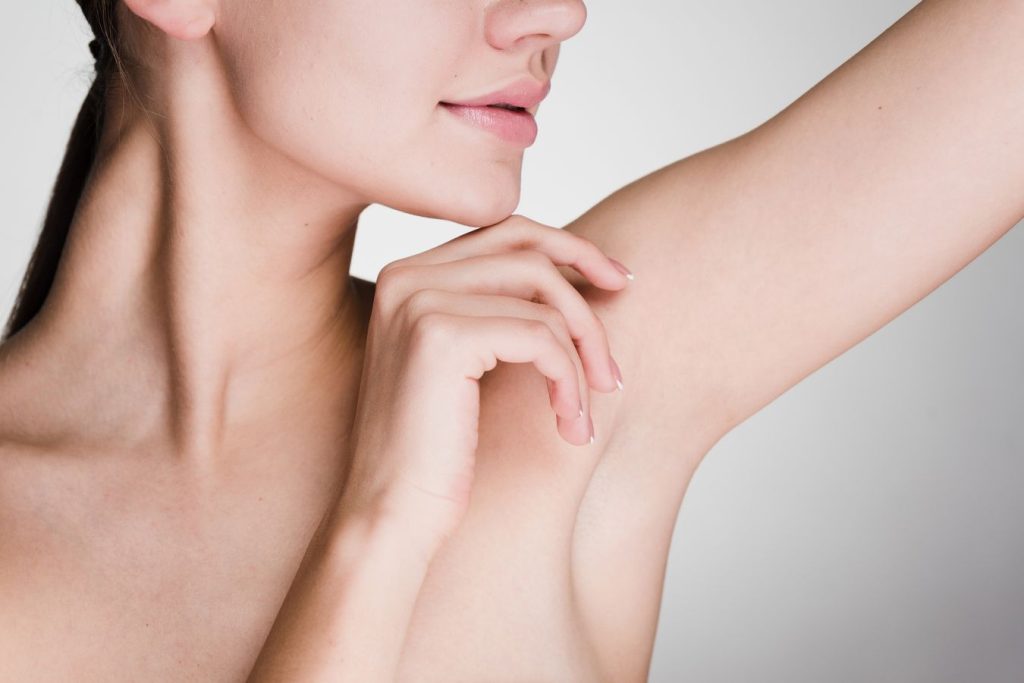
Did you know that over 80% of people experience stretch marks, a common skin condition, at some point? Stretch mark treatment laser options are revolutionizing the way we handle these pesky skin issues for the patient, including surgical scars, with blue light therapy administered by a qualified ASDS dermatologist. This cutting-edge technology offers a non-invasive, effective solution to reduce the appearance of stretch marks through skin resurfacing treatment, ablative laser treatment, and light therapy for the patient. With minimal downtime and impressive results, it’s no wonder more patients are turning to laser treatments by a qualified ASDS dermatologist despite potential risks.

In this post, we’ll dive into how stretch mark treatment lasers work, their benefits, and what you can expect from the procedure with a qualified ASDS dermatologist for the patient. Whether you’re dealing with recent stretch marks or older ones, understanding your options like ablative laser treatment from an ASDS dermatologist can help you make an informed decision as a patient. Let’s explore the world of laser treatments for stretch marks with an asds dermatologist and discover how they can help you achieve smoother, clearer skin as a patient.

Understanding Stretch Marks

Definition

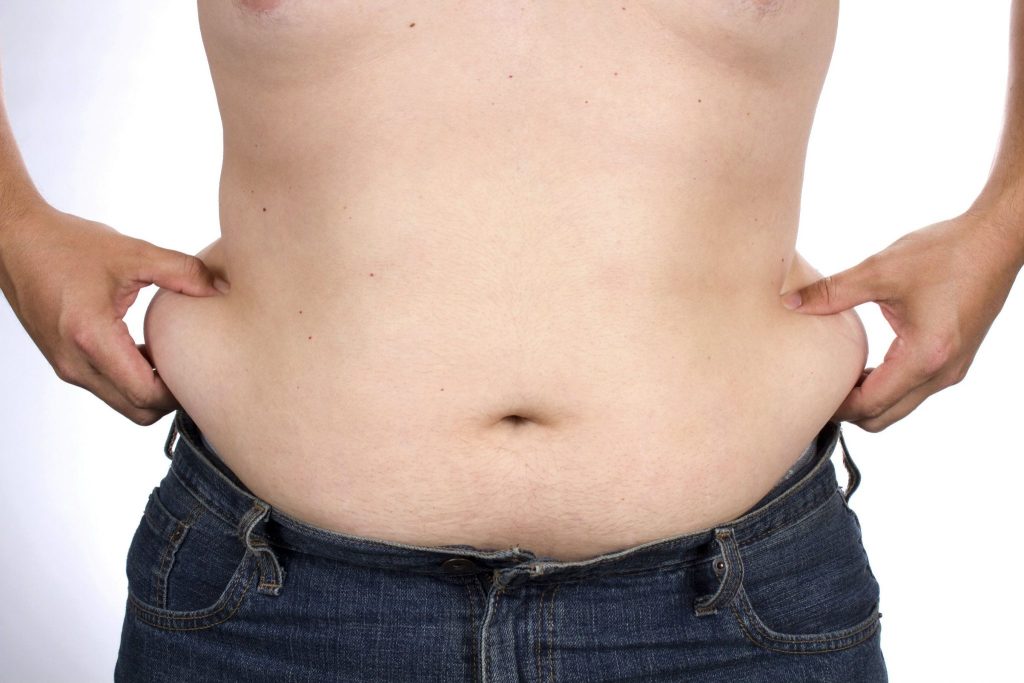
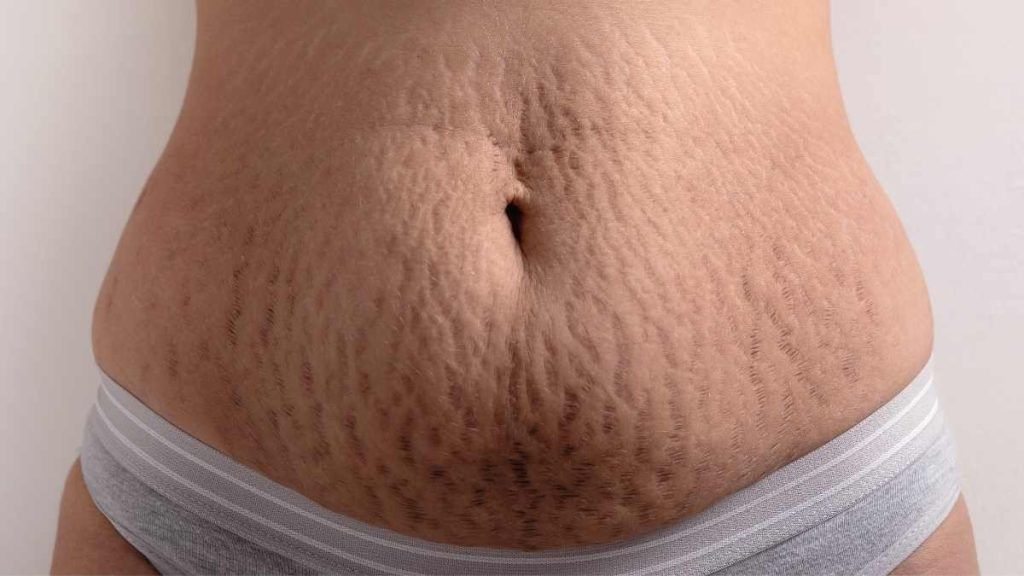
Stretch marks are scars. They form when the dermis tears due to rapid growth or weight gain, often treated by asds dermatologists using laser stretch mark treatments. These scars are known as striae.

Affects All Individuals

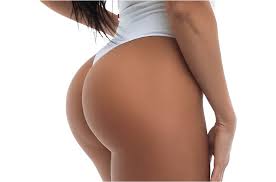
Stretch marks affect everyone. Age and gender do not matter. They commonly appear on:

  • Abdomen

  • Breasts

  • Hips

  • Flank

  • Buttocks

  • Thighs

These areas are prone to stretching.

Difficulty in Removal

Completely removing stretch marks is difficult. The skin’s structure changes permanently. Effective treatments are necessary.
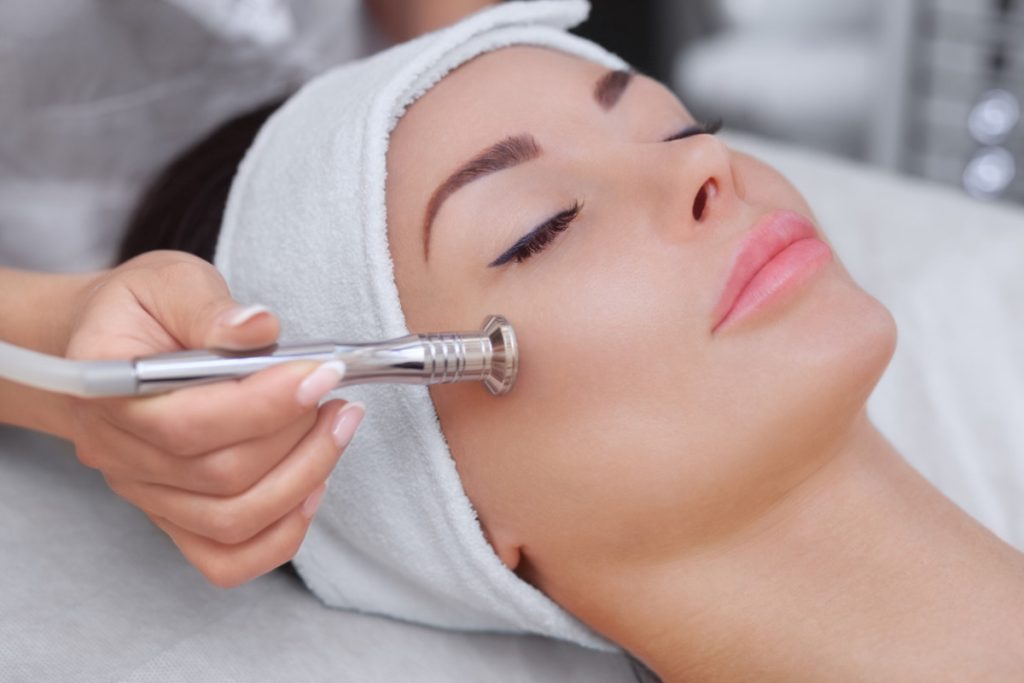
Laser Therapy

Laser therapy helps treat stretch marks. This method uses focused light, such as laser stretch mark removal, to target the affected area, asds dermatologist. It stimulates collagen production.

Benefits of Laser Therapy

Laser therapy offers several benefits:

  • Reduces appearance of stretch marks

  • Improves skin texture

  • Minimizes skin pigmentation issues

Benefits of Laser Treatment

Collagen Production

Laser therapy promotes collagen production. Collagen is a protein that helps skin stay firm and smooth, asds dermatologist, often discussed during laser stretch mark removal. The laser penetrates the skin and stimulates collagen growth. This process improves the appearance of stretch marks.

New skin generation also occurs. The laser removes damaged skin layers. New, healthier skin replaces the old layers. Stretch marks become less visible as the skin regenerates.

Non-Invasive Nature

Laser treatment is non-invasive. Unlike surgery, there are no cuts or stitches. This makes it a safer option for many people.

Minimal downtime is another benefit. Patients can return to normal activities quickly. Most people only need a few days to recover from laser treatments, asds dermatologist.

Healing Response

Laser therapy boosts the healing response. The laser’s heat encourages blood flow to the treated area, asds dermatologist. Increased blood flow speeds up healing.

The immune system also benefits. Laser treatment can enhance overall skin health. Healthier skin looks better and feels smoother.

Safe and Effective

Laser stretch mark removal is safe and effective. Many patients see significant improvements after just a few sessions. Fractional laser therapy targets specific areas without damaging surrounding tissue.

Ablative laser treatments are one type of laser therapy used for stretch marks. They remove thin layers of skin, which promotes new skin growth.

Risks of Laser Therapy

Pain and Swelling

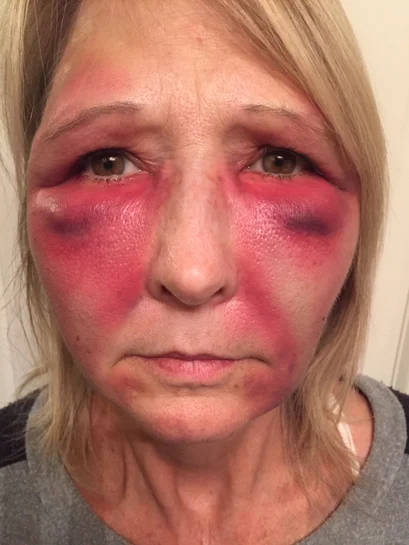
Laser therapy for stretch marks can cause pain. The laser’s heat may lead to discomfort during the procedure. Some patients report a burning sensation. Swelling often follows the treatment. This is a common side effect. It usually subsides in a few days.

Skin Discoloration

Skin discoloration is another potential risk. The laser can affect skin pigmentation. This may result in either hyperpigmentation or hypopigmentation. Hyperpigmentation causes dark spots. Hypopigmentation leads to lighter patches on the skin. These changes are sometimes temporary but can be permanent.

Scarring and Infection

Though rare, scarring is a possible risk. Improper use of the laser can damage deeper layers of the skin. This might cause scars to form. Infections can also occur if the treated area is not properly cared for after the procedure. Keeping the area clean is crucial to prevent this.

Qualified Dermatologist

Choosing a qualified dermatologist minimizes risks. A skilled professional ensures proper laser settings and technique. They assess your skin type and condition before treatment. This helps avoid complications. Always verify the credentials of your dermatologist.

Follow-up Treatments

Follow-up treatments are often necessary to maintain results. Each session carries its own risks, including repeated exposure to the laser. This can increase the likelihood of side effects like pain, swelling, and discoloration.

Choosing Laser Over Other Methods

Effectiveness

Laser therapy is more effective than creams and oils. Traditional methods like creams and oils often provide minimal results. Creams and oils can take months to show any change. Even then, the improvement is usually slight.

Laser treatments target deeper layers of the skin. They use laser light to stimulate collagen production. This helps regenerate the skin and improve texture. Clinical evidence supports these claims. Studies have shown that laser therapy can significantly reduce stretch marks.

Scientific Backing

Laser therapy has strong scientific backing. Dermatologists use different types of lasers for treatment. One common type is the dye laser. Dye lasers are known for their precision. They target specific areas without damaging surrounding tissue.

Research supports the effectiveness of laser treatments. A study published in the Journal of Dermatology found that laser therapy improved skin texture by up to 60%. The treatments help by breaking down scar tissue and promoting new skin growth.

Cost-Effectiveness

Laser treatments are cost-effective in the long run. Topical products like creams and oils need continuous use. This can add up over time. Many people spend hundreds of dollars on products with little to no benefit.

Laser procedures may seem expensive initially. However, they offer lasting results with fewer sessions needed. Most people see significant improvement after just a few treatments. This makes laser therapy a better investment compared to ongoing purchases of topical products.

Professional Guidance

Dermatologists recommend laser therapy for stretch marks. Experts in dermatology understand skin conditions well. They can tailor treatments to individual needs. This ensures better outcomes and minimizes risks.

By choosing professional guidance, patients get personalized care. Dermatologists can also monitor progress and adjust treatments as needed.

Innovative Laser Techniques Explained

Fractional Laser Therapy

Fractional laser therapy is a recent advancement. This technique targets smaller areas of skin. It creates micro-injuries to stimulate healing. This method allows for quicker recovery.

Cosmetic surgery specialists often recommend this treatment. It is effective for reducing stretch marks. The precision of fractional lasers ensures that only affected areas are treated.

Light Wavelengths

Different wavelengths of light are used in laser treatments. Each wavelength penetrates different layers of the skin. For example, shorter wavelengths reach the surface. Longer wavelengths go deeper.

This variety optimizes the healing process. It allows for better targeting of stretch marks. Specialists select the right wavelength based on the patient’s needs.

Personalized Care

Laser treatments can be customized. Specialists consider individual skin types. They also look at the condition of the stretch marks.

Personalized care ensures better results. Different skin types react differently to lasers. Customization minimizes risks and improves outcomes.

Benefits and Risks

Laser technology offers many benefits. It is non-invasive and precise. Recovery times are shorter compared to other methods.

However, there are risks involved. Some patients may experience redness or swelling. It’s important to consult a specialist before undergoing treatment.

Preparing for Your Session

Consultation

Consult an ASDS dermatologist before your session. A thorough medical history review is essential. The dermatologist will perform a physical exam to ensure you are a suitable candidate for the procedure. This step helps identify any underlying conditions that might affect the treatment.

Avoid Sun Exposure

Avoid sun exposure before your laser treatment. Sunburned or tanned skin can react poorly to the laser. It can lead to complications like hyperpigmentation or burns. Use sunscreen with high SPF if you must be outdoors.

Medication Check

Certain medications increase skin sensitivity to lasers. Inform your dermatologist about all medications you are taking. This includes over-the-counter drugs and supplements. Your doctor may advise stopping some medications temporarily.
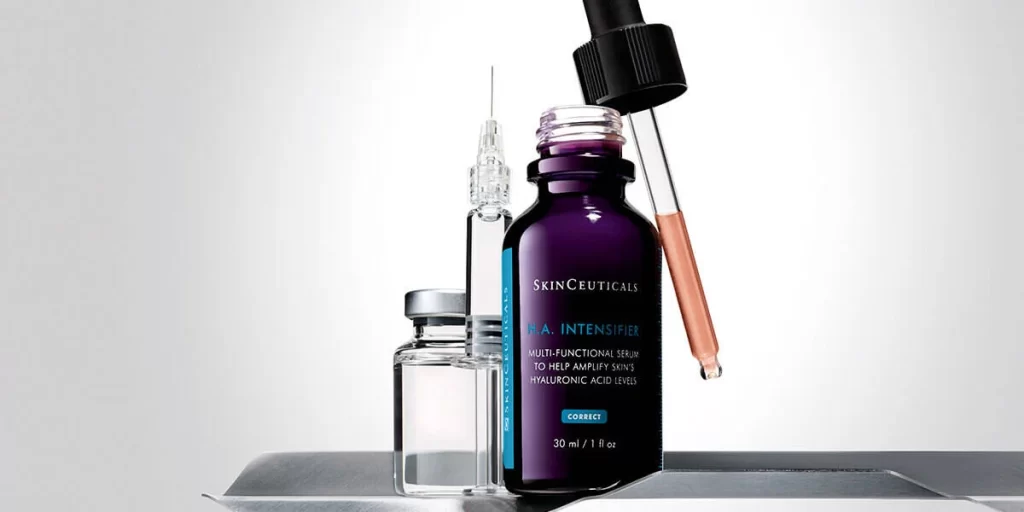
Skin Preparation

Prepare your skin as advised by your dermatologist. They might recommend specific lotions or treatments. These products can help optimize the results of the laser treatment. Follow their instructions carefully for the best outcome.

Hydration and Diet

Stay hydrated before your session. Drink plenty of water in the days leading up to the procedure. A well-hydrated body can heal faster and better withstand the laser treatment.

Post-Treatment Expectations

Initial Reactions

Patients may notice immediate effects after the laser treatment. Skin can appear pink or red. Some experience mild swelling. The treated area might sting, similar to a sunburn. These reactions are normal and temporary.

Healing Time

Significant changes might not be visible right away. It takes time for the skin to heal and regenerate. Expect to see improvements several weeks post-treatment. Patience is key during this period.

Post-Care Instructions

Following post-care instructions is crucial for optimal results. Avoid applying makeup on the treated area initially. This prevents irritation and supports healing. Moisturize regularly to keep the skin hydrated.

Sun Protection

Protecting your skin from the sun is essential. Use a broad-spectrum sunscreen with at least SPF 30. This helps prevent further damage and supports the healing process.

Follow-Up Sessions

Multiple sessions might be necessary for desired results. Discuss with your dermatologist about follow-up treatments. They will guide you on the best schedule based on your progress.

Managing Pain and Side Effects

Pain Relief

Patients often experience discomfort after stretch mark laser treatment. Cool compresses can help reduce pain and swelling. Over-the-counter pain relief, like ibuprofen or acetaminophen, may also be beneficial. Always follow the dosage instructions provided on the medication.

Monitoring for Infection

It’s crucial to monitor the treated area for any signs of infection. Look for redness, swelling, or pus. If these symptoms appear, contact a dermatologist immediately. Early intervention can prevent complications.

Follow-Up Care

Adhering to follow-up care instructions is essential. This includes keeping the treated area clean and moisturized. Avoid exposing the skin to direct sunlight. Use sunscreen with a high SPF if you need to go outside.

Reducing Side Effects

Side effects like redness and swelling are common but usually temporary. To minimize these, avoid strenuous activities for a few days post-treatment. Hydration also plays a key role in healing.

Contacting Your Dermatologist

If unusual side effects occur, such as severe pain or blistering, reach out to your dermatologist promptly. They can provide guidance and additional treatment if necessary.

Summary

Laser treatment for stretch marks offers a promising solution with its advanced technology and effective results. By understanding the benefits, risks, and preparation involved, you can make an informed decision about this innovative approach. Laser therapy stands out due to its precision and ability to target affected areas, making it a preferred choice over traditional methods.

Ready to take the next step? Consult with a qualified dermatologist to explore your options and start your journey toward smoother skin. Don’t let stretch marks hold you back—embrace the confidence that comes with clear, beautiful skin today.

Frequently Asked Questions

What are stretch marks?

Stretch marks are scars that appear when the skin stretches or shrinks quickly. This sudden change causes the collagen and elastin in the skin to rupture.

How does laser treatment help with stretch marks?

Laser treatment stimulates collagen production and resurfaces the skin. This reduces the appearance of stretch marks, making them less noticeable.

Are there risks associated with laser therapy for stretch marks?

Yes, risks include redness, swelling, and temporary discomfort. Rarely, it may cause scarring or changes in skin pigmentation.

Why choose laser treatment over other methods?

Laser treatment is non-invasive and effective. It offers quicker results compared to creams and lotions, providing significant improvement in a few sessions.

What innovative laser techniques are available?

Fractional lasers and pulsed dye lasers are popular. They target deeper skin layers and improve texture without damaging the surface.

How should I prepare for a laser session?

Avoid sun exposure and tanning products before your session. Cleanse your skin thoroughly on the day of treatment.

What can I expect after laser treatment?

Expect some redness and swelling post-treatment. These effects usually subside within a few days. Follow aftercare instructions for best results.

Buttock Reduction Surgery Cost: Factors, Breakdown, Consultation

Curious about buttock reduction surgery cost? You’re not alone. Many people want a more balanced body frame without breaking the bank, considering buttock reduction and weight fluctuations. This procedure can reshape your body and boost confidence, but understanding the expenses of buttocks liposuction, buttock enhancement, and a buttock lift with a plastic surgeon is crucial. Costs for buttocks liposuction and buttock enhancement vary widely based on factors like location, surgeon expertise, and facility fees. While some might think it’s only for celebrities, procedures like BBL are becoming more accessible to everyday folks through plastic surgeons and the average cost is becoming more affordable. Knowing what to expect financially, including the average cost for a plastic surgeon and fat reduction, can help you plan better and avoid surprises.

In this post, we’ll dive into the details of buttock reduction surgery costs, including buttocks liposuction and consulting a plastic surgeon, helping you make an informed decision. Stay tuned to learn how to achieve your desired look with fat reduction without draining your wallet.

Understanding Buttock Reduction

Definition

Buttock reduction surgery aims to decrease buttock size. It involves removing excess fat and skin. This creates a more proportionate appearance.

The surgery can be performed through liposuction or excision. Liposuction removes fat deposits. Excision removes both skin and fat.

Primary Goals

The primary goal of buttock reduction surgery is to achieve a balanced look. Many seek this procedure to improve their self-confidence. The surgery also helps with physical discomfort due to large buttocks and fat reduction.

Patients often want a more toned and firm appearance. This can also enhance the fit of clothes.

Differences from Other Procedures

Buttock reduction differs from other body contouring procedures like buttocks augmentation and buttocks lift. While reduction focuses on decreasing size, augmentation increases volume using implants or fat transfer.

A buttocks lift tightens and lifts sagging skin but doesn’t reduce size significantly or offer fat reduction. These procedures serve different purposes but can be combined for desired fat reduction results.

Realistic Expectations

Setting realistic expectations is crucial. Every patient’s body responds differently to surgery. It’s important to understand that results may vary.

Consultation with a qualified surgeon is essential. They will discuss potential outcomes and limitations. They will also ensure that patients have a clear understanding of the fat reduction procedure.

Patient Satisfaction

Patient satisfaction largely depends on realistic goals, fat reduction, and clear communication with the surgeon. It’s vital to follow pre- and post-operative instructions for fat reduction carefully.

Recovery time varies but typically takes several weeks. Swelling and bruising are common but temporary side effects.

Benefits of Reduction Surgery

Physical Comfort

Buttock reduction can greatly improve physical comfort. Excess fat in the buttocks can cause discomfort when sitting for long periods. It can also lead to back pain and strain on the lower body, affecting fat reduction. Fat reduction helps alleviate these issues. Patients often report feeling more at ease after the procedure.

Enhanced Mobility

Mobility is another significant benefit. Large buttocks can restrict movement. This makes activities like running or even walking difficult. Reduction surgery removes excess fat, making it easier to move freely. Many patients find they can engage in physical activities more comfortably post-surgery, especially after fat reduction.

Improved Body Image

Improved body image is a common outcome of buttock reduction. Many people feel self-conscious about their large buttocks. This can affect their confidence and social interactions. Cosmetic surgery can help reshape the body to a more desired form through fat reduction. Patients often feel more confident and satisfied with their appearance after fat reduction.

Higher Self-Esteem

Higher self-esteem often follows an improved body image. Feeling good about one’s appearance, such as through fat reduction, can boost overall mental health. Cosmetic procedures like buttock reduction have been shown to enhance self-worth. Patients may experience a renewed sense of self-confidence.

Better-Fitting Clothes

Better-fitting clothes are another advantage. Large buttocks can make finding well-fitting clothes challenging. After bbl reduction liposuction, patients often find that clothes fit better. They no longer need to buy larger sizes just to accommodate their buttocks after fat reduction.

Wider Fashion Choices

Wider fashion choices become available post-surgery. Patients can explore different styles and trends they couldn’t before, including fat reduction. This opens up a whole new world of fashion possibilities. Many patients enjoy shopping for clothes much more after their fat reduction surgery.

Long-Lasting Results

The results of buttock reduction surgery are usually long-lasting. The fat cells removed do not grow back, making the changes permanent. However, maintaining a healthy lifestyle is crucial to keep the fat reduction results.

Less Need for Additional Surgeries

Less need for additional surgeries is another benefit. Once the excess fat is removed, there’s generally no need for further procedures in that area. This means fewer costs and less recovery time in the future, with fat reduction.

Ideal Candidates

Health Status

Ideal candidates for buttock reduction surgery should be in good health. They must not have any serious medical conditions that could complicate the procedure or recovery for fat reduction. Doctors often require a full medical evaluation before approving the surgery. This helps ensure that the candidate can handle both the surgery and the healing process.

Individuals with chronic illnesses might not be suitable candidates. Conditions like heart disease or diabetes can increase risks. Discussing these health issues with a doctor is crucial.

Stable Weight

Maintaining a stable weight is essential for optimal results. Candidates should have a consistent weight for at least six months before surgery. Fluctuating weight can affect the outcomes and may lead to complications.

Achieving a stable weight involves regular exercise and a balanced diet. Sudden weight changes post-surgery can alter the results. It’s important to follow a healthy lifestyle both before and after the procedure.

Realistic Expectations

Having realistic expectations is key for anyone considering this surgery. The procedure aims to reduce excess fat, not achieve perfection. Patients should understand what the surgery can and cannot do.

Doctors will discuss potential outcomes during initial appointments. They will explain how much reduction is possible based on individual body types. Setting realistic goals helps in achieving satisfaction with the results.

Specific Needs

Each individual has specific needs and goals for their surgery. Some may seek reduction due to discomfort, while others may want aesthetic improvements. Understanding personal motivations is important.

Candidates need to communicate their specific needs clearly to their surgeons. This allows for tailored surgical plans that meet those unique requirements.

Qualifications

Not everyone qualifies for buttock reduction surgery. Good candidates are usually non-smokers as smoking can hinder healing. Age also plays a role; younger individuals tend to recover faster.

Surgeons look for candidates who fit certain criteria to ensure safety and effectiveness. These qualifications help in achieving better outcomes and minimizing risks.

Emotional Preparedness

Emotional readiness is another critical factor. Surgery can be stressful, and recovery takes time. Candidates must be mentally prepared for both the physical changes and the healing process.

Support from friends and family can aid emotional preparedness. Having a strong support system makes the journey smoother and more manageable.

Procedure Overview

Anesthesia

The first step in buttock reduction surgery is anesthesia. The surgeon administers either general anesthesia or local anesthesia with sedation. This ensures the patient feels no pain during the procedure.

Incision Types

Surgeons use different incision types based on the patient’s needs. One common technique involves making incisions in the buttock crease. Another approach may involve incisions along the natural contours of the buttocks. These incision types aim to minimize visible scarring.

Liposuction Role

Liposuction often plays a key role in buttock reduction surgery. Surgeons use liposuction to remove excess fat from specific areas. This helps achieve a smoother and more contoured appearance. The surgeon may use small cannulas to suction out fat deposits.

Tissue Removal

After liposuction, the surgeon removes excess skin and tissue. This step is crucial for reducing the size of the buttocks. The surgeon uses precise techniques to ensure an even and natural look. This part of the procedure requires great expertise.

Customization

Every buttock reduction surgery is customized. Surgeons tailor their approach based on individual goals and body types. Factors like skin elasticity and fat distribution affect how the procedure is performed. A personalized plan ensures optimal outcomes.

Additional Procedures

etimes, additional procedures are necessary for best results. These might include thigh lifts or other body contouring surgeries. Combining procedures can enhance overall appearance and save recovery time.

Surgeon Expertise

The surgeon’s expertise greatly influences the success of the operation. Experienced surgeons know how to balance aesthetics and functionality. They use advanced techniques and state-of-the-art equipment to achieve full results.

Recovery and Care

Recovery timeline

The recovery period for buttock reduction surgery varies. Most patients can expect a recovery time of about six weeks. In the first few days, patients should rest and limit movement.

By the end of the first week, some light activities can resume. Full recovery usually occurs by the sixth week.

Post-operative care

Following post-operative care instructions is crucial. Patients need to keep the surgical area clean and dry to prevent infection. Pain medication may be prescribed to manage discomfort.

Patients should avoid sitting directly on their buttocks for at least two weeks. Special cushions can help with this.

Common side effects

Common side effects include swelling, bruising, and pain. Swelling typically peaks within the first three days and gradually decreases over the next few weeks.

Bruising may last up to two weeks. Pain can be managed with prescribed medications and usually subsides within a few days.

Managing symptoms

To manage these symptoms, patients should:

  • Use ice packs to reduce swelling.

  • Wear compression garments as advised by their surgeon.

  • Take prescribed medications on schedule.

Proper rest is essential for healing. Avoid strenuous activities until cleared by the doctor.

Monitoring complications

It’s important to monitor for signs of complications. Symptoms like excessive bleeding, severe pain, or fever should be reported immediately.

Patients should attend all follow-up appointments to ensure proper healing and address any concerns.

Facility and safety

Choosing a reputable facility ensures better care and safety during recovery. The facility should have experienced staff and proper equipment.

Patients must follow all post-surgery guidelines provided by the facility for optimal results.

Returning to work

Most patients can return to work in two to three weeks, depending on their job’s physical demands. Jobs requiring heavy lifting or prolonged sitting might require more time off.

Discuss your specific work situation with your surgeon to determine the best time to return.

Cost Factors

Complexity and Experience

The complexity of the procedure significantly impacts costs. A more complex surgery requires more time and skill, leading to higher prices. Surgeons with extensive experience often charge more. They have advanced skills, reducing risks and improving results. Patients may pay a premium for high-quality outcomes.

Geographic Location

Geographic location also affects the price of buttock reduction surgery. Urban areas typically have higher operational costs. These costs include rent, utilities, and staff wages. Therefore, surgeries in large cities usually cost more than those in smaller towns. For example, New York City charges are higher compared to rural clinics.

Additional Procedures

etimes, additional procedures are necessary. Liposuction might be needed to achieve desired results. This adds to the overall cost. Each extra procedure involves additional fees, such as anesthesia fees and facility fees. Patients should discuss these potential needs with their surgeon during the consultation.

Facility Fees

Facility fees contribute to the total cost of the surgery. These fees cover the use of the operating room, medical equipment, and supplies. High-end facilities with modern equipment may charge more. However, they often provide better care and reduce risks.

Anesthesia Fees

Anesthesia fees are another factor in the overall cost. The type of anesthesia used can vary based on patient needs and procedure length. General anesthesia is more expensive than local anesthesia. Experienced anesthesiologists might also charge higher fees.

Surgeon’s Fee

The surgeon’s fee is a significant part of the total cost. This fee depends on the surgeon’s reputation and expertise. Renowned surgeons usually have higher fees due to their experience and success rates.

Post-Operative Care

Post-operative care also influences costs. Follow-up visits ensure proper healing and address any side effects or complications. Some clinics include these visits in the initial quote, while others charge separately.

Insurance Coverage

Most insurance plans do not cover cosmetic procedures like buttock reduction surgery. Patients should verify this with their provider beforehand. Lack of coverage means patients must bear all expenses out-of-pocket.

Expense Breakdown

Surgeon Fees

The surgeon’s fee is a significant part of the overall expense. This fee varies based on the surgeon’s experience and reputation. A skilled surgeon may charge more, reflecting their expertise. The average cost for buttock reduction surgery ranges between $3,000 and $7,000.

Anesthesia Costs

Anesthesia is necessary for this surgery. The type of anesthesia used affects the price. General anesthesia costs more than local anesthesia. On average, anesthesia fees range from $500 to $1,200.

Facility Charges

Facility charges cover the use of the operating room and medical equipment. These fees depend on the location and quality of the facility. High-end clinics may charge more. Generally, facility fees range from $800 to $2,000.

Post-Surgery Garments

Patients often need special garments after surgery. These garments help support the body during recovery. They reduce swelling and improve results. The cost of these garments can range from $50 to $200.

Medications

Medications are essential for pain management and preventing infections. These include pain relievers and antibiotics. The price of medications can vary but typically ranges from $100 to $300.

Consultation Fees

Consultation fees are usually separate from the surgery cost. Initial consultations help determine if you are a good candidate for the procedure. The consultation fee can range from $100 to $300.

Possible Extra Costs

e additional expenses may arise during the process:

  • Follow-up visits: Necessary for monitoring recovery.

  • Lab tests: Required before surgery to ensure safety.

  • Travel expenses: If traveling to a distant clinic or specialist.

Consultation Significance

Personalized Quote

A consultation is essential for obtaining a personalized surgery quote. Each patient’s needs and body type vary. Surgeons assess these individual factors during the consultation. Personalized quotes are more accurate than generic estimates.

Consultations help patients understand what influences the cost. Factors like the extent of reduction, the surgeon’s expertise, and the clinic’s location play a role. This detailed assessment ensures transparency in pricing.

Understanding Risks

During consultations, surgeons explain potential risks associated with buttock reduction surgery. These include infection, scarring, and anesthesia complications. Knowing these risks helps patients make informed decisions.

Surgeons also discuss how pre-existing health conditions might affect surgery outcomes. This information is crucial for patient safety. Understanding the risks beforehand reduces anxiety and prepares patients mentally.

Benefits Explanation

Consultations are vital for discussing the benefits of buttock reduction surgery. Patients learn about improved body contour and increased comfort in daily activities. The surgeon provides examples of successful outcomes.

Seeing before-and-after photos during consultations can be encouraging. It gives patients realistic expectations of what surgery can achieve. This understanding helps align patient goals with surgical possibilities.

Recovery Process

Understanding the recovery process is another key aspect of consultations. Surgeons outline post-surgery care, including rest, medication, and follow-up visits. Clear instructions on recovery help patients plan accordingly.

Patients also learn about potential side effects during recovery. Swelling, bruising, and temporary discomfort are common but manageable with proper care. Discussing these details ensures patients are well-prepared.

Customization Options

Consultations offer an opportunity to discuss customization options for buttock reduction surgery. Surgeons tailor procedures to meet individual aesthetic goals. This personalized approach enhances patient satisfaction.

Patients can ask about different techniques used in surgery. Liposuction or excision methods might be discussed based on suitability. Customization ensures results that match patient expectations closely.

Exercise and Health

Surgeons emphasize the importance of maintaining good health before and after surgery. Regular exercise and a balanced diet aid in faster recovery and better results. Patients receive guidance on incorporating healthy habits into their routine.

Maintaining a stable weight post-surgery helps preserve results longer. Surgeons provide tips on staying active without straining the body during recovery.

Summary

Buttock reduction surgery offers a tailored solution for those seeking a more proportional silhouette. Understanding the process, from benefits to recovery, ensures you’re well-prepared and informed. The cost can vary, but knowing the factors and expense breakdown helps you budget effectively.

Ready to take the next step? Schedule a consultation with a qualified surgeon to discuss your goals and options. Your journey to a more confident you starts now. Explore your possibilities and make an informed decision today.

Frequently Asked Questions

What is buttock reduction surgery?

Buttock reduction surgery removes excess fat and tissue from the buttocks. It aims to create a more proportional and aesthetically pleasing appearance.

Who are ideal candidates for buttock reduction?

Ideal candidates are healthy individuals with realistic expectations. They often seek to reduce the size of their buttocks due to discomfort or aesthetic concerns.

How much does buttock reduction surgery cost?

Costs vary based on surgeon expertise, location, and procedure complexity. On average, expect to pay between $5,000 and $10,000.

What factors influence the cost of buttock reduction surgery?

Key factors include surgeon’s experience, geographical location, facility fees, anesthesia costs, and post-operative care.

What is the recovery time for buttock reduction surgery?

Recovery typically takes 2-4 weeks. Patients may resume normal activities within this period but should avoid strenuous exercise until fully healed.

Why is a consultation important before buttock reduction surgery?

A consultation assesses your suitability for the procedure. It allows you to discuss goals, understand risks, and get personalized cost estimates.

Are there any benefits to undergoing buttock reduction surgery?

Yes, benefits include improved body proportions, increased comfort, enhanced self-confidence, and relief from physical discomfort caused by large buttocks.

Power-Assisted Liposuction vs VASER: Which Offers Better Recovery?

Ever wondered which fat removal technique is right for you? Power-assisted liposuction vs VASER is a hot topic in cosmetic surgery. Both methods promise to sculpt your body, but what’s the difference? From recovery time to results, we’ll cover it all.

Choosing between these two can be tough. You want effective results with minimal downtime. We aim to help you make an informed decision by comparing power-assisted liposuction and VASER side by side. Ready to find out which one suits your needs best? Keep reading!

Understanding Liposuction Techniques

Definition

Liposuction is a surgical procedure. It removes unwanted fat from specific areas of the body. The goal is to sculpt and contour the body, giving it a more defined shape. Fat removal helps in areas like the abdomen, thighs, and arms.

Evolution

Liposuction techniques have evolved over time. Traditional methods were invasive and had longer recovery times. Newer technologies are less invasive and more efficient. Power-assisted liposuction (PAL) and Vaser liposuction are two advanced methods.

Power-Assisted Liposuction

Power-assisted liposuction (PAL) uses a vibrating cannula. The cannula breaks up fat cells for easier removal. This technique reduces surgeon fatigue and increases precision. PAL is effective for large volumes of fat.

Vaser Liposuction

Vaser liposuction uses ultrasound technology. Ultrasound waves liquefy fat cells before removal. This method targets fat cells without harming surrounding tissues. Vaser liposuction is ideal for patients wanting high-definition results.

Choosing the Right Technique

Choosing the right technique depends on individual needs. Factors include:

  • Amount of fat to be removed

  • Desired level of body contouring

  • Patient’s overall health

Consulting with a qualified surgeon is crucial. They can recommend the best method based on personal goals.

Key Differences Between Power-Assisted and VASER Liposuction

Mechanism

Power-assisted liposuction (PAL) uses mechanical movement. A cannula vibrates rapidly to break up fat cells. This makes it easier to remove the fat through suction.

VASER liposuction uses ultrasound technology. Sound waves liquefy fat cells before removal. This method targets fat more precisely.

Specificity of Fat Removal

VASER liposuction allows detailed contouring. It can target specific areas with great accuracy. This makes it ideal for sculpting body features.

Power-assisted liposuction focuses on general fat reduction. It removes larger amounts of fat quickly. However, it may not achieve the same level of precision as VASER.

Recovery

Recovery time varies between the two methods. VASER liposuction often leads to quicker recovery. The ultrasound technology causes less damage to surrounding tissues.

Power-assisted liposuction may result in more bruising and swelling. The mechanical action can be more invasive, leading to a longer recovery period.

Detailed Results

VASER liposuction offers more detailed results. The precision of ultrasound allows for fine-tuning body contours. This method is preferred for areas needing high definition.

Power-assisted liposuction provides effective fat removal but less detail. It is suitable for individuals seeking significant fat reduction without intricate contouring.

Exploring Power-Assisted Liposuction

Cannula Mechanism

Power-assisted liposuction (PAL) uses a specialized cannula. This cannula moves rapidly back and forth. The mechanical motion helps break down fat cells. The vibration loosens fat for easier removal.

Doctors insert the cannula through small incisions. They then use suction to remove the dislodged fat. This method is less labor-intensive for surgeons. It also reduces fatigue during long procedures.

Volume Removal

PAL is effective for removing large volumes of fat. It’s suitable for areas like the abdomen, thighs, and buttocks. Patients often seek this method for significant body contouring.

The technique is efficient and quick. It can treat multiple areas in one session. This makes it a popular choice for those wanting substantial changes.

Generalized Sculpting

PAL offers more generalized body sculpting. It may not provide the detailed precision of newer techniques like VASER liposuction. However, it still achieves noticeable results.

Patients might not get as fine-tuned shaping. But they will see a reduction in overall fat volume. This is beneficial for those looking to slim down larger areas.

Recovery Time

Recovery from PAL is generally swift. Most patients return to normal activities within a few days. Bruising and swelling are common but usually subside quickly.

Delving into VASER Liposuction

Ultrasound Waves

VASER liposuction uses ultrasound waves to liquefy fat cells. A small probe emits these waves into the fatty tissue. The ultrasound energy breaks down fat cells while sparing other tissues.

The liquefied fat is then removed through a thin tube called a cannula. This process is less traumatic to the body compared to traditional methods. Patients often experience less bruising and swelling.

Targeting Delicate Areas

VASER lipo can target delicate areas with high precision. It allows surgeons to sculpt and define muscles more accurately. This technique is ideal for areas like the neck, arms, and inner thighs.

The method provides more nuanced results. Surgeons can create a more natural look by removing fat in a controlled manner. Patients seeking detailed body contouring often prefer this option.

Less Invasive Nature

VASER liposuction is less invasive than other forms of liposuction. The procedure causes less damage to surrounding tissues. Recovery times are generally shorter.

Patients often return to normal activities within a few days. There is also less risk of complications such as infections or prolonged swelling.

Benefits for Recovery

The benefits of VASER lipo extend to recovery. Because it is less invasive, patients experience quicker healing times. Many report minimal discomfort post-surgery.

This method also reduces the need for pain medication. Patients can resume their daily routines faster, making it a convenient choice for many.

Precise Outcomes

VASER liposuction offers precise outcomes. The ultrasound technology allows for targeted fat removal. Surgeons can achieve a high level of detail in body sculpting.

This precision leads to smoother and more even results. Patients often achieve their desired look with fewer touch-ups or additional procedures.

Procedure Insights for Both Techniques

Anesthesia

Both power-assisted liposuction (PAL) and VASER liposuction start with anesthesia. Local or general anesthesia is used based on the extent of the procedure. The type of anesthesia chosen affects recovery time.

Initial Incisions

Small incisions are made in the target areas. These incisions allow the surgeon to insert the cannula, a thin tube used in both procedures.

PAL Technique

PAL uses a specialized tool that oscillates rapidly. This breaks down fat cells for easier removal. The machine’s vibrations help reduce manual effort. Surgeons then suction out the fat cells through the cannula.

VASER Technique

VASER liposuction involves more steps. After making incisions, a saline solution mixed with anesthetic is injected. This solution helps numb the area and shrink blood vessels. Next, ultrasound energy is applied via a probe to liquefy fat cells. Finally, the emulsified fat is removed using a cannula.

Surgeon’s Expertise

The surgeon’s skill significantly impacts outcomes. For PAL, precision in moving the oscillating cannula is key. In VASER, expertise in using ultrasound technology ensures even fat liquefaction and minimal tissue damage. Experienced surgeons can achieve smoother results and reduce complication risks.

Duration

PAL generally takes less time than VASER. The additional steps in VASER, like injecting saline and applying ultrasound energy, extend the procedure duration. Typically, VASER can take up to 4 hours, while PAL often completes within 2-3 hours.

Complexity

VASER’s added steps make it more complex. The ultrasound phase requires careful application to avoid damaging surrounding tissues. PAL is relatively straightforward but demands consistent manual control for uniform fat removal.

Recovery Time

Recovery varies between techniques. PAL patients might experience swelling and bruising for about a week. VASER patients may have similar symptoms but often report quicker healing due to reduced tissue trauma from the ultrasound process.

Recovery and Outcomes Compared

Recovery Time

VASER liposuction offers a faster recovery time. This is because it uses ultrasound technology to break down fat cells. This approach is less traumatic to the body. Patients often return to normal activities within a few days.

Power-assisted liposuction (PAL) may require a longer recovery period. The mechanical motion of the cannula can cause more tissue damage. Most patients need about one to two weeks of rest.

Final Results Timeline

Final results with VASER lipo are visible quicker. Patients often see significant changes within a few weeks. The ultrasound energy allows for more precise fat removal. This leads to smoother contours and less swelling.

PAL results take longer to become apparent. Swelling and bruising can persist for several weeks. Patients might wait up to three months to see the final outcome.

Post-Procedure Care

Both techniques require post-procedure care. Compression garments are essential in both cases. They help reduce swelling and support the new body shape.

Patients should wear these garments for at least six weeks. Activity restrictions are also important. Light walking is encouraged, but strenuous activities should be avoided.

For VASER liposuction, the care routine may be slightly easier. The reduced trauma means fewer complications like seromas or infections.

PAL patients might need more follow-up visits. The increased tissue trauma can lead to more side effects.

Precision and Effectiveness in Liposuction

Precision

VASER liposuction offers more precision. It uses ultrasound technology to break down fat cells. This allows for better sculpting and muscle definition. Surgeons can target specific, delicate areas with high accuracy.

Power-assisted liposuction (PAL) uses a vibrating cannula. It is effective for large volume reduction. However, it may not offer the same level of detail as VASER. PAL is less precise in defining muscles.

Effectiveness

VASER liposuction excels in aesthetic detailing. It is ideal for patients wanting a chiseled look. The ultrasound waves help separate fat from tissues more gently.

PAL is effective in removing larger volumes of fat. It works well for patients needing significant weight reduction. The vibrating motion helps dislodge fat quickly.

Delicate Areas

VASER is better suited for delicate areas like the neck or arms. The technology minimizes damage to surrounding tissues. This leads to smoother results and less bruising.

PAL may be too aggressive for such areas. It is more suitable for larger body parts like the abdomen or thighs.

Patient Goals

Patient goals are crucial in choosing the right technique. Those aiming for muscle definition should opt for VASER lipo. It provides superior sculpting capabilities.

Patients focused on volume reduction might prefer PAL. It removes fat efficiently and quickly. Discussing goals with a surgeon can help determine the best method.

Choosing the Right Liposuction Method

Personalized Consultation

A personalized consultation with a qualified surgeon is crucial. They will discuss your goals and evaluate your suitability for either power-assisted liposuction (PAL) or VASER. Each method has unique benefits. The surgeon can help determine which aligns with your needs.

Consultations often include a physical examination. Surgeons assess your skin elasticity, fat distribution, and overall health. This helps in making an informed decision.

Treatment Area

The area to be treated influences the choice of liposuction method. PAL is effective for larger areas like the abdomen and thighs. It uses a vibrating cannula to break up fat cells, making it easier to remove them.

VASER, on the other hand, uses ultrasound technology. It is ideal for smaller, more delicate areas such as the neck or arms. The ultrasound waves target fat cells without damaging surrounding tissues.

Desired Precision

Precision is another significant factor. VASER offers high precision due to its targeted approach. This makes it suitable for sculpting and defining muscles.

PAL provides effective fat removal but may not offer the same level of precision as VASER. It is better suited for general body contouring rather than detailed sculpting.

Recovery Considerations

Recovery time varies between the two methods. PAL generally has a shorter recovery period. Patients can resume normal activities within a few days.

VASER might require a longer recovery time due to its more invasive nature. Swelling and bruising can last longer compared to PAL.

Lifestyle Factors

Lifestyle plays a role in choosing the right method. Consider how much time you can dedicate to recovery. If you have a busy schedule, PAL might be more suitable due to its quicker recovery time.

If you seek highly defined results and can afford more downtime, VASER could be the better option. Discussing these factors with your surgeon will provide clarity.

Aesthetic Goals

Your aesthetic goals are paramount in this decision. PAL is excellent for reducing large volumes of fat. It provides a smoother overall appearance.

VASER excels in achieving detailed body contouring and muscle definition. If you aim for a chiseled look, VASER might be more appropriate.

Summary

Power-assisted liposuction and VASER liposuction each have their unique benefits and considerations. By understanding the key differences and weighing the recovery and outcomes, you can make an informed decision that aligns with your body goals. Both techniques offer precision and effectiveness, but the right choice depends on your specific needs.

Ready to transform your physique? Consult with a qualified specialist to discuss which method suits you best. Take the next step towards achieving your desired results. Your journey to a more confident you starts now.

Frequently Asked Questions

What is the main difference between power-assisted liposuction and VASER liposuction?

Power-assisted liposuction uses a vibrating cannula to break up fat, while VASER liposuction uses ultrasound energy. Both aim to remove fat but use different technologies.

Which technique offers quicker recovery: power-assisted or VASER liposuction?

VASER liposuction often allows for quicker recovery due to its less invasive nature. However, individual results may vary.

Is one method more effective for precision sculpting?

VASER liposuction is generally more precise, making it ideal for contouring and sculpting smaller areas.

Are there any specific risks associated with VASER liposuction?

VASER liposuction can cause minor burns due to ultrasound energy. However, it’s generally safe when performed by experienced surgeons.

How long does a typical power-assisted liposuction procedure take?

A typical power-assisted liposuction procedure lasts between 1 to 3 hours, depending on the area treated.

Can both techniques be used on multiple body areas?

Yes, both power-assisted and VASER liposuction can target multiple body areas, including the abdomen, thighs, and arms.

Which method is better for removing large volumes of fat?

Power-assisted liposuction is often preferred for removing larger volumes of fat efficiently.

Rhinoplasty Recovery Time: Managing Swelling & Pain

Did you know that the average rhinoplasty recovery time for nose surgery or nasal surgery is about one to two weeks for a healing nose and swollen nose? This timeline can vary based on individual factors, but understanding what to expect during your rhinoplasty recovery journey can make a world of difference. Whether you’re considering rhinoplasty surgery for cosmetic reasons or to improve breathing, knowing the recovery process and asymmetrical healing helps set realistic expectations.

You’ll learn about the typical healing stages after rhinoplasty surgery, tips for a smooth recovery, and what activities to avoid following the rhinoplasty procedure. By the end, you’ll be better prepared for your journey to a new nose, understanding rhinoplasty surgery, rhinoplasty recovery timeline, and asymmetrical healing. Stick around to get all the essential details on navigating your rhinoplasty recovery with ease.

Before Rhinoplasty Basics

Discuss Expectations

Rhinoplasty patients should discuss their expectations with their surgeon. This ensures clarity and alignment of goals. The surgeon will explain what is realistically achievable. Clear communication helps avoid disappointment.

Prepare for Surgery

Before rhinoplasty surgery, compile a list of current medications and supplements. Some substances can affect healing or interact with anesthesia. Share this list with the surgeon.

Consider bringing reference photos of desired nose appearances. These photos help illustrate your goals. Visual aids can make discussions more productive.

Thorough Examination

Undergo a thorough examination before the nose job procedure. This includes measurements and photographs. These details help tailor the rhinoplasty surgery approach to your unique anatomy.

The surgeon will analyze your nasal structure. They might use digital imaging to show potential results. This step ensures a personalized plan.

During the Procedure Insights

Anesthesia Choice

Choosing the right anesthesia is crucial. General anesthesia puts you to sleep completely. Local anesthesia with sedation numbs the area and relaxes you. The choice depends on your health and the complexity of the surgical procedure. Your surgeon will discuss the best option during your consultation.

Surgery Duration

The duration of rhinoplasty varies. Most procedures last between one to three hours. Simple reshaping takes less time. More complex surgeries take longer. Discuss the expected duration with your provider before the surgery date.

Immediate Post-Operative Care

Plan for post-operative care in advance. Arrange for someone to drive you home after the surgery. You will be groggy from anesthesia. Having a person assist you on the first night is essential. They can help manage discomfort and ensure you follow post-surgery instructions.

Outpatient Procedure

Rhinoplasty is usually an outpatient procedure. This means you go home the same day. Staying overnight in a hospital is rare unless there are complications. Ensure your home is prepared for recovery before the surgery.

Managing Discomfort

Expect some discomfort after surgery. Swelling, bruising, and mild pain are common side effects. Your surgeon will prescribe pain medication to manage this. Follow their instructions closely to ease your recovery process.

Results Timeline

Results aren’t immediate. Initial swelling masks the final outcome. It can take up to a year to see the full results of your rhinoplasty. Patience is key during this period.

Follow-Up Appointments

Regular follow-up appointments are vital. Your surgeon will monitor your healing progress and address any concerns. These visits help ensure that you achieve the best possible results.

Initial Recovery Steps

Follow Instructions

The initial recovery steps are crucial. Follow post-surgery instructions closely. Surgeons often place a plastic splint on the nose. This helps maintain its new shape. Cotton gauze packing inside the nose is common too. It helps control bleeding and supports healing.

Swelling and Bruising

Swelling and bruising around the nose and eyes are normal. These effects can last several days. Swelling may peak by day three but will gradually decrease. Bruising usually fades within two weeks. Have realistic expectations for their resolution timeline.

Signs of Complications

Stay vigilant for signs of complications. Watch for excessive bleeding, severe pain, or unusual discharge. Fever might indicate an infection. Contact your surgeon immediately if any of these occur. Regular follow-up appointments with the surgeon ensure optimal healing.

Swelling Stages Explained

Immediate Swelling

Right after surgery, facial swelling is most noticeable. The first 48 hours are crucial. Ice packs can help reduce this initial swelling. Keeping your head elevated also aids in minimizing it. Bruising around the eyes is common during this time.

First Week

By the end of the first week, some swelling and bruising will start to subside. Most patients can return to work or school. However, the nose will still be swollen. Facial swelling may extend to the cheeks and under the eyes. Stitches and splints are usually removed by this point.

Two to Four Weeks

Swelling continues to decrease gradually over the next few weeks. By four weeks, a significant amount of swelling should be gone. The nose might appear larger than expected due to residual swelling. Patients should avoid strenuous activities during this period to prevent complications.

Four to Six Weeks

Mark your calendar for this milestone. Most visible swelling and bruising significantly reduce by this time. The nose starts taking on a more defined shape. However, subtle swelling may persist, especially at the tip of the nose.

Three Months

By three months post-surgery, patients will notice further reduction in swelling. The nose will look more natural and refined. Taking photographs helps track these changes over time. Comparing these photos can show progress and provide reassurance.

Six Months

At six months, nearly all swelling should have subsided. Only minor changes may still occur as the tissues continue to settle. It’s essential to follow up with your surgeon during this period for any concerns or questions.

One Year

Adjust expectations for the final shape of the nose to become apparent at one year after surgery. This is when all residual swelling typically resolves. The final result should be stable and permanent by now.

Tips for Monitoring Progress

Keeping photographic records is a useful way to monitor healing progression. Take photos at regular intervals:

  • Immediately post-surgery

  • One week

  • One month

  • Three months

  • Six months

  • One year

These photos allow you to see how much swelling has reduced over time and appreciate the gradual improvements.

Asymmetrical Healing Insight

Common Phase

Asymmetrical healing is a normal part of the recovery process. After rhinoplasty, the nose may appear uneven. This happens because different parts of the nose heal at varying rates. Swelling can affect one side more than the other.

This phase is temporary. The body needs time to adjust and heal fully.

Early Weeks

In the first few weeks post-surgery, it is common for the nose to look crooked. Swelling and bruising can cause this appearance. Patients often worry about their results during this period.

Avoid panic or concern. Most asymmetry resolves naturally as swelling decreases. Trust the process and give your body time.

Consult Surgeon

If asymmetry persists beyond the initial healing phase, consult with your surgeon. They can provide reassurance or further evaluation. Persistent asymmetry might need additional attention.

Surgeons are experienced in recognizing normal healing patterns versus complications. They will guide you on the next steps if needed.

Managing Pain Post-Procedure

Pain Levels

Pain after rhinoplasty varies. Most patients experience mild to moderate discomfort. The pain usually peaks within the first 48 hours. After this, it gradually decreases. Swelling and bruising can add to the discomfort.

Medication Use

Surgeons often prescribe pain medications. These may include over-the-counter pain relievers like acetaminophen or stronger prescriptions. Follow the surgeon’s instructions closely. Do not take more than the recommended dose.

Anesthesia Effects

Anesthesia plays a role in pain management. Local anesthesia numbs the area during surgery. General anesthesia puts you to sleep. Both types wear off after surgery, so expect some pain post-procedure.

Home Care

Prepare your home for recovery. Have ice packs ready to reduce swelling. Keep prescribed medications nearby. Rest is crucial for healing.

Communication with Surgeon

Stay in touch with your surgical team. Report any intense or unusual pain immediately. They can adjust your pain management plan if needed.

Following Instructions

Follow all post-operative care instructions. This includes taking medications on time and attending follow-up appointments. Proper care ensures better outcomes post-surgery.

Emotional Support

Recovery involves emotional challenges too. Feeling anxious or frustrated is normal. Talk to friends or family for support.

Care Tips for Faster Recovery

Follow Instructions

Adhere strictly to the surgeon’s post-operative care instructions. These guidelines are crucial for a smooth recovery. They often include activity restrictions and wound care advice. Ignoring these can lead to complications.

Surgeons usually recommend avoiding strenuous activities. This helps prevent increased blood flow to the face, reducing swelling and bruising. Proper wound care is also vital to avoid infections.

Elevate Head

Implement lifestyle adjustments like sleeping with the head elevated. This minimizes swelling and promotes better blood circulation. Use extra pillows or a wedge pillow for support.

Avoid lying flat on your back. This position can increase pressure on the nose, hindering recovery. Keeping the head elevated at all times during sleep is essential.

Avoid Strenuous Activities

Strenuous activities should be avoided for at least two weeks post-surgery. Exercise increases heart rate and blood pressure, which can cause bleeding or swelling in the nasal area.

Light activities like walking are usually safe. However, consult your surgeon before resuming any physical activity. Take it slow to ensure proper healing.

Maintain Healthy Diet

Maintain a healthy diet rich in vitamins and hydration. Nutrients like Vitamin C and Zinc play a key role in tissue repair and immune function. Fresh fruits, vegetables, lean proteins, and whole grains should be included in meals.

Drink plenty of water to stay hydrated. Proper hydration supports the body’s natural healing processes. Avoid alcohol and caffeine as they can dehydrate the body.

Skin Care

Take special care of your skin during recovery. Use gentle cleansers and moisturizers recommended by your surgeon. Avoid harsh skincare products that can irritate the surgical area.

Protect your skin from sun exposure. UV rays can damage healing tissues and cause discoloration. Wear sunscreen and hats when going outside.

Monitor Progress

Regularly monitor your progress and attend follow-up appointments with your surgeon. These visits help ensure that everything is healing properly and allow for early detection of any issues.

Resuming Daily Activities

First Week

During the first week, rest is crucial. Avoid strenuous activities. Keep your head elevated when sleeping. This helps reduce swelling and promotes healing. Avoid bending over or lifting heavy objects.

Follow your surgeon’s advice closely. They will provide specific guidelines for you. Protect your nose from any accidental bumps. It can affect the healing process.

Two Weeks Post-Surgery

By the second week, some daily activities can be reintroduced. Light walking is acceptable. Avoid intense exercise or heavy lifting. These activities can increase blood pressure and cause bleeding.

Work can be resumed if it does not involve physical strain. Face-to-face social engagements should be limited to avoid potential contact with germs.

Three to Four Weeks

At this point, more activities can be resumed. Light exercises like jogging may be allowed. Always consult your surgeon before increasing activity levels.

Sun exposure should be minimized. Use SPF on your nose to prevent discoloration or damage. The skin on your nose will be sensitive during this period.

One Month Onwards

After a month, most daily activities can be resumed. Intense exercises and sports may still need caution. Follow your surgeon’s guidance to ensure safe recovery.

By the end of the first month, swelling should have reduced significantly. The nose will start to take its final shape, but full healing might take up to a year.

Important Tips

  • Avoid smoking and alcohol as they can impede healing.

  • Maintain a healthy diet rich in vitamins.

  • Stay hydrated to help with overall recovery.

  • Keep follow-up appointments with your surgeon.

Closing Thoughts

Rhinoplasty recovery can be a rollercoaster, but with the right care, you’ll get through it smoothly. Remember, patience is key. Your body needs time to heal and reveal the final results. Stick to the guidelines provided by your surgeon.

Ready to take the next step? Follow these tips, stay positive, and soon you’ll enjoy the new you. Share your journey with others who might need encouragement. Got questions or tips of your own? Drop them in the comments below. We’re here to support you every step of the way!

Frequently Asked Questions

How long does initial recovery take after rhinoplasty?

Initial recovery typically takes 1-2 weeks. During this period, expect swelling and bruising.

When can I resume normal daily activities post-rhinoplasty?

You can usually resume light activities after 1 week. Full physical activities may take up to 4-6 weeks.

What are the common stages of swelling after rhinoplasty?

Swelling peaks at 2-3 days post-surgery and starts to diminish by the end of the first week. It can take several months for all swelling to fully subside.

How can I manage pain after rhinoplasty?

Pain is generally mild and manageable with prescribed medications. Over-the-counter pain relievers like acetaminophen can also help.

Is asymmetrical healing normal during rhinoplasty recovery?

Yes, it’s common for one side to heal faster than the other. This usually balances out over time.

What care tips help speed up rhinoplasty recovery?

Elevate your head while sleeping, avoid strenuous activities, and follow your surgeon’s care instructions diligently.

Can I wear glasses or sunglasses after rhinoplasty?

Avoid wearing glasses or sunglasses directly on your nose for at least 4-6 weeks. Use cheek supports or contact lenses if possible.

Breast Implants Rippling: Prevention & Correction Tips

Breast implants rippling can be a frustrating issue for many women, regardless of width or place. This issue occurs when the implant develops visible folds or wrinkles during breast surgery, causing an uneven appearance. Rippling is more common with saline implants but can also place an issue on silicone ones. Factors like implant placement, skin thickness, and implant size contribute to this problem. Understanding the causes and solutions can help you make informed decisions about your breast augmentation journey, including implant surgery, planning implant placement, implant position, and implant leakage. Whether you’re considering implants or already have them, knowing how to minimize rippling is crucial for achieving natural-looking results.

Key Takeaways

  • Understand Rippling: Rippling is a common issue with breast implants, where the surface appears wavy or uneven, often due to implant type or placement.

  • Root Causes Matter: Factors like thin skin, minimal breast tissue, and implant underfilling can contribute to rippling. Knowing these helps in prevention.

  • Choose Implants Wisely: Opt for high-quality implants and consider silicone over saline as they tend to ripple less.

  • Placement is Crucial: Submuscular placement (under the muscle) generally reduces the risk of rippling compared to subglandular placement (over the muscle).

  • Prevention Strategies: Surgeons can employ techniques such as using textured implants or adjusting pocket dimensions to minimize rippling risks.

  • Seek Expertise: Always choose a board-certified surgeon with extensive experience in breast augmentation to ensure optimal outcomes and address rippling effectively.

Understanding Rippling

Definition

Breast implant rippling refers to the formation of visible wrinkles or waves on the surface of breast implants. These ripples can appear under the skin, especially when the skin is thin. Silicone and saline implants are both susceptible to this issue. Rippling often becomes noticeable in certain positions or movements.

Visibility

Rippling is more visible in patients with less natural breast tissue. Thin skin also makes implant ripple more apparent. The upper and outer parts of the breast are common areas where rippling shows up. Wearing tight clothing can make ripples even more noticeable.

Aesthetic Impact

Rippling affects the overall look of the breasts. Many patients feel self-conscious about these visible waves. They may avoid certain types of clothing or activities to hide the ripples. This can lead to dissatisfaction with their appearance.

Patient Satisfaction

Patient satisfaction drops when rippling occurs. Many patients expect smooth, natural-looking results from their implants. Visible ripples can be disappointing and frustrating. Some may seek additional surgeries to correct the problem, which adds to their stress and financial burden.

Importance for Recipients

Understanding rippling is crucial for anyone considering breast implants. Knowing the risks helps patients make informed decisions. They can discuss potential outcomes with their surgeons and choose options that minimize rippling.

Root Causes of Rippling

Insufficient Tissue Coverage

Insufficient breast tissue coverage can lead to rippling. Thin skin or minimal breast tissue cannot adequately cover the implant. This lack of coverage makes the implant edges more noticeable. Women with less natural breast tissue are at higher risk. The skin and tissue cannot hide the implant, resulting in visible wrinkles or ripples on the surface.

Implant Size and Capsule Sizing

The size of the implant plays a crucial role. Larger implants are more likely to ripple. They stretch the skin and tissue more than smaller ones. This stretching can cause visible wrinkling. Proper capsule sizing is also essential. If the pocket made for the implant is too large, it can lead to movement and rippling.

Saline Implant Under-Filling

Saline implants can suffer from under-filling issues. Under-filled implants do not have enough saline solution inside them. This lack of filling creates folds and wrinkles in the implant shell. These folds become visible through the skin, causing rippling.

Valve Failure

Valve failure is another problem with saline implants. The valve controls the amount of saline inside the implant. If it fails, saline can leak out, causing the implant to deflate partially. This partial deflation leads to visible wrinkles on the breast surface.

Cleavage Concerns

Rippling often occurs near the cleavage area. The skin in this region is usually thinner, making it more prone to showing ripples. Women seeking larger cleavage may opt for bigger implants, increasing their risk of rippling in this area.

Choosing Implants Wisely

Implant Size

Selecting the right implant size is crucial. Breast augmentation patients should choose implants that fit their body. A larger implant may cause rippling if it does not match the chest width.

Implant sizing involves measuring the chest and determining the volume needed. Surgeons can help patients pick a size that looks natural and reduces risks.

Implant Profile

The profile of an implant affects its appearance and risk of rippling. Lower profile implants are wider and flatter, while high-profile ones are narrower and more projecting.

Choosing the correct profile depends on the patient’s body type. Lower profile implants often suit broader chests, reducing the chance of rippling.

Implant Types

There are different types of breast implants. Smooth implants have a softer feel but might move around more. Textured implants stick better to tissue, reducing movement.

Each type has pros and cons. Consulting with a surgeon helps patients understand which type suits them best.

Advanced Technology

Advancements in implant technology have reduced rippling risks. Newer implants mimic natural breast tissue more closely.

For example, cohesive gel implants hold their shape better than traditional breast implants. These innovations provide beautiful breast augmentation results with fewer complications.

Surgeon Consultation

A consultation with a skilled surgeon is essential. Surgeons can explain the differences between various implants and help make informed choices.

During a breast augmentation consultation, surgeons discuss patient goals and anatomy. This ensures that the chosen implant will meet expectations and minimize risks like rippling.

Placement Techniques

The placement of breast implants also plays a role in preventing rippling. Subglandular breast implants are placed above the muscle, while submuscular ones go below it.

Submuscular placement often reduces rippling since the muscle provides extra coverage for the implant edges. Surgeons can recommend the best technique based on individual cases.

Revision Surgery

etimes, patients may need implant revision surgery to correct issues like rippling. This procedure replaces or adjusts existing implants to improve appearance and comfort.

Revision surgery can address problems from previous augmentations. It offers a solution for those experiencing complications with their current implants.

Importance of Implant Placement

Muscle Placement

Placing implants under the muscle can reduce rippling. The muscle provides a layer of coverage over the implant. This extra layer hides any wrinkles or folds in the implant surface. Submuscular placement is often recommended for those with thin breast tissue.

Rippling Risk

Submuscular and subglandular placements have different risks. Submuscular placement involves placing the implant under the chest muscle. This reduces visible rippling but can be more painful initially. Subglandular placement puts the implant above the muscle, directly under the breast tissue. This method may result in more visible rippling, especially if there is little natural breast tissue.

Surgical Technique

The surgeon’s technique plays a key role in implant placement. Proper planning and execution can optimize aesthetic outcomes. Surgeons must choose the right implant size and profile for each patient. They also need to create an appropriate implant pocket to ensure a good fit.

Implant Profile

Implant profile affects how noticeable rippling will be. High-profile implants project more from the chest, which might hide ripples better. Low-profile implants spread out more, potentially increasing the risk of visible rippling.

Implant Surface Wrinkles

Implants can develop surface wrinkles over time. These wrinkles are more noticeable in certain placements. Choosing textured implants can sometimes help because they adhere better to surrounding tissues.

Saline Versus Silicone

Rippling Propensity

Saline breast implants are more likely to cause rippling. The saline solution inside the implant can move around. This movement creates visible waves on the skin surface.

Silicone implants, especially those filled with highly cohesive gel, have a lower chance of rippling. The gel inside these implants is thicker and less likely to shift. Highly cohesive silicone gel implants remain stable and maintain their shape better.

Benefits of Silicone

Highly cohesive silicone gel implants offer several benefits. One major advantage is their reduced risk of rippling. The thick gel inside these implants mimics natural breast tissue closely.

These implants also feel more natural to the touch. They provide a smoother appearance under the skin. Silicone implants are often preferred for their realistic look and feel.

Choosing Based on Risk Factors

Choosing between saline and silicone depends on individual risk factors. Patients with thin breast tissue may experience more rippling with saline implants. Those with thicker tissue might not notice as much difference.

Surgeons consider body type, skin elasticity, and existing breast tissue when recommending an implant type. Saline breast implants might be suitable for some, while others benefit more from silicone.

Cost Considerations

Silicone implants are generally more expensive than saline ones. This cost difference is due to the materials used and the manufacturing process. Patients must weigh the price against the benefits.

Insurance coverage can vary based on the type of implant and reason for surgery. It’s important to check with providers about what costs are covered.

Safety and Maintenance

Both saline and silicone implants have safety profiles approved by health authorities. Regular check-ups are necessary to monitor implant condition. Silicone implants may require MRI scans to detect any silent ruptures.

Patients should follow their surgeon’s advice for maintenance and care. Proper post-surgery care can minimize complications and prolong implant life.

Surgeon Strategies for Prevention

Surgical Techniques

Surgeons use various techniques to prevent breast implant rippling. One key method is precise pocket creation. The pocket is the space where the implant sits. Creating this space accurately helps in achieving a smooth surface and reduces rippling.

Another technique involves choosing the correct implant size and shape. Surgeons consider the patient’s body frame and desired breast projection. By matching the implant to the body’s natural contours, they can minimize rippling.

Surgeon Experience

Experience plays a crucial role in preventing rippling. Skilled surgeons plan surgeries meticulously. They assess factors like skin thickness and tissue quality. This careful planning helps in selecting the right implant type and placement.

Experienced surgeons are also adept at handling complications. They know how to adjust their techniques based on individual patient needs. Their expertise ensures better outcomes and less risk of rippling.

Post-Operative Care

Post-operative care is vital in maintaining implant integrity. Proper care helps reduce the chances of rippling over time. Surgeons often provide detailed instructions for recovery.

Patients may need to wear support garments. These garments help in keeping the implants in place during healing. Following these guidelines can make a significant difference.

Corrective Options for Rippling

Fat Transfer

Fat transfer can help camouflage implant rippling. Surgeons use liposuction to remove fat from other parts of the body. They then inject this fat into the breast area. This method adds natural tissue coverage over the implants, reducing visible ripples.

Patients often prefer this option because it uses their own body fat. It provides a more natural look and feel. However, not all patients are candidates for fat transfer. The surgeon will evaluate each case individually.

Implant Revision Surgery

Breast implant revision surgery addresses the underlying causes of rippling. During this procedure, surgeons can correct issues with the implant or its placement. This surgery often involves removing and replacing the implants.

The surgeon may also adjust the pocket where the implant sits. This adjustment can help reduce movement and minimize ripples. Revision surgery is usually more complex than the initial procedure. It requires a skilled and experienced surgeon.

Changing Implant Type

Changing the type of implant can also correct rippling. Silicone implants are less likely to ripple compared to saline implants. They have a thicker gel that maintains its shape better.

Switching from saline to silicone may reduce visible ripples. Some patients may choose highly cohesive silicone implants, also known as “gummy bear” implants. These implants hold their shape well and offer a firmer feel.

Adjusting Implant Placement

Adjusting the placement of the implant can be another solution. Implants can be placed either above or below the chest muscle. Submuscular placement (below the muscle) often reduces rippling.

This method provides more tissue coverage over the implant. It hides ripples better than subglandular placement (above the muscle). Patients should discuss these options with their surgeon to determine the best approach.

Combining Methods

etimes, combining multiple methods yields better results. For example, a surgeon might use both fat transfer and implant revision surgery. This combination can offer a more comprehensive solution to implant ripples.

Each patient’s situation is unique. A personalized approach ensures better outcomes and higher patient satisfaction.

Finding a Reliable Surgeon

Board-Certified Surgeons

Selecting a board-certified plastic surgeon is crucial. Certification ensures the surgeon has completed rigorous training. They should have experience in breast augmentation and reconstruction surgery. This background helps manage complications like rippling.

Reviewing Before-and-After Photos

Before choosing a surgeon, review their before-and-after photos. Look for patients with similar body types and concerns. These photos provide insight into the surgeon’s skill and expected results. They also help set realistic expectations.

Patient-Surgeon Communication

Effective communication between patient and surgeon is essential. Discuss your goals and concerns in detail. Ask about potential risks and outcomes. A good surgeon will listen and provide honest feedback.

Importance of Experience

Experienced surgeons are more likely to achieve satisfactory results. They understand the complexities of breast surgery. Their expertise helps them handle issues like skin elasticity and implant placement.

Setting Realistic Expectations

Discussing expectations with your surgeon is vital. Understand that perfect results are not always possible. Knowing the potential cons and limitations can help you make an informed decision.

Addressing Rippling Issues

Ask your surgeon about strategies to minimize rippling. Techniques may include using textured implants or placing them under the muscle. Surgeons may also recommend fat grafting to improve appearance.

Post-Surgery Care

Follow your surgeon’s post-surgery instructions carefully. Wearing a surgical bra can support healing. Proper care reduces complications and improves overall results.

Closing Thoughts

You’ve now got a solid grasp on breast implant rippling and how to tackle it. From understanding the causes to choosing the right implants and placement, you’re better equipped to make informed decisions.

Don’t settle for less. Find a reliable surgeon who can guide you through this journey. Ready to take the next step? Schedule a consultation and ensure your peace of mind.

Frequently Asked Questions

What is breast implant rippling?

Breast implant rippling refers to visible or palpable folds and wrinkles on the surface of breast implants, which can affect the appearance and feel of the breasts.

What causes breast implant rippling?

Rippling can be caused by factors such as thin breast tissue, underfilled implants, or placement above the muscle. It’s essential to discuss these risks with your surgeon.

How can I choose implants to minimize rippling?

Opt for silicone implants over saline, as they tend to ripple less. Also, consider implants with a textured surface and appropriate size to suit your body.

Why is implant placement important in preventing rippling?

Placing implants under the muscle provides better coverage and reduces the chances of rippling. Always consult with an experienced surgeon about the best placement for you.

Which type of implant is less likely to ripple in breast augmentation procedures: saline or silicone?

Silicone implants are generally less likely to ripple compared to saline implants due to their cohesive gel filling that maintains shape better.

Can a skilled surgeon prevent breast implant rippling?

Yes, an experienced surgeon can use techniques such as selecting the right implant type, proper placement, and ensuring adequate tissue coverage to minimize the risk of rippling.

What are my options if I experience breast implant rippling with a cosmetic surgeon, choice of place, and tissues?

Corrective options include fat grafting, switching to silicone implants, or adjusting implant placement. Consult with a board-certified plastic surgeon for personalized solutions.

Botox Gone Wrong: 5 Alarming Signs to Watch For

Ever wondered what happens when Botox goes wrong? Botox is a popular cosmetic treatment, but sometimes botulinum toxin injections don’t go as planned. This post dives into the mishaps, side effects, and real-life horror stories of botulinum toxin injections and cosmetic surgeries gone wrong. Learn how to spot the signs of a bad Botox job involving botulinum toxin and what steps to take if you find yourself in this unfortunate situation.

We’ll cover everything from droopy eyelids to frozen faces, ensuring you’re well-informed before making any decisions about your botox treatment. Understanding these risks, such as botulism from a botox injection or surgeries, can save you from potential embarrassment and health issues. Stick around to get the lowdown on avoiding a Botox disaster and ensuring your beauty treatments are safe and effective.

Understanding Botox Complications

Botox Uses

Botox is a popular treatment. It is used both cosmetically and therapeutically.

In cosmetics, Botox reduces wrinkles. It smooths the skin on the face.

Therapeutically, it treats conditions like chronic migraines. It can also help with muscle spasms and excessive sweating through a botox treatment.

How Botox Works

Botox works by blocking nerve signals to muscles. This causes temporary paralysis of those muscles.

When injected into facial muscles during a botox session, it reduces the appearance of wrinkles. The skin looks smoother and younger.

The effects usually last for three to six months. After that, the muscle action returns, and wrinkles may reappear after a botox session.

Potential Complications

Understanding potential complications is essential. Informed consent means knowing the risks before treatment.

Common side effects include:

  • Bruising at the injection site

  • Headaches

  • Drooping eyelids or eyebrows

More serious complications are rare but can occur. These include difficulty swallowing or breathing if Botox spreads beyond the target area.

Importance of Informed Consent

Before getting Botox, discussing possible risks with a doctor is crucial. Knowing what to expect helps make an informed decision.

Signs of Botched Botox

Asymmetry

Asymmetry is a clear sign of botched Botox. One side of the face may appear different from the other after a bad botox session. This can happen if the botox injections are not evenly distributed. For example, after a bad botox session, one eyebrow might be higher than the other.

Drooping Eyelids

Drooping eyelids, or ptosis, is another common issue. This occurs when Botox spreads to unintended areas. It can make it hard to open your eyes fully after a bad botox session. This condition usually lasts for a few weeks.

Uneven Smile

An uneven smile can also indicate bad Botox results. If the botulinum toxin injections from a bad botox session affect the muscles around the mouth, one side might droop. This makes smiling look awkward and unnatural.

Headaches

Headaches are less obvious but significant signs of improper Botox injection techniques. These headaches can be mild or severe. They often occur soon after the botox treatment.

Muscle Weakness

Muscle weakness is another subtle symptom. It can affect areas far from where the injections were given during a botox session, resulting in bad botox. This happens when too much Botox spreads beyond the targeted area.

Dissatisfaction

Botched Botox often leads to dissatisfaction. People invest time and money expecting positive changes. When results are poor, like after a bad botox session, it leads to regret and frustration.

Decreased Self-Confidence

Decreased self-confidence is a major emotional impact of bad Botox treatments. People may feel embarrassed about their appearance. This can affect social interactions and mental well-being.

Real-Life Experiences

Many real-life experiences highlight these issues. For instance, someone might go to a non-certified botox provider and end up with drooping eyelids. Another person might attend botox parties and get fake Botox products, leading to uneven smiles.

Common Causes

Injector Experience

The experience of the injector plays a crucial role. Inexperienced injectors may lack the necessary skills. They might inject Botox into the wrong muscle. This can lead to complications.

Experienced injectors understand facial anatomy. They know how much product to use. Proper technique reduces risks. Botched Botox outcomes are less likely with skilled professionals.

Technique Matters

Technique is as important as experience. Injectors must use precise techniques. Incorrect injection techniques can cause issues. For example, injecting too deeply can affect nerves.

Proper technique ensures even distribution. It prevents lumps and asymmetry. Using the right needle size also matters. Skilled injectors follow these practices.

Communication Issues

Clear communication between provider and client is essential. Misunderstandings can lead to dissatisfaction. Clients need to express their goals clearly. Providers should explain realistic outcomes.

Lack of communication can result in unexpected results. Clients might be unhappy with the look. Inadequate provider-client communication affects overall satisfaction.

Non-Medical Settings

Botox injections should occur in medical settings. Non-medical settings pose risks. These include spas or beauty salons without medical oversight.

Non-medical providers might not have proper training. They may not follow hygiene standards. This increases infection risk. Always choose a licensed medical facility for Botox treatments.

Risks of Unqualified Injectors

Unqualified injectors can cause serious harm. They might use counterfeit products. These products can be dangerous and ineffective.

Qualified injectors use approved products only. They follow safety protocols strictly. This minimizes risks and complications.

Importance of Aftercare

Aftercare is vital for successful Botox outcomes. Providers should give clear aftercare instructions. Clients need to follow them closely.

Ignoring aftercare after a botox session can lead to problems like bruising, bad botox, or infection. Proper aftercare enhances results and reduces side effects.

Prevention Tips

Qualified Provider

Researching a Botox provider is crucial. Look for medical professionals with experience in cosmetic procedures. Check their credentials and certifications. Ensure they have a good track record.

Read reviews from other patients. Seek recommendations from trusted sources. Avoid providers with many negative reviews or complaints.

Thorough Consultation

A thorough consultation is essential. Discuss your goals and expectations with the provider. Ask about potential risks and side effects.

Understand the procedure fully before proceeding. Clarify any doubts you may have. This helps set realistic expectations.

Red Flags

Be aware of red flags. If the provider rushes through the consultation, reconsider. A qualified professional will take time to explain everything.

Avoid providers who offer unusually low prices. Cheap procedures can be risky. Safety should be the priority.

Injection Site

Ensure the injection site is clean and sterile. The provider should use new, sealed syringes. Proper hygiene reduces infection risk.

Ask about aftercare instructions. Follow them carefully to avoid complications. Proper care at home is crucial for recovery.

Invasive Interventions

Botox is minimally invasive but still requires caution. Ensure the provider follows all safety protocols. Avoid non-medical settings for Botox injections.

Choose clinics with proper medical facilities. This ensures you get professional care if complications arise.

Safety Over Cost

Prioritize safety over cost. Choosing a cheaper provider can lead to poor results, bad botox, or complications. Investing in a reputable provider ensures better outcomes.

Identifying Treatment Errors

Normal vs. Botched

After receiving Botox, it’s normal to experience some side effects. These include mild swelling and bruising. Redness at the injection site is also common.

However, certain symptoms indicate a botched treatment. Drooping eyelids or eyebrows are major signs. They can occur if the Botox spreads to unintended areas. If you notice asymmetry in your face, this could also be a problem from a bad botox session.

Another sign is difficulty swallowing or speaking. This happens if the Botox affects nearby muscles. Severe pain or infection at the injection site after a botox session should not be ignored. Seek medical advice immediately if these occur.

Keeping Records

It’s important to keep detailed records of any adverse effects after your Botox injections. Note the date and time of your treatment. Record any symptoms you experience and their severity.

Take photos of your face before and after the botox session to avoid bad botox. These can help track changes over time. Documenting everything provides valuable information for healthcare providers.

Share these records with your treating professional. They can help identify what went wrong. If necessary, they can adjust future treatments, including a botox session, based on this information.

Seeking Second Opinion

If you suspect a treatment error, consider seeking a second opinion from another qualified professional, especially after a botox session or bad botox. Look for someone experienced in injectable treatments.

A new perspective can be very helpful. Another doctor might spot issues that were missed initially. They can suggest corrective measures or alternative treatments.

Do not delay in seeking help if you feel something is wrong. Early intervention can prevent further complications.

Reversal and Correction

Additional Injections

etimes, additional injections can correct botched Botox. This option is often used to balance the appearance. If one side of the face looks different from the other, a surgeon may suggest more Botox. This helps even out the asymmetry.

In some cases, additional injections from a botox session can fix drooping eyebrows or eyelids caused by bad botox. The surgeon will inject small amounts into specific areas. This technique requires precision. Only experienced professionals should perform it.

Natural Resolution

Another option is to wait for the Botox to wear off naturally. Botox effects usually last between three to six months. Over time, the body absorbs the substance. The muscles gradually regain movement.

This approach requires patience. People might feel uncomfortable during this period. However, it avoids additional procedures or surgeries. It’s a safe and natural way to correct errors.

Emergency Services

Severe reactions or side effects need immediate attention. Symptoms like difficulty breathing, severe swelling, or intense pain require emergency medical services. These reactions are rare but serious.

If someone experiences these symptoms from a bad botox, they should seek help right away. Emergency rooms have the necessary equipment and expertise. Quick action can prevent further complications.

Consultation

Consulting with a qualified professional is essential before deciding on any correction method, especially for a botox session to avoid bad botox. A thorough consultation can help determine the best course of action for a botox session and avoid bad botox. The surgeon will assess the situation and provide expert advice.

During the consultation, people should ask about risks and benefits of a botox session and bad botox. They should also inquire about the surgeon’s experience with similar cases and bad botox. Proper consultation ensures informed cosmetic decisions.

Cosmetic Surgery

In extreme cases, cosmetic surgery might be needed to correct botched Botox. This option is less common but sometimes necessary. Procedures like chin reduction, botox session, or other plastic surgeries can help restore appearance.

Cosmetic surgery involves more risk and recovery time compared to a botox session or bad botox. It’s important to weigh these factors carefully. Consulting with an experienced plastic surgeon is crucial for successful outcomes and avoiding bad botox.

Home Care for Better Results

Minimize Swelling

Applying ice can reduce swelling after Botox injections. Use an ice pack wrapped in a cloth. Apply it gently to the treated area for 10-15 minutes after the botox session to avoid bad botox. Avoid taking aspirin or ibuprofen as they can increase bruising after a botox session.

Avoid Certain Activities

Refrain from strenuous activities for at least 24 hours post-treatment after your botox session. Exercise can raise your blood pressure and worsen bruising. Also, avoid lying down for four hours after the appointment to prevent Botox from spreading to unintended areas.

Gentle Facial Exercises

Gentle facial exercises may help distribute Botox evenly. Lightly frown, smile, and raise your eyebrows several times a day to avoid a bad botox session. These movements can help achieve more balanced results.

Follow Provider’s Instructions

Always follow the post-treatment care instructions given by your healthcare provider after a botox session to avoid bad botox. These guidelines are tailored for optimal results. Providers often suggest avoiding alcohol and excessive sun exposure.

Stay Hydrated

Drink plenty of water to stay hydrated. Proper hydration helps your skin heal faster and look healthier. It also aids in reducing swelling and bruising.

Monitor Your Progress

Keep an eye on your progress in the days following the botox session. Take photos to compare changes over time. If you notice unusual symptoms, contact your provider immediately.

Use Gentle Skincare Products

Use gentle skincare products on treated areas. Avoid harsh exfoliants and retinoids for at least a week after a botox session to prevent bad botox results. Opt for mild cleansers and moisturizers instead.

Schedule Follow-Up Appointments

Schedule follow-up appointments with your plastic surgeon if necessary, especially after a botox session or bad botox. They can assess the results of the botox session and make any needed adjustments to avoid bad botox. Regular check-ins ensure long-term satisfaction with your botox session and cosmetic treatment, avoiding bad botox.

When to Seek Professional Help

Severe Side Effects

If experiencing severe side effects, seek professional help immediately. Difficulty breathing is a serious symptom that requires urgent attention, especially after a bad botox session. Vision changes also indicate a need for immediate consultation. These symptoms can signal complications from the Botox treatment.

Contact a healthcare provider right away. They can assess your condition and provide necessary interventions. Do not delay seeking help if you notice these severe reactions after a botox session or bad botox.

Contacting the Provider

For unsatisfactory results, contact the original provider. Discuss your concerns openly with them. They may offer solutions or corrective measures.

The provider might suggest adjustments or additional treatments. This can help improve the results and address any issues. Clear communication with your provider is crucial for resolving problems effectively, especially before a botox session.

Consulting a Plastic Surgeon

Consider consulting a plastic surgeon for expert advice. They specialize in correction and prevention strategies. A plastic surgeon can evaluate your situation thoroughly.

They might recommend further treatments or procedures, including a botox session, to correct the issue. Expert guidance from a plastic surgeon ensures you receive the best care possible, avoiding bad botox and ensuring a successful botox session.

Summary

Botox can be a game-changer, but complications are real. Recognize the signs of botched Botox early to avoid long-term issues. Understanding the causes and prevention tips can save you from a lot of hassle, including a botox session gone wrong or bad botox.

If things go south after a bad botox session, know how to correct and care for it at home. Always seek professional help if needed. Stay informed and proactive about your beauty treatments. Got questions or concerns? Reach out to experts today!

Frequently Asked Questions

What are the common signs of botched Botox?

Common signs of a bad botox session include uneven eyebrows, drooping eyelids, and asymmetrical facial expressions. If you notice these, consult your provider.

How can I prevent Botox complications?

Choose a certified and experienced provider. Follow pre- and post-procedure instructions carefully to minimize risks of a bad botox session.

Can botched Botox be corrected?

Yes, in many cases. A skilled practitioner can use additional treatments or allow time for the effects of a bad botox session to wear off naturally.

What should I do if I experience side effects at home?

Apply ice to reduce swelling and avoid strenuous activities. If symptoms persist, seek professional medical advice.

When is it necessary to seek professional help after Botox?

Seek help if you experience severe pain, difficulty breathing, or signs of infection like redness and fever after a botox session or bad botox.

How long does it take for Botox complications to appear?

Complications from a bad botox session can appear within a few hours to a week after treatment. Monitor your results closely during this period.

What are the most common causes of Botox going wrong?

Inexperienced practitioners, incorrect dosage, and improper injection techniques are common causes of bad botox during a botox session. Always choose a qualified professional.

Male Abdominal Liposuction Cost: A Complete Guide

Did you know that male abdominal liposuction cost, a fat reduction cosmetic surgery, has decreased by 15% in the past five years? This popular procedure helps men achieve a slimmer, more defined midsection without the hassle of endless workouts by undergoing liposuction. If you’re considering this surgery, understanding the cost factors for invasive liposuction procedures is crucial for planning.

From surgeon fees to anesthesia and facility charges, several elements contribute to the total expense of male liposuction and cosmetic surgery, including liposuction cost. Knowing these details can help you budget effectively for cosmetic surgery and avoid surprises with male liposuction. Whether you’re aiming for a six-pack or just want to lose some stubborn fat, this guide covers everything you need to know about male abdominal liposuction costs in cosmetic surgery.

Understanding Liposuction for Men

Growing Trend

More men are opting for liposuction. This trend has grown in the last decade. The American Society of Plastic Surgeons reported a 30% increase in male cosmetic surgery liposuction procedures from 2010 to 2020. Men seek to improve their physical appearance with cosmetic surgery and boost confidence through male liposuction.

Targeted Areas

Male liposuction differs from female liposuction. Men often target different areas. Common areas include the abdomen, chest, and flanks. Abdominal liposuction helps achieve a flatter stomach. Chest liposuction reduces excess fat in the chest area.

Desired Outcomes

Men have different goals compared to women. They often aim for a more defined and muscular look through male liposuction. High definition liposuction techniques can help achieve this. These techniques, including male liposuction, remove fat around muscles, creating a sculpted appearance.

Procedure Differences

The procedure itself also varies. Male fat is usually more fibrous and dense. This makes it harder to remove than female fat. Surgeons may use different tools or techniques. Laser liposuction can be more effective on denser fat.

Consulting Specialists

Consulting with an experienced liposuction surgeon is crucial. Specialists can explain the benefits and limitations. They assess whether you are a good candidate for the male liposuction procedure. They also discuss potential risks and recovery time.

Benefits and Limitations

Liposuction can provide significant benefits. It can remove stubborn fat through lipo that doesn’t respond to diet or exercise. However, it’s not a weight-loss solution. It’s important to maintain realistic expectations.

Importance of Experience

Experienced surgeons are essential for successful outcomes. They have a better understanding of male anatomy and can tailor the lipo procedure accordingly. Always check credentials and past patient reviews before choosing a lipo surgeon.

Factors Affecting Liposuction Costs

Treatment Areas

The size and number of areas treated greatly influence male liposuction costs. Larger areas like the abdomen usually cost more. Smaller areas such as the chin are cheaper. Treating multiple areas at once increases the overall price.

A single body area liposuction price can range from $3,000 to $7,500. Multiple area liposuction price range varies from $8,000 to $15,000. The more extensive the treatment, the higher the cost.

Geographic Location

Where you have the lipo procedure done impacts the cost significantly. Urban centers with higher living expenses tend to charge more for cosmetic surgery procedures like lipo. For instance, liposuction in New York or Los Angeles is pricier than in smaller cities.

Costs also vary between countries. Procedures in the U.S., like lipo, usually cost more than those in countries like Mexico or Thailand. However, traveling abroad for surgery can add other expenses.

Procedure Complexity

The complexity of the procedure affects liposuction pricing. More intricate techniques require specialized equipment and skilled surgeons. Advanced methods like laser-assisted liposuction or ultrasound-assisted liposuction often cost more.

Complex cases may need longer surgery times, lipo, and additional staff. This increases the total price. Simple procedures without complications are generally less expensive.

Surgeon’s Experience

Experienced surgeons typically charge more for their services. They bring expertise and a proven track record. Patients often prefer experienced surgeons despite higher costs.

Surgeons with specialized training in male liposuction may also charge premium rates. Their expertise in lipo ensures better results and safety, justifying the higher price.

Facility Fees

Facility fees include operating room charges and post-surgery care costs for lipo. High-end clinics with state-of-the-art facilities tend to have higher fees for lipo. These fees cover essential aspects like sterilization, nursing staff, lipo, and recovery rooms.

Lower-cost facilities might lack some amenities but offer basic care at a reduced price. Patients should weigh these factors when considering where to have their lipo procedure done.

Anesthesia Fees

Anesthesia is crucial for comfort during surgery. The type of anesthesia used affects the total cost. General anesthesia is more expensive than local anesthesia due to its complexity and monitoring needs.

Anesthesiologists’ fees also vary based on their experience and location. Highly skilled anesthesiologists in major cities will charge more.

Average Cost Range

Overview

Male abdominal liposuction costs range from $3,900 to $7,500. This price includes all necessary fees. These fees cover everything from the initial consultation to follow-up appointments, including lipo.

All-Inclusive Fees

The quoted cost is comprehensive. It includes:

  • Surgeon’s fee

  • Anesthesia

  • Operating room facilities

  • Pre-operative tests

  • Post-operative garments

  • Follow-up visits

This means there are no hidden charges. Patients can expect a single payment for the entire lipo procedure.

Body Area Variation

Costs vary based on the body area being treated. Larger areas or multiple areas at once can increase the lipo price. For example, treating the abdomen with lipo may be more expensive than smaller regions like the chin.

Factors Affecting Costs

Several factors influence the cost of male abdominal liposuction. The surgeon’s experience and the clinic’s location play significant roles in lipo. More experienced surgeons often charge higher fees due to their expertise in lipo.

Age and Need

Age can affect the cost as well. Older patients might need more extensive procedures, like lipo, leading to higher costs. Those with more fat deposits may require longer lipo surgery times.

Analyzing Treatment Areas

Abdomen

The abdomen is a common treatment area for male liposuction. Patients often target this area with lipo to achieve a flatter midsection. The procedure involves using cannulas to remove fat deposits. The size of the abdomen can make the lipo procedure more costly. Larger areas require more time and effort.

Chest

Another frequent area is the chest. Men opt for liposuction here to reduce excess fat and enhance muscle definition. This area may need micro cannulas for precision. The complexity of removing fat near the skin and muscles with lipo can increase costs.

Love Handles

Love handles are also popular targets for liposuction. These are located on the sides of the waist. Removing fat from this area with lipo can improve overall body contour. The size and shape of love handles can vary, affecting the cost of lipo.

Submental Area

The submental area, or under the chin, is another lipo treatment option. This smaller area usually requires local anesthesia. Despite its size, it demands precision, which can make it relatively expensive.

Factors Affecting Cost

Costs vary based on several factors:

  • Size of the Body Area: Larger areas like the abdomen cost more for lipo.

  • Complexity: Areas requiring precision, like the chest, might be pricier.

  • Anesthesia Type: Local anesthesia might be cheaper than general anesthesia.

Personalized Assessment

A personalized assessment is crucial. Each patient’s needs differ. A consultation helps determine the exact cost based on individual treatment plans. Doctors consider body type, desired results, and medical history.

Importance of Surgeon Experience

Surgeon Qualifications

A surgeon’s qualifications matter. They impact the cost of male abdominal liposuction. Experienced surgeons often charge more. They have advanced training and certifications. This expertise ensures safer procedures.

Qualified surgeons belong to professional bodies. Examples include the American Board of Cosmetic Surgery. These memberships indicate high standards. Patients should verify certifications before choosing a surgeon.

Correlation Between Cost and Outcomes

Higher costs can mean better outcomes. Experienced surgeons use refined techniques. This leads to more precise results. Fewer complications occur with skilled professionals.

Studies show experienced surgeons have higher success rates. They handle complex cases better. Paying more for an experienced surgeon can reduce risks. It also increases satisfaction with results.

Researching Surgeons

Research is crucial when selecting a surgeon. Look into their background thoroughly. Check their success rates with male liposuction. Reviews and testimonials offer insights.

Ask about their experience specifically with male patients. Men have different fat distribution than women. A surgeon familiar with these differences achieves better results.

Success Rates

Success rates reflect a surgeon’s skill. High success rates indicate consistent quality. They also suggest fewer post-surgery issues.

Request data on past surgeries from potential surgeons. Compare this information before making a decision. Choosing a surgeon with high success rates ensures a smoother recovery process.

Importance of Consultation

Consultations are essential steps in the process. During consultations, discuss your goals and concerns. Evaluate the surgeon’s approach and communication style.

Good communication builds trust between patient and surgeon. It also helps set realistic expectations for the surgery outcomes.

Financing Options

CareCredit

CareCredit is a popular financing option. It helps cover the cost of male abdominal liposuction. They offer 0% financing for a set period. This means no interest if paid in full within the promotional period. Approval depends on credit history and other factors.

To apply, visit the CareCredit website. Fill out the application form. Approval usually takes minutes. Monthly payments can start as low as $79. This makes it an affordable solution for many.

United Medical Credit

United Medical Credit is another good option. They specialize in medical financing. They offer flexible payment plans with competitive interest rates. Approval criteria include credit score and income verification.

Applying is simple. Go to the United Medical Credit website. Complete the online application form. Approval time varies but often happens quickly. They provide personalized loan options based on your needs.

Insurance Coverage

Insurance rarely covers cosmetic procedures like liposuction. Most policies exclude elective surgeries. Check with your provider to be sure.

e insurance may cover liposuction if it’s medically necessary. This includes cases like removing excess fat due to certain health conditions. Always verify coverage details with your insurance company.

Other Payment Solutions

Other solutions exist for financing male abdominal liposuction. Personal loans from banks or credit unions are an option. Interest rates depend on your credit score and loan amount.

e clinics offer in-house financing plans. These may come with different terms and conditions. Always read the fine print before committing.

Fee Transparency

Understanding fees is crucial when considering liposuction. Surgeons should provide a detailed fee breakdown. This includes costs for anesthesia, facility fees, and post-operative care.

Ask for all-inclusive quotes to avoid hidden charges. Knowing the total cost upfront helps in planning your finances better.

Choosing Quality Over Cost

Importance of Quality

Quality should be the top priority when selecting a liposuction provider. Experienced surgeons and reputable facilities ensure better results and safety. Opting for cheaper options can lead to complications. Complications may include infections, uneven fat removal, or prolonged downtime.

Risks of Low Prices

Choosing low-cost providers can be risky. Less experienced surgeons might cut corners to offer lower prices. This can result in poor outcomes and additional costs for corrective procedures. Some facilities might use outdated equipment or lack proper licensing.

Long-term Benefits

Spending a bit more on quality care pays off in the long run. High-quality providers use advanced techniques like laser liposuction. These methods offer better precision and faster recovery times. The initial investment leads to lasting and satisfactory results.

Safety Concerns

Safety is crucial in any medical procedure. Reputable providers follow strict safety protocols. They have well-trained staff and state-of-the-art equipment. This reduces the risk of complications during and after the surgery.

Real-life Examples

Consider John, who chose a cheap clinic for abdominal liposuction. He ended up with uneven fat removal and had to undergo corrective surgery. On the other hand, Mike opted for a renowned surgeon. He experienced minimal downtime and excellent results.

Evaluating Providers

Check the credentials of potential surgeons. Look at their experience, certifications, and patient reviews. Visit the facility to assess cleanliness and professionalism. Ensure they use modern techniques for fat removal.

Comprehensive Care

High-quality providers offer comprehensive care packages. These often include pre-surgery consultations, post-surgery follow-ups, and inclusive care plans. Such packages ensure a smoother recovery process and better overall experience.

Emotional Well-being

Choosing quality over cost also impacts emotional well-being. Knowing you are in good hands reduces anxiety about the procedure. The confidence in achieving desired results boosts self-esteem post-surgery.

Setting Realistic Goals

Importance of Expectations

It’s crucial to have realistic expectations about male abdominal liposuction. This procedure can enhance body contours but won’t result in a perfect body. Unrealistic goals often lead to disappointment.

Liposuction removes fat deposits but doesn’t address loose skin. Understanding this will help set achievable goals.

Consultation Benefits

A consultation with a qualified surgeon is essential. During the appointment, the surgeon assesses your body type and discusses desired results. They explain what liposuction can and cannot achieve.

This helps in setting realistic expectations. The surgeon’s expertise ensures you understand the possible outcomes.

Not a Weight Loss Solution

Liposuction should not be seen as a weight loss method. It’s designed to sculpt and refine specific areas of the body. Weight gain after the procedure can impact results.

Maintaining a stable weight is important for long-term success. Regular exercise and a healthy diet are key components.

Impact of Exercise

Exercise plays a significant role post-liposuction. It helps maintain the new body shape and prevents weight gain. Cardiovascular activities and strength training are beneficial.

Consistency in exercise routines enhances the overall outcome of the surgery.

Final Thoughts

Final Remarks

Understanding male abdominal liposuction costs can be daunting. But with insights into factors like surgeon experience, treatment areas, and financing options, you can make informed decisions. Prioritize quality over cost to ensure the best outcomes. Set realistic goals and choose a skilled surgeon to maximize your investment.

Ready to take the next step? Consult with a qualified professional to discuss your options. Your journey to a better you starts now. Don’t let cost be the only factor; focus on achieving the results you deserve.

Frequently Asked Questions

What is male abdominal liposuction?

Male abdominal liposuction is a cosmetic procedure to remove excess fat from the abdomen, creating a more contoured appearance.

How much does male abdominal liposuction cost?

Costs vary widely but typically range from $3,000 to $7,500. Factors such as location, surgeon experience, and treatment area size affect the price.

What factors influence the cost of male liposuction?

Factors include the surgeon’s expertise, geographic location, clinic reputation, and the extent of fat removal needed.

Why is surgeon experience important for liposuction?

Experienced surgeons ensure safer procedures and better results. They minimize risks and provide natural-looking outcomes.

Are financing options available for liposuction?

Yes, many clinics offer financing plans or payment options to make the procedure more affordable.

Should I choose the cheapest liposuction option?

No, prioritize quality over cost. A skilled surgeon ensures better results and reduces the risk of complications.

What should my goals be for abdominal liposuction?

Set realistic goals. Liposuction improves contour but isn’t a weight loss solution. Consult with your surgeon for personalized advice.

Glow Like Never Before: At-Home Microdermabrasion for Radiant Skin

Benefits of Microdermabrasion

Clearer Skin

Microdermabrasion benefits include clearer skin. The treatment removes dead skin cells. This reveals a brighter complexion. Regular use can help reduce acne scars and blackheads. It also unclogs pores, preventing future breakouts.

Cost Savings

Performing microdermabrasion at home saves money. Professional treatments can be expensive. Home microdermabrasion devices are a one-time purchase. These devices offer similar results to professional sessions. They provide an affordable way to maintain healthy skin.

Convenience

At-home microdermabrasion is convenient. You can perform the treatment anytime. There is no need to schedule appointments or travel to a spa. This flexibility allows for consistent skincare routines. It fits easily into busy lifestyles.

Improved Absorption

Microdermabrasion improves skincare product absorption. By removing dead skin cells, new cells are exposed. This allows creams and serums to penetrate deeper. Products become more effective, enhancing their benefits.

Non-Invasive

Microdermabrasion is non-invasive. It does not involve chemicals or needles. The procedure uses a gentle exfoliating technique. This makes it suitable for all skin types, including sensitive skin.

Immediate Results

Results from microdermabrasion are immediate. Skin appears smoother and more radiant after one session. Continued use leads to long-term improvements in texture and tone.

Understanding the Process

Mechanical Exfoliation

Microdermabrasion is a mechanical exfoliation technique. It uses fine crystals or a diamond tip to remove the outermost layer of skin. This process helps reveal smoother and fresher skin underneath.

Fine crystals are often made from aluminum oxide. These crystals gently abrade the skin’s surface. The diamond tip, on the other hand, uses a roughened surface to achieve similar results. Both methods effectively remove dead skin cells and impurities.

Professional vs. At-Home Kits

Professional microdermabrasion treatments are usually more powerful. Dermatologists or estheticians perform these treatments using advanced machines. These machines can penetrate deeper into the skin layers.

At-home kits are less powerful. They are designed for safer use by non-professionals. These kits provide a gentler exfoliation compared to professional treatments. However, they still offer noticeable improvements in skin texture and appearance.

Following Instructions

Following instructions carefully is crucial when using at-home microdermabrasion kits. Incorrect usage can lead to skin irritation or damage. Always read the instruction manual thoroughly before starting.

Here are some key points to remember:

  • Start with clean skin: Ensure your face is free of makeup and dirt.

  • Use gentle pressure: Avoid pressing too hard on your skin.

  • Limit treatment time: Do not exceed the recommended duration for each session.

  • Moisturize afterward: Apply a hydrating moisturizer to soothe your skin post-treatment.

Choosing the Right Kit

Skin Type

Different skin types need different kits. Oily skin benefits from kits with stronger suction. Dry skin needs gentler tools to avoid irritation. Sensitive skin should use kits with adjustable settings. High customer satisfaction products on Amazon include the Microderm GLO Diamond Microdermabrasion Machine for sensitive skin and the Kendal Professional Diamond Microdermabrasion Machine for oily skin.

Specific Concerns

Consider your specific skin concerns. For acne scars, look for kits with diamond tips. Hyperpigmentation requires kits that offer both suction and exfoliation. Popular choices on Amazon are the Trophy Skin MicrodermMD for acne scars and the PMD Personal Microderm Classic for hyperpigmentation.

Sustainability Features

Sustainability is important. Choose kits that are eco-friendly. Look for reusable tips and filters. Kits from small business brands often focus on sustainability. The ECO FACE Platinum LED Mask is a great example. It supports Amazon’s commitment to empowering small businesses while being eco-friendly.

Small Business Brands

Support small business brands when possible. They often offer unique features and better customer service. The Silk’n Revit Prestige is a good option. It has high reviews and supports small businesses. This aligns with Amazon’s goal of helping smaller brands grow.

Additional Savings

Look for additional savings options. Many kits come with discounts or coupons on Amazon. Some offer Subscribe & Save options for extra savings. The Microderm GLO MINI often has coupons available, making it more affordable.

Step-by-Step Guide

Preparation

Start by gathering all the necessary items. These include your microdermabrasion kit, a gentle cleanser, a soft towel, and a moisturizer. Ensure your kit is fully charged if it’s battery-operated.

Before beginning, wash your hands thoroughly. Then, cleanse your face using a gentle cleanser to remove dirt and oil. Pat your skin dry with a soft towel.

Testing the Device

Always test the device on a small area of your skin first. This helps check for any adverse reactions. Choose an inconspicuous spot like behind your ear.

Turn on the device and use it on the test spot for a few seconds. Wait 24 hours to see if there is any redness or irritation. If there are no issues, proceed with the treatment.

Using the Device

Begin with the lowest setting on your microdermabrasion device. Hold your skin taut with one hand and gently glide the device over your face with the other hand.

Move in upward strokes. Avoid staying in one spot for too long to prevent irritation. Focus on areas with more noticeable concerns like fine lines or scars.

Post-Treatment Care

After finishing with the device, rinse your face with cool water. This helps soothe your skin and removes any remaining debris.

Apply a gentle moisturizer to hydrate and protect your skin. Avoid using products with strong ingredients like retinoids or acids immediately after treatment.

Tips for Maintenance

Regularly clean your microdermabrasion device to maintain its performance. Remove the tip and rinse it under warm water after each use.

Dry all parts completely before reassembling and storing the device. Replace filters as recommended by the manufacturer to ensure optimal results.

Frequency and Schedule

Skin Types

Different skin types need different frequencies of microdermabrasion. Oily skin can usually handle more frequent sessions. Start with once a week. Dry or sensitive skin needs less frequent treatments. Begin with once every two weeks.

Initial Sessions

Start with fewer sessions. This helps your skin adapt to the treatment. For the first month, do one session every two weeks. See how your skin responds. If there is no irritation, you can increase the frequency.

Gradual Increase

After the initial month, gradually increase the frequency. Move to weekly sessions if your skin shows no signs of over-exfoliation. For normal skin, once a week is ideal. Oily skin may handle twice a week.

Listening to Your Skin

Always listen to your skin’s response. If you notice redness, irritation, or dryness, reduce the frequency. Give your skin time to heal before the next session. Adjust based on how your skin feels.

Long-Term Schedule

For long-term maintenance, find a schedule that works best for you:

  • Oily Skin: 1-2 times per week

  • Normal Skin: Once a week

  • Dry/Sensitive Skin: Every two weeks

Skin Type Suitability

Oily Skin

Oily skin can benefit greatly from microdermabrasion. The treatment removes dead skin cells and excess oil. This helps unclog pores and reduce the occurrence of acne. It also improves the appearance of large pores, making the skin look smoother.

Acne-Prone Skin

Microdermabrasion can be effective for acne-prone skin. The procedure exfoliates the top layer of the skin. This reduces blackheads and whiteheads. However, it’s crucial to avoid active acne areas to prevent irritation.

Aging Skin

Aging skin shows signs like fine lines and wrinkles. Microdermabrasion stimulates collagen production. This helps improve skin elasticity and reduces the appearance of fine lines. Regular sessions can make the skin look younger and more vibrant.

Sensitive Skin

Sensitive skin requires caution with microdermabrasion. The procedure might cause redness and irritation. It’s best to consult a dermatologist before trying it at home. They can recommend suitable products and techniques.

Active Acne

Active acne is not ideal for microdermabrasion. The treatment can aggravate inflammation. It may spread bacteria, worsening the condition. Always seek professional advice before proceeding.

Rosacea

Rosacea sufferers should be cautious with microdermabrasion. The treatment may exacerbate redness and irritation. Consulting a dermatologist is essential in these cases.

Post-Treatment Care

After microdermabrasion, use gentle skincare products. Avoid harsh ingredients like alcohol or fragrances. Opt for soothing lotions or creams to support healing.

Best Practices for Safety

Read Manual

Always read the product manual thoroughly. Each microdermabrasion device has specific instructions. These instructions ensure correct usage and prevent skin damage.

Manufacturers include guidelines for a reason. Ignoring these guidelines can lead to serious skin issues. Follow the recommended settings and techniques.

Use Sunscreen

After treatment, your skin becomes more sensitive to sunlight. Apply sunscreen immediately after a microdermabrasion session. This protects the newly exposed skin layer from UV damage.

Choose a broad-spectrum sunscreen with at least SPF 30. Reapply every two hours if you are outdoors. Sunscreen helps prevent sunburn and long-term skin damage.

Avoid Other Exfoliations

Do not use other forms of exfoliation before or after microdermabrasion. This includes chemical peels, scrubs, and retinol products. Over-exfoliation can irritate your skin and cause redness.

Give your skin time to recover between treatments. Allow at least one week between different types of exfoliation. Your skin needs this time to heal properly.

Clean Tools

Ensure all tools are clean before use. Bacteria on the device can cause infections. Clean the device according to the manufacturer’s instructions.

Use alcohol wipes or a mild soap solution to disinfect the tool. Proper cleaning prevents bacterial contamination and keeps your skin safe.

Patch Test

Perform a patch test before full use. Apply the device on a small area of skin first. This checks for any adverse reactions like redness or irritation.

Wait 24 hours after the patch test. If no reaction occurs, proceed with the full treatment. Patch testing ensures your skin tolerates the procedure.

Moisturize After Treatment

Hydrate your skin with a gentle moisturizer post-treatment. Microdermabrasion can leave your skin dry and flaky. Choose a non-comedogenic moisturizer that won’t clog pores.

Apply moisturizer twice daily to keep your skin soft and hydrated. Moisturizing aids in faster recovery and maintains skin health.

Limit Frequency

Limit the frequency of at-home microdermabrasion sessions. Overuse can lead to thinning of the skin and increased sensitivity.

Stick to once every two weeks for best results. Frequent treatments may harm rather than help your skin.

Consult Professionals

If unsure, consult a dermatologist before starting at-home treatments. They can provide personalized advice based on your skin type and condition.

Professional guidance ensures you follow safe practices tailored to your needs. Dermatologists help avoid potential risks and complications.

Comparing Exfoliation Methods

Microdermabrasion vs. Chemical Peels

Microdermabrasion and chemical peels are popular exfoliation techniques. Microdermabrasion uses a device to remove the outer layer of skin. It works well for most skin types and offers immediate results.

Chemical peels use acids to dissolve dead skin cells. They can be stronger and more intense than microdermabrasion. These peels may cause redness, peeling, and other side effects. They are often not suitable for sensitive skin.

Microdermabrasion vs. Manual Scrubs

Manual scrubs involve rubbing the skin with gritty substances. This type of physical exfoliation is gentle and easy to do at home. However, it might not be as effective as microdermabrasion.

Microdermabrasion provides a more thorough exfoliation. It uses an exfoliative device to ensure even and consistent removal of dead skin cells. Manual scrubs can sometimes cause irritation if used too harshly.

Effectiveness and Suitability

Microdermabrasion offers a middle ground between manual scrubs and chemical peels. It is effective in physically removing the outermost layer of dead skin cells. This leads to immediate improvement in skin texture and tone.

Chemical peels are good for deeper exfoliation but can be risky for some skin types. Manual scrubs are gentle but might not provide strong exfoliation. Microdermabrasion is suitable for those looking for powerful exfoliating treatments without the intensity of chemical peels.

Benefits of Microdermabrasion

Microdermabrasion has several benefits:

  • Immediate results: Skin looks smoother and brighter right away.

  • Minimal risks: Less likely to cause irritation compared to chemical peels.

  • Suitable for most skin types: Works well on normal, dry, oily, and combination skin.

  • Non-invasive: No downtime needed after treatment.

Using an exfoliation head, microdermabrasion can target specific areas effectively. It is a versatile method that balances effectiveness with safety.

Potential Risks

While microdermabrasion is generally safe, there are potential risks:

  • Minor redness: Skin might appear slightly red after treatment.

  • Sensitivity: Some people may experience temporary sensitivity.

  • Improper use: Using the device incorrectly can cause abrasions or irritation.

Closing Thoughts

Microdermabrasion at home can revolutionize your skincare routine. With the right kit and proper technique, you can achieve glowing, youthful skin without stepping into a spa. It’s safe, effective, and tailored to fit your schedule and skin type.

Now it’s your turn to take action. Grab a microdermabrasion kit and start your journey to radiant skin today. Trust in the process, follow the guide, and enjoy the benefits. Your skin will thank you!

Frequently Asked Questions

What are the benefits of microdermabrasion at home?

Microdermabrasion at home can improve skin texture, reduce fine lines, and enhance product absorption. It’s a cost-effective way to achieve glowing skin.

How often should I do microdermabrasion at home?

For most skin types, once a week is ideal. Sensitive skin may need less frequent treatments, around every two weeks.

Is microdermabrasion suitable for all skin types?

Microdermabrasion suits most skin types but may irritate very sensitive or acne-prone skin. Always do a patch test first.

What should I look for in a microdermabrasion kit?

Choose a kit with adjustable suction levels, replaceable heads, and positive reviews. Ensure it’s suitable for your specific skin type.

Are there any safety precautions for at-home microdermabrasion?

Always follow the instructions. Avoid broken or inflamed skin. Use gentle pressure and don’t overdo it to prevent irritation.

How does microdermabrasion compare to other exfoliation methods?

Microdermabrasion offers deeper exfoliation than scrubs and peels. It’s more effective for improving texture and reducing fine lines.

Can I use other skincare products after microdermabrasion?

Yes, but stick to gentle, hydrating products immediately after treatment. Avoid harsh ingredients like retinoids or acids for 24 hours.

Dermal Fillers: Side Effects, Precautions, and Alternatives

Understanding Dermal Fillers

Definition and Use

Dermal fillers are substances injected into the skin. They primarily enhance facial features and reduce signs of aging. People use dermal filler injections to smooth wrinkles, add volume, and improve facial contours.

Materials Used

Various materials are used in dermal fillers. Hyaluronic acid dermal fillers are popular because they are naturally found in the body. Other options include calcium hydroxylapatite, poly-L-lactic acid, and polymethylmethacrylate beads. Each material offers different benefits and durations.

Natural vs Synthetic Options

Natural options like hyaluronic acid fillers integrate well with the body’s tissues. Synthetic options may last longer but can have a higher risk of complications. It’s important to understand the differences before choosing.

Consulting Healthcare Professionals

Consulting with healthcare professionals is crucial. They provide personalized treatment plans tailored to individual needs. They assess the skin type, medical history, and desired outcomes.

Personalized Treatment Plans

Healthcare professionals use various dermal filler techniques based on the patient’s requirements. This ensures safe and effective results. Proper consultation helps in selecting the right dermal filler product.

Importance of Expertise

Expertise in applying dermal fillers minimizes risks and enhances results. Trained professionals know how to manage potential side effects and complications.

Common Side Effects

Swelling and Redness

Swelling is a common side effect after getting dermal fillers. It usually occurs around the injection site. Most people experience this within a few hours post-injection. Redness often accompanies swelling, making the treated area look inflamed. Both of these effects are temporary. They typically resolve within a few days to weeks.

Bruising

Bruising can also happen after receiving dermal fillers. This occurs because the needle can damage small blood vessels under the skin. The bruises might appear as dark spots or patches. These marks usually fade away within a week or two. Applying ice packs can help reduce bruising.

Pain and Tenderness

Pain and tenderness at the injection site are other common side effects. This discomfort can range from mild to moderate. It may last for a few days post-treatment. The pain can make it hard to perform daily activities, like chewing or smiling, if the filler was injected near the mouth.

Itching

e individuals may experience itching at the injection site. This sensation is usually mild but can be annoying. Itching often subsides within a few days. Avoid scratching the area to prevent irritation or infection.

Allergic Reactions

Allergic reactions to dermal fillers are rare but possible. Signs of an allergic reaction include severe swelling, redness, and itching. In extreme cases, difficulty breathing may occur. Seek medical attention immediately if you suspect an allergic reaction.

Lumps and Bumps

Lumps and bumps can form under the skin after filler injections. This happens when the filler material clumps together. These lumps are usually temporary and dissolve on their own over time. Massaging the area gently can help smooth out these irregularities.

Infection

Infection is a less common but serious side effect of dermal fillers. Symptoms include increased redness, swelling, and pain at the injection site. If you notice any pus or fever, consult your doctor right away. Proper sterilization techniques during the procedure can minimize this risk.

Temporary Loss of Sensation

Temporary loss of sensation in the treated area can occur. This numbness is due to nerve irritation from the injection process. Sensation usually returns within a few days to weeks.

Rare Complications

Inflammation

Inflammation is a rare but possible side effect of dermal fillers. It can occur after illnesses, vaccinations, or dental procedures. The skin may become red, swollen, and painful. This reaction can last for days or weeks. Medical attention might be needed if the symptoms persist.

Nodules

Nodules are small lumps that may form under the skin. They can develop weeks or even months after the injection. These nodules might be hard or soft. Some cases require further treatment to dissolve them. Steroid injections or surgery might be necessary.

Granulomas

Granulomas are another type of lump that can form. They result from the body’s immune response to the filler material. These lumps are often firm and can be painful. Granulomas might need medical intervention to remove them. Treatment options include steroids or surgical removal.

Infection

Infection is a serious but rare risk of dermal fillers. Bacteria can enter the injection site, causing redness, swelling, and pain. Infections may lead to abscesses that require drainage. Antibiotics are often prescribed to treat infections.

Allergic Reactions

Allergic reactions to dermal fillers are uncommon but possible. Symptoms include itching, swelling, and redness at the injection site. Severe allergic reactions can cause difficulty breathing and require immediate medical attention.

Tissue Death (Necrosis)

Necrosis is a rare but severe complication of dermal fillers. It occurs when blood flow is blocked to an area of tissue, causing it to die. This can happen if the filler is injected into a blood vessel by mistake. Skin necrosis results in pain and discoloration of the affected area.

Unintended Injection

Unintended injection into blood vessels can cause serious problems. It may lead to skin complications like necrosis or even blindness if it affects the eyes. Immediate treatment is crucial to minimize damage.

Bruising

Bruising is another rare complication but can be severe in some cases. It happens when blood vessels are damaged during the injection process. Large bruises may take weeks to heal and could require medical attention.

Pre-Procedure Precautions

Medical History

Disclose your full medical history to your healthcare provider. This includes any past surgeries, allergies, and chronic conditions. Knowing your medical background helps the provider assess potential risks. For instance, if you have a history of severe allergies, it may affect the choice of dermal fillers.

Current Medications

Inform the provider about all medications you are currently taking. This includes prescription drugs, over-the-counter medications, and supplements. Certain medications can increase the risk of adverse reactions during cosmetic procedures. Blood thinners like aspirin can cause excessive bruising.

Qualified Provider

Consult with a qualified healthcare provider before undergoing any procedure. Choose a licensed professional with experience in administering dermal fillers. They can explain both the benefits and risks involved. A skilled provider minimizes complications by using proper techniques.

Avoid Certain Medications

Stop taking certain medications and supplements before the procedure to reduce risks. Avoid blood-thinning medications like aspirin and ibuprofen at least two weeks prior. These can increase bruising and bleeding. Also, avoid vitamin E and fish oil supplements as they have similar effects.

Informed Consent

Before proceeding with dermal fillers, ensure you sign an informed consent form. This document outlines the potential risks and benefits of the procedure. It also confirms that you understand these aspects fully. Signing this form is crucial for legal and ethical reasons.

Skin Assessment

A thorough skin assessment should be conducted before the procedure. The healthcare provider will examine your skin type and condition. This helps in selecting the most suitable filler type. Certain skin conditions like acne or eczema may require special considerations.

Allergic Reactions

Discuss any known allergies with your provider to prevent allergic reactions. Some dermal fillers contain substances that could trigger allergies. For example, fillers made from animal products may not be suitable for everyone.

Treatment Plan

Develop a comprehensive treatment plan with your provider. This plan should outline the areas to be treated, the type of filler to be used, and the expected outcomes. A clear treatment plan ensures that both you and your provider are on the same page.

Post-Treatment Care

Ice Application

Applying ice to the treated area can reduce swelling. Use an ice pack wrapped in a cloth. Apply it gently for 15-20 minutes. Repeat this process every few hours on the first day.

Avoid applying ice directly to the skin. Direct contact can cause frostbite. Always use a barrier like a cloth or towel.

Activity Restrictions

Avoid strenuous activities for at least 24-48 hours after the injection. Exercise and heavy lifting can increase blood flow, leading to more swelling and bruising.

Rest is crucial for recovery. Strenuous activities can also raise blood pressure, which may worsen side effects.

Follow Provider Instructions

Follow your healthcare provider’s instructions carefully. They know your specific case and will give personalized advice.

Ignoring these instructions can lead to complications. Providers often recommend avoiding certain medications that thin the blood, like aspirin, before and after treatment.

Signs of Complications

Watch for signs of complications. Unusual pain, severe swelling, or skin discoloration are red flags.

If you notice any of these symptoms, contact your health care provider immediately. Early intervention can prevent more serious issues.

Avoid Certain Products

Avoid using products with harsh chemicals on the treated area. This includes strong cleansers and exfoliants.

These products can irritate the skin further and delay healing. Stick to gentle skincare products as recommended by your provider.

Stay Hydrated

Drink plenty of water after your treatment. Staying hydrated helps your body heal faster.

Water aids in flushing out toxins and keeps your skin healthy. Hydration is key for maintaining overall skin health post-treatment.

Safety Tips for Consumers

Avoid Self-Injection

Never purchase dermal fillers online. These products can be counterfeit or unsafe. Attempting self-injection poses serious risks. Complications include infections, allergic reactions, and unsatisfactory results.

Self-injection can also cause uneven distribution of the filler. This leads to lumps or asymmetry in the face. Always seek professional help.

Choose Licensed Providers

Only let experienced and licensed healthcare providers perform injections. They know how to handle the materials safely. They also understand facial anatomy well.

Licensed providers use sterile techniques. This reduces the risk of infections. They can also manage any complications that arise during the procedure.

Understand the Product

Know the specific product being used. Different fillers have different uses and side effects. Some are for wrinkles, while others add volume to lips or cheeks.

Ask about the ingredients in the filler. Some materials may not be suitable for everyone. Understand potential side effects like swelling, bruising, or redness.

Be Aware of Risks

All medical procedures come with risks. Dermal fillers can cause side effects like:

  • Swelling

  • Bruising

  • Redness

  • Infection

In rare cases, more severe complications occur. These include vascular occlusion, which can lead to tissue death if untreated.

Follow Post-Treatment Care

Proper post-treatment care is crucial for safety. Follow all instructions given by your provider. This helps minimize risks and ensures better results.

Avoid touching or massaging treated areas unless advised otherwise. Doing so can move the filler and affect results.

Report Any Issues

If you experience unusual symptoms after treatment, contact your provider immediately. Early intervention can prevent serious complications.

Alternatives to Fillers

Topical Treatments

Topical treatments offer a non-invasive option for those hesitant about filler injections. These products include creams, serums, and lotions that contain active ingredients like retinoids, hyaluronic acid, and peptides. Retinoids help increase cell turnover, which can reduce wrinkles over time. Hyaluronic acid attracts moisture to the skin, making it appear plumper and more hydrated.

Peptides stimulate collagen production. Collagen is essential for maintaining skin elasticity and firmness. Using these topical treatments consistently can lead to noticeable improvements in skin texture and appearance.

Botox

Botox is another popular alternative to dermal fillers. Unlike cosmetic fillers, Botox works by temporarily paralyzing the muscles that cause wrinkles. This makes it effective for treating dynamic wrinkles, such as crow’s feet and forehead lines. The effects of Botox typically last three to six months.

Botox is administered through injections but involves less downtime compared to some filler procedures. It has been widely used for decades and is FDA-approved for various cosmetic applications.

Laser Treatments

Laser treatments are another viable option for those looking to avoid injectable fillers. These treatments use focused light energy to target specific skin concerns, like wrinkles, scars, and pigmentation issues. There are different types of lasers, including ablative and non-ablative lasers.

Ablative lasers remove the outer layer of skin, promoting new skin growth. Non-ablative lasers work beneath the surface without damaging the top layer. Both types can stimulate collagen production, improving skin tone and texture over time.

Lifestyle Changes

Lifestyle changes can naturally enhance skin health and appearance. A balanced diet rich in vitamins and minerals supports overall skin health. Foods high in antioxidants, like fruits and vegetables, can protect the skin from damage caused by free radicals.

Regular exercise improves blood circulation, which helps nourish skin cells. Hydration is also crucial; drinking plenty of water keeps the skin hydrated from within.

Skincare Routines

A consistent skincare routine can also serve as an alternative to injectable drugs like dermal fillers. Cleansing removes dirt and oil that can clog pores and cause breakouts. Exfoliating helps remove dead skin cells, revealing fresher skin underneath.

Moisturizing maintains the skin’s hydration levels, preventing dryness and flakiness. Sunscreen protects against UV damage, which accelerates aging and increases the risk of skin cancer.

Making Informed Decisions

Research First

People should gather information before deciding on dermal fillers. Various studies and clinical trials provide valuable insights. These resources can help understand the potential side effects. Reading up-to-date research ensures you are aware of the latest findings.

Consulting with a healthcare professional is crucial. They can offer personalized advice based on your medical history. This step helps avoid unexpected complications.

Weighing Benefits and Risks

Dermal fillers can improve appearance by reducing lines and crow’s feet. However, there are risks involved. Some people may experience swelling or bruising. In rare cases, more severe reactions can occur.

Consider your health conditions before proceeding. For example, people with allergies might face higher risks. Discuss these factors with your doctor to make an informed choice.

Reflect on Motivations

Understanding why you want dermal fillers is important. Are you looking to enhance your appearance for a special event? Or do you seek long-term changes? Reflecting on your motivations helps set realistic expectations.

Many seek dermal fillers to combat signs of age. It’s essential to have a clear vision of the results you desire. Setting realistic goals prevents disappointment later on.

Set Realistic Expectations

Expectations should align with what dermal fillers can achieve. Fillers can smooth wrinkles and add volume to certain areas. However, they won’t stop the aging process entirely.

Discuss potential outcomes with your healthcare provider. They can show before-and-after photos from past patients. This gives a clearer idea of what to expect.

Personal Health Conditions

Your overall health plays a role in how well you respond to dermal fillers. Certain conditions may increase risks or affect results. For instance, people with autoimmune diseases need extra caution.

Medical professionals can assess if you’re a good candidate for fillers. Share all relevant health information during consultations.

Closing Thoughts

Understanding dermal fillers and their side effects is crucial for your safety and satisfaction. By knowing both common and rare complications, you can make informed choices and take necessary precautions. Remember, proper pre-procedure and post-treatment care can significantly reduce risks.

We encourage you to weigh all alternatives and follow the safety tips provided. Always consult with a qualified professional before proceeding. Your health and well-being are paramount. Stay informed, stay safe, and enjoy the benefits with confidence. Ready to explore more? Dive deeper into our resources or reach out for expert advice today.

Frequently Asked Questions

What are dermal fillers?

Dermal fillers are injectable substances used to restore volume, smooth wrinkles, and enhance facial contours. They are commonly made from hyaluronic acid.

What are the common side effects of dermal fillers?

Common side effects include redness, swelling, bruising, and tenderness at the injection site. These usually subside within a week.

Are there any rare complications associated with dermal fillers?

Yes, rare complications can include infection, lumps, and vascular occlusion. It’s essential to choose a qualified practitioner to minimize risks.

How should I prepare before getting dermal fillers?

Avoid blood thinners and alcohol for a few days before the procedure. Discuss your medical history with your provider.

What post-treatment care is recommended after getting dermal fillers?

Apply ice to reduce swelling. Avoid strenuous activities and exposure to heat for 24-48 hours post-treatment.

Are there alternatives to dermal fillers?

Yes, alternatives include Botox, laser treatments, and non-invasive skin tightening procedures. Consult with a dermatologist to determine the best option for you.

How can I make an informed decision about dermal fillers?

Research thoroughly, consult with certified professionals, and consider potential risks and benefits. Always prioritize safety over cost.

Arm Lift Surgery Cost Breakdown and Financing Options

Understanding Arm Lift Surgery

Definition and Goal

Arm lift surgery, also known as brachioplasty, aims to improve the appearance of the upper arms by addressing sagging skin from the elbow to the back, with individual results varying. This cosmetic surgery procedure removes excess sagging skin and fat between the underarm and elbow. The goal is to create a more toned and proportionate arm contour through cosmetic surgery, enhancing the elbow and back in a balanced manner. Many people seek this surgery after significant weight loss or due to aging.

Candidate Suitability

Not everyone is a suitable candidate for an arm lift cosmetic surgery. Ideal candidates should be in good health with no medical conditions that impair healing. They should have realistic expectations about the outcome. Those with a stable weight are preferred. Significant weight fluctuations can affect results. Non-smokers are better suited as smoking can complicate recovery.

Procedure Duration

The average duration of an arm lift surgery is 2-3 hours. It is usually performed on an outpatient basis. This means patients can go home the same day. However, some may need an overnight stay depending on individual circumstances.

Steps Involved

  1. Anesthesia: General anesthesia or local anesthesia with sedation is administered.

  2. Incision: Incisions are made on the inside or back of the arm.

  3. Tissue Removal: Excess skin and fat are removed.

  4. Sutures: The incisions are closed with sutures.

Recovery Time

Recovery from an arm lift surgery varies. Most patients return to work within two weeks. Full recovery can take several months. Swelling and bruising are common but subside over time. Patients should avoid strenuous activities for at least six weeks.

Risks and Complications

Like any surgery, arm lifts carry risks. These include infection, bleeding, and scarring. Numbness or changes in skin sensation can occur but often resolve over time. It’s important to follow post-operative care instructions to minimize risks.

Costs Involved

The cost of an arm lift surgery varies widely based on location, surgeon’s experience, and facility fees. On average, it ranges from $4,000 to $8,000 in the United States. This typically includes anesthesia, operating room facilities, and other related expenses.

Factors Influencing Cost

Geographic Location

The cost of arm lift surgery varies by location. In large cities, prices are often higher. This is due to the high cost of living and demand for medical services. For example, a procedure in New York or Los Angeles may cost more than one in a smaller town.

In rural areas, costs tend to be lower. Fewer patients mean less demand for surgeries. Lower overhead costs for clinics also contribute to reduced prices. However, finding highly experienced surgeons in these areas can be challenging.

Surgeon’s Expertise

A surgeon’s experience affects the price significantly. Highly skilled surgeons with many years of practice charge more. They have a proven track record and often use advanced techniques. Patients are willing to pay extra for high-quality results.

Newer surgeons may offer lower prices. They might be building their reputation and attracting clients. However, choosing a less experienced surgeon involves risks. The quality of the outcome might not match that of seasoned professionals.

Case Complexity

The complexity of the case also impacts the cost. Simple procedures are less expensive. They require less time and fewer resources. For instance, a minor lift with minimal skin removal is cheaper.

More complex cases cost more due to additional factors:

  • Extensive skin removal

  • Combination with other procedures

  • Longer surgery duration

These elements increase the overall expense. Patients with significant weight loss or severe sagging skin may face higher costs. Complex cases often need specialized care and extended recovery time.

What Costs May Include

Anesthesia Fees

Anesthesia is essential during arm lift surgery. It ensures patients feel no pain. Anesthesia fees can vary based on the type used. Local anesthesia costs less than general anesthesia. On average, expect to pay between $500 and $1,000.

Surgical Facility Costs

The surgical facility where the procedure takes place also charges fees. These include operating room expenses and equipment use. Surgical facility costs typically range from $1,000 to $2,000. Some high-end clinics may charge more.

Surgeon’s Fee

The surgeon’s expertise affects the cost. More experienced surgeons charge higher fees. The surgeon’s fee usually falls between $2,000 and $5,000. This fee reflects their skill and experience level.

Medical Tests

Before surgery, doctors require medical tests. These tests ensure patients are fit for surgery. Common tests include blood work and physical exams. The cost of medical tests ranges from $100 to $300.

Post-Surgery Garments

After surgery, patients need special garments. These garments help reduce swelling and support healing. Post-surgery garments cost between $50 and $150 each. Patients may need more than one garment.

Prescriptions

Medications are necessary after surgery for pain management and infection prevention. Typical prescriptions include painkillers and antibiotics. The cost of prescriptions can add up to about $50 to $200.

Follow-Up Visits

Follow-up visits are crucial for monitoring recovery. Surgeons check for complications and ensure proper healing. Follow-up visit costs vary but generally range from $100 to $300 per visit.

Potential Complications

Complications can arise post-surgery, requiring additional treatment. These might include infections or poor wound healing. Addressing these complications can increase overall costs significantly.

Additional Procedures

e patients may need additional procedures for optimal results. These could include minor touch-ups or scar revisions. Additional procedures can add several hundred to a few thousand dollars to the total cost.

Selecting a Surgeon

Board-Certified Importance

Choosing a board-certified plastic surgeon is crucial. Certification ensures the doctor has undergone extensive training. It also indicates they meet high standards of practice.

A certified surgeon minimizes risks during and after surgery. They follow strict protocols to ensure patient safety. This reduces the chances of complications.

Consultation Questions

During the consultation, ask specific questions. These help assess the surgeon’s experience and approach.

  • How many arm lift surgeries have you performed?

  • What are your qualifications and certifications?

  • Can you explain the potential risks and how you handle them?

These questions provide insight into their expertise. A skilled surgeon will answer confidently and clearly.

Evaluating Photos

Review before-and-after photos of previous arm lifts. This helps in understanding the surgeon’s skill level. Look for consistency in results.

Pay attention to how well the excess skin was removed. Check if the arms look natural post-surgery. Consistent, positive results indicate a reliable surgeon.

Patient Reviews

Read patient reviews online. These offer real-life experiences about the surgeon’s work. Look for comments on:

  • Satisfaction with results

  • Professionalism and bedside manner

  • Post-surgery support

Positive reviews can build trust in your choice.

Hospital Affiliation

Check if the surgeon is affiliated with a reputable hospital. This often means they have access to better facilities and resources. It also adds an extra layer of credibility.

Cost Transparency

Discuss all costs involved during consultation. Ensure there are no hidden fees. A trustworthy surgeon will provide a clear breakdown of expenses.

Insurance and Financing

Health Insurance

Most health insurance plans do not cover cosmetic arm lift surgery. This is because it is considered elective. Elective surgeries are not medically necessary. Insurance companies usually only cover procedures that improve health or function. Before scheduling an arm lift, check your insurance policy. Confirm what is covered and what is not.

Financing Options

Patients often seek financing options for cosmetic surgeries. One popular option is Care Credit. Care Credit offers special financing for health-related expenses. They have various payment plans. Some plans offer no interest if paid within a certain period.

Another option is medical loans. Many banks and financial institutions provide these loans. They can be used to cover the cost of surgery.

Payment Plans

Discuss payment plans with your surgeon’s office. Many surgeons offer in-house financing options. These can include monthly payment plans. Ask about their financial policies during your consultation.

e offices might require a down payment. Others may offer discounts for paying in full upfront. It is important to understand all terms and conditions before agreeing.

Cost Breakdown

Understanding the cost breakdown helps in planning finances. The total cost of an arm lift surgery includes:

  • Surgeon’s fee

  • Anesthesia fee

  • Facility fee

  • Post-surgery garments

  • Medication costs

Each component adds to the overall expense. Clarify these details with your surgeon.

Real-Life Examples

Many patients share their experiences online. For example, Jane from Florida financed her arm lift through Care Credit. She chose a 24-month no-interest plan. This made her payments manageable.

John from Texas discussed payment plans with his surgeon’s office. He arranged a six-month plan with low monthly payments.

Recommendations

It is crucial to explore all available options before deciding on financing. Discussing financial matters openly with your surgeon ensures clarity and avoids surprises later.

Preparing for Surgery

Dietary Adjustments

Patients should focus on a balanced diet before surgery. Eating healthy foods helps the body heal faster. Increase intake of fruits, vegetables, and lean proteins. Avoid alcohol and smoking two weeks before the procedure. These can interfere with healing.

Medication Management

Discuss all medications with your doctor. Some medicines can cause complications during surgery. Blood thinners, for example, might need to be stopped temporarily. Your doctor will give a list of medicines to avoid.

Pre-Operative Consultation

A pre-operative consultation is essential. Discuss the type of arm lift surgery and what to expect. This meeting covers the surgery details, including incisions and techniques. Ask about potential risks and recovery times.

Arrange Assistance

After surgery, help will be needed. Arrange for someone to drive you home. Having someone stay with you for the first 24 hours is important. They can assist with daily activities and monitor any swelling or discomfort.

Plan Recovery Time

Plan your recovery time carefully. Most patients need at least one week off work. Full recovery can take several weeks. Avoid heavy lifting or strenuous activities during this period.

Home Preparation

Prepare your home for recovery. Set up a comfortable resting area with pillows and blankets. Keep essentials like water, snacks, and medications within reach. This helps reduce movement and promotes healing.

Post-Surgery Care

Follow post-surgery care instructions strictly. Keep incisions clean and dry to prevent infection. Attend all follow-up appointments with your doctor. These visits help monitor progress and address any concerns.

Managing Expectations

Managing expectations is crucial. Understand that results take time to show fully. Initial swelling and bruising are normal but will subside over time. Be patient and follow your doctor’s advice for the best outcome.

Recovery and Results

Typical Timeline

Most people can return to work or school within two weeks. The first few days after surgery are crucial. Rest and limited movement help the body heal. Swelling and bruising are common but will gradually decrease.

Patients often need to wear compression garments during this period. These help reduce swelling and support the new arm shape. Stitches or staples are usually removed after one or two weeks.

Gradual Improvement

Results improve over time. Initial swelling can mask the final outcome. As swelling decreases, the skin firms up, revealing a more contoured arm. This process can take several months.

Patients should follow post-operative care instructions carefully. Proper care includes keeping the incision sites clean and avoiding strenuous activities. Individual results may vary based on personal health and adherence to care guidelines.

Long-Term Firmness

Optimal outcomes can be achieved with proper care. However, the natural aging process affects long-term firmness. Skin loses elasticity over time, which may impact the results.

Maintaining a stable weight helps preserve the surgical outcome. Fluctuations in weight can stretch the skin and alter the arm’s appearance. Regular exercise and a healthy diet are essential for long-lasting results.

Activities to Avoid

Certain activities should be avoided during recovery. Heavy lifting and strenuous exercise can strain the healing tissues. Patients should refrain from such activities for at least six weeks.

Driving is also not recommended immediately after surgery. Pain medications can impair judgment and reaction time. It’s best to arrange for someone else to drive during initial recovery days.

Emotional Impact

Recovery isn’t just physical; it’s emotional too. Seeing gradual improvements can boost confidence and self-esteem. However, patience is key as results develop over time.

Support from family and friends is valuable during this period. Sharing experiences with others who have undergone similar procedures can also provide comfort and reassurance.

Potential Complications

Infection

Infection is a common risk after arm lift surgery. It can occur when bacteria enter the incision site. Symptoms include redness, swelling, and pus.

To prevent infection, follow post-operative care instructions closely. Clean the incision area as directed. Use prescribed antibiotics if given.

Scarring

Scarring is another potential complication. The extent of scarring varies among individuals. Some may have minimal scars, while others might have noticeable ones.

To reduce scarring, keep the incision clean and dry. Avoid exposing it to direct sunlight. Use scar-reducing creams if recommended by your surgeon.

Discomfort

Discomfort is typical after surgery. Pain, swelling, and bruising are common. These symptoms usually subside within a few weeks.

Manage discomfort with prescribed pain medications. Rest and avoid strenuous activities. Follow your surgeon’s advice on when to resume normal activities.

Extra Skin

etimes, extra skin may not be fully removed during the surgery. This can lead to dissatisfaction with the results.

Discuss your expectations with your surgeon before the procedure. Ask about the possibility of needing a follow-up surgery to remove any remaining extra skin.

Nerve Damage

Nerve damage is a rare but serious complication. It can result in numbness or tingling in the arms.

Report any unusual sensations to your surgeon immediately. Early intervention can help address nerve issues promptly.

Hematoma

A hematoma is a collection of blood outside blood vessels. It can cause swelling and pain.

To minimize this risk, avoid taking blood-thinning medications before surgery unless approved by your doctor. Follow post-operative care instructions carefully.

Seroma

Seroma occurs when fluid collects under the skin after surgery. It can cause swelling and discomfort.

Drainage tubes may be used to prevent seromas. Keep an eye on the incision site for signs of fluid accumulation and report them to your surgeon.

Blood Clots

Blood clots are a serious risk after any surgery. They can travel to the lungs and cause life-threatening complications.

To reduce this risk, move around as soon as possible after surgery. Wear compression garments if advised by your surgeon.

Allergic Reactions

e patients may experience allergic reactions to anesthesia or surgical materials.

Discuss any known allergies with your surgeon before the procedure. Ensure that all medical staff are aware of your allergies.

Summary

You’ve learned a lot about arm lift surgery, from understanding the procedure to knowing what affects the cost. Choosing the right surgeon and preparing for recovery are crucial steps. By being informed, you can make better decisions and feel more confident about your journey.

Ready to take the next step? Consult with a qualified surgeon to discuss your options and get personalized advice. Your new, confident self is just around the corner. Don’t wait—start your transformation today!

Frequently Asked Questions

What is arm lift surgery?

Arm lift surgery, or brachioplasty, removes excess skin and fat from the upper arms. It improves contour and appearance.

How much does arm lift surgery typically cost?

Costs range from $4,000 to $10,000. Prices vary based on location, surgeon expertise, and facility fees.

What factors influence the cost of arm lift surgery?

Factors include surgeon experience, geographic location, anesthesia fees, and facility costs.

Does insurance cover arm lift surgery?

Typically, insurance does not cover cosmetic procedures. However, if deemed medically necessary, partial coverage may be possible.

What expenses are included in the total cost of arm lift surgery?

Costs may include surgeon fees, anesthesia, operating room facilities, post-surgery garments, and follow-up visits.

How do I choose the right surgeon for my arm lift surgery?

Select a board-certified plastic surgeon with extensive experience in arm lifts. Check reviews and before-and-after photos.

What should I expect during the recovery period after arm lift surgery?

Expect swelling and bruising for 1-2 weeks. Full recovery takes several months. Follow your surgeon’s post-op care instructions for best results.