Key Takeaways
-
GLP-1 meds take the fat but leave behind loose skin and muscle atrophy, so be prepared to re-sculpt your body in the aftermath if you’re after a more toned silhouette.
-
Typical post-GLP-1 body sculpting trouble spots are the belly, arms, thighs, back, and neck. These areas frequently require specific therapies such as skin tightening, liposuction, or surgical lifts.
-
Choose treatments based on the issue type: surgical lifts remove excess skin. Liposuction targets stubborn fat. Non-invasive fat reduction suits mild bulges. Muscle stimulation restores definition.
-
With elective sculpting, be sure your weight is stable and your health is optimized. A detailed medical review and realistic goals enhance safety and satisfaction.
-
Anticipate a staged journey from consult to recovery that can involve more than one modality, a recovery period with standard swelling or bruising, and multidisciplinary care from surgeons, nutritionists, and trainers.
-
Maintain results with balanced nutrition, strength training, and lifestyle habits. Get psychological support to cope with body-image shifts and sustain long-term success.
POST-GLP-1 BODY SCULPTING OPTIONS
Nonsurgical and surgical methods to sculpt after GLP-1 medication weight loss. Targeted fat reduction, skin tightening, and contouring procedures have measured recovery and predictable results.
Selection is contingent on skin laxity, fat distribution, and overall health. Setting clear expectations, establishing realistic goals, and consulting with a board-certified specialist guide the selection and timing for optimal outcomes.
The GLP-1 Effect
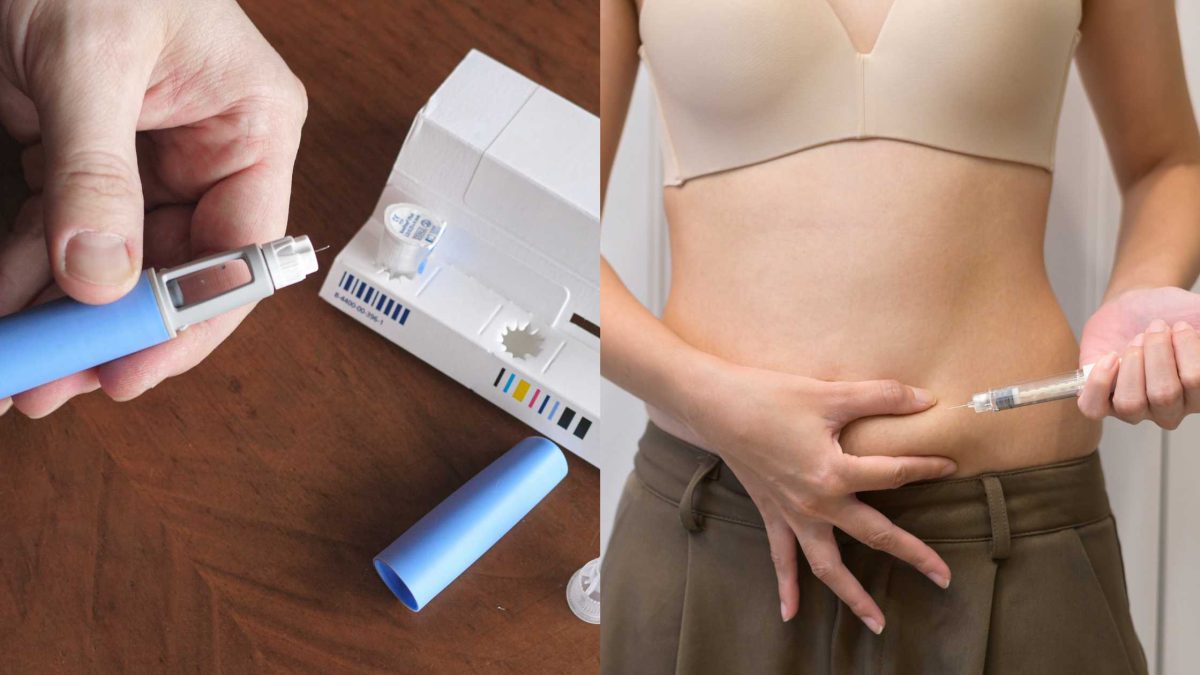
GLP-1 receptor agonists like semaglutide and tirzepatide cause significant weight loss by decelerating gastric emptying, reducing appetite, and enhancing insulin sensitivity. Clinical trials demonstrate mean losses of 7.7% for semaglutide and 12.4% for tirzepatide after one year.
Metabolic gains include improved blood glucose control and reduced systemic inflammation, which is why these drugs dominate treatment for type 2 diabetes and body fat management.
Skin Laxity
Major, fast weight loss tends to result in loose skin that simply refuses to shrink to new forms. Skin elasticity varies by age, genetics, nutritional status, and amount of weight lost, so results are very different from one person to another.
Older skin and bigger weight losses mean more sag. Common areas affected include:
Non-surgical skin tightening—radiofrequency, ultrasound, and laser—can treat mild to moderate laxity. For large folds, surgical excision such as abdominoplasty or brachioplasty is often necessary.
Numerous patients express frustration and insecurity about loose skin, which can fuel the decision for surgical body contouring following GLP-1–associated weight loss.
Stubborn Fat
Even with significant overall weight loss, hard pockets of fat can remain. Love handles, inner thighs, and lower abdomen are areas where fat seems to be stubborn and won’t easily succumb to systemic treatment.
GLP-1 therapy decreases fat mass generally. It does not specifically target localized tummies or redistribute fat in a consistent manner.
Non-invasive options include cryolipolysis (fat freezing), high-intensity focused ultrasound, and injectable deoxycholic acid for small spots. Surgical options, particularly liposuction, are still the most dependable for sculpting.
The table below pairs zones with typical treatments:
|
Stubborn zone
|
Common treatment options
|
|
Love handles / flanks
|
Liposuction, cryolipolysis
|
|
Lower abdomen
|
Liposuction, surgical trim (abdominoplasty)
|
|
Inner thighs
|
Liposuction, radiofrequency-assisted lipolysis
|
|
Upper back / bra roll
|
Liposuction, skin excision if loose skin present
|
The best route is based on skin quality, fat thickness, and patient objectives. A hybrid strategy usually wins.
Muscle Tone
Rapid weight loss often includes muscle mass loss, which blunts natural body definition and depresses metabolism. Resistance training and protein-centric nutrition assist in reconstructing lean mass.
In-office solutions like electrical muscle stimulation or specialized physiotherapy can accelerate visible tone restoration. Restored muscle tone promotes longer-term weight stability and provides a more proportional, sculpted appearance when combined with fat reduction and skin tightening.
Multimodal plans that incorporate exercise, nutritional support, and procedural treatments offer the best opportunity to recover contour and function.
Sculpting Solutions
After GLP-1 weight loss, you’re often left with a combination of loose skin, stubborn fat deposits, and decreased muscle tone. Surgical and non-surgical options stand alone or in combination to sculpt shape. Selection of this option is contingent on health, skin quality and elasticity, weight maintenance, and personal goals. Many patients wait 12 to 18 months at a stable weight before proceeding.
1. Surgical Lifts
Abdominoplasty, thigh lift, and brachioplasty remove significant portions of loose skin and sculpt underlying tissue. For massive weight loss, full body lifts or upper body lifts may be required to treat several areas simultaneously and regain proportion.
These sculpting procedures provide the most significant transformation in skin tightness and contour, frequently alleviating discomfort and enhancing clothing fit. For example, inner thigh laxity can cause chafing and discomfort that sleep lifts.
Results depend on surgeon expertise. Select a board-certified plastic surgeon who has experience after weight loss to reduce the risk of complications and revisions, which are more frequent here, approximately 15 to 25 percent in certain series. Recovery depends on the amount of work and may demand weeks to months off physical labor.
2. Liposuction
Liposuction removes fat that’s resistant to diet, exercise, and GLP-1 therapy. Options encompass classic suction-assisted liposuction, laser lipolysis, and power or selective cannula methods tailored for detail.
Liposuction sculpts volume but doesn’t consistently tighten loose skin or repair muscle laxity, so it is often combined with lifts or skin-tightening procedures for optimal contour. Prepare for local or general anesthesia, different amounts of downtime, and dangers such as fluid shifts, contour deformities, and occasional secondary touch-ups.
3. Non-Invasive Fat Reduction
Cryolipolysis (CoolSculpting), focused ultrasound and other non-surgical fat-reduction systems work for mild to moderate lumps and bumps. Without incisions and with minimal downtime, they’re appealing for active people.
Results come to light over weeks to months and fit patients with good skin tone. Otherwise, fat loss can make loose skin more apparent. Compare devices and target areas when browsing clinics and have reasonable expectations about minimal volume loss per visit.
4. Skin Tightening Tech
Radiofrequency, high-intensity focused ultrasound and a few laser platforms stimulate collagen to firm mild-to-moderate laxity. Multiple sessions over three to six months are typical, with incremental progress.
These treatments complement injectables or topical regimens and assist patients not yet ready for surgery. Prices range tremendously by device, treatment area, and clinic.
5. Muscle Stimulation
Electromagnetic technologies such as Emsculpt generate intense muscle contractions to sculpt tone and definition surgically free. This is great if muscle depletion comes post-weight loss or for patients looking to achieve a more athletic aesthetic.
It is most effective when sessions are paired with resistance training and nutrition for sustainable muscle support. Consider device accessibility, session count, and bundled deals with other sculpting steps.
Determining Candidacy
Post-GLe body sculpting candidacy starts with clear medical pictures, weight trajectories, and reasonable expectations. The decision is individual and should rest on measurable factors such as stable weight, absence of uncontrolled medical issues, reasonable expectations about outcomes, and readiness for recovery and maintenance.
Weight Stability
It is crucial to have reached and maintained a stable weight for some months prior to the body contouring surgery. Most clinicians suggest a plateau of 6 to 12 months, or 12 to 18 months after initiating medications to ensure weight is stable. Persistent shuttling back and forth can extend fresh boundaries and increase the chance of infection.
Track weight trends with weekly logs or apps, note any recent drops tied to medication changes such as GLP-1s and do not schedule procedures until weight holds. Stability demonstrates your dedication to lifelong weight management and makes surgical outcomes more consistent.
Patients near goal weight with small to moderate abdominal fat and good skin elasticity are the best candidates.
Health Status
A complete health exam is necessary, with an emphasis on blood sugar management, metabolic markers, and wound-healing potential. Uncontrolled diabetes mellitus, active smoking, or use of blood thinners can impede healing and may render patients unsuitable candidates until addressed.
Anyone with a history of significant weight loss or bariatric surgery should be screened for nutrient deficiencies that hinder healing. Lifestyle history matters; frequent weight cycling reduces predictability of results. Medical clearance from your PCP or specialist is typically required.
Here’s a quick table of typical health prerequisites for safe body sculpting candidacy.
|
Requirement
|
Typical Standard
|
|
Blood sugar control
|
HbA1c within target per clinician
|
|
Smoking status
|
Abstain for several weeks pre/post
|
|
Medications
|
Adjust blood thinners as directed
|
|
Nutritional status
|
Normal protein, iron, vitamin levels
|
|
Cardiorespiratory fitness
|
Clearance for anesthesia
|
Realistic Goals
Set clear, specific goals tied to anatomy: reduce a focused fat pocket, improve waist contour, or tighten lax skin. Anticipate enhancement, not flawlessness. Surgery can contour but cannot eliminate every wrinkle or stretch mark.
Know probable scars, recovery timelines, and requirements for upkeep via diet and exercise. Discuss examples. Someone with 5 to 10 kg weight loss remaining may need a different plan than a patient who lost 25 kg and has excess skin.
Create a short checklist to prioritize outcomes: most important change, acceptable scars, recovery time you can commit to, and maintenance plan. Good candidates mix realistic goals with physical preparedness and strong health.
The Treatment Journey
Post-GLP-1 body sculpting starts with a roadmap of where to go from first consult to final result, and a high-level overview helps set expectations. Common phases are consultation, personalized planning, preparation, the procedure, and staged recovery with follow-up appointments.
Multidisciplinary care is common: plastic surgeons lead surgical choices, nutritionists guide weight stability and wound healing diets, and fitness experts design graded return to activity plans. Patients must record the journey along the treatment, including dates of appointments, surgery, dressings removed, and increasing activity levels, to monitor progress and keep the care team on the same page.
Consultation
This begins with an in-depth consultation with a board-certified plastic surgeon who evaluates skin laxity, excess fat, muscle tone and areas of functional impairment. Medical history review spans prior weight-loss strategies, bariatric surgery, and medications such as GLP-1 agents, all of which impact bleeding risk, wound healing, and surgery timing.
Consider all of your options, circumferential tummy tucks, arm lifts, liposuction, facial fat grafting, non-surgical energy-based treatments, and their risks and realistic results. Come armed with a list of questions about scars, recovery, complication rates and costs. Single-area liposuction can start from around $8,000 USD, and combined procedures can be $30,000 or more.
Discuss psychosocial issues such as body image and activity restrictions during this visit.
Preparation
Prepare a pre-surgery checklist: quit smoking, medications, labs. Optimize nutrition with protein meals and good hydration. A nutritionist can provide targets in grams of protein per day to support healing.
Organize transport back home and daily assistance for the initial 48 to 72 hours, including groceries and hygiene if you’re immobile. Skincare advice, such as mild cleansing, topical emollients, and photoprotection, decreases infections and enhances scar healing.
Make a customized checklist with dates for the final weight check, stopping blood thinners if recommended, and verifying support people are in place.
Recovery
Recovery timelines vary: minimally invasive procedures may allow light activity in a week, while major body lifts require several weeks off work. Most return to office work in 3 to 4 weeks and introduce light exercise gradually.
Anticipate swelling, bruising, and pain. Complete results may take 3 to 6 months as the tissues subside. Stick to post-op directions—wound care, compression garment wear, activity restrictions, and pain management—to reduce your risk of complications.
Monitor healing with photos and symptom logs and report fever, escalating pain, or drainage promptly. Issues such as skin irritation or infection are more prone in areas where loose skin existed pre-operatively.
Patients are very happy—researchers find something like 95 percent satisfied with their choice—while emotional realignments and price tag are significant factors.
The Mind-Body Connection
The mind-body connection contextualizes the interplay between thought, feeling, and biology in post-GLP-1 body sculpting. Scale and shape fluctuations are usually accompanied by mood, stress, and self-image fluctuations. From the gut-brain axis to genetics and lifestyle, even GLP-1 agonists can influence how people feel and recover.
Here we deconstruct the mental changes, expectation management, and body-image work that should accompany any surgical or non-surgical agenda.
Psychological Shift
Achieving a weight milestone on GLP-1 medications can feel like pride, relief, and fresh stress about sustaining results. There’s a lot of mixed emotions. Some feel unshackled, while others are concerned about identity or their friends’ and family’s reactions.
Adjustment takes months for daily habits and even your self-view to adapt to a tinier body. Emotions impact physiology as well. Stress and depression are associated with changes in sleep, appetite, and inflammatory markers, factors that can delay healing following surgery.
The gut microbiome, connected to the gut-brain axis, could alter with diet and impact mood and recovery in an indirect way. Maintain a journal or visual diary to record emotions and achievements. Note key dates: medication starts and stops, body-sculpting procedures, and mood changes.
Over time, patterns emerge that help guide counseling, medication adjustments, or lifestyle tweaks. Think about including counseling in the care plan. A therapist can assist with self-acceptance, coping skills, and relapse prevention.
Group therapy or peer support provides common stories that smooth the highs and lows.
Expectation Management
Have reasonable expectations for surgical and non-surgical outcomes. These procedures decrease the volume and re-contour the shape but often will not create perfect symmetry or eradicate all loose skin. Scarring, temporary swelling, and minor asymmetries are typical and anticipated.
Final results might take weeks to months to manifest as tissues settle and swelling abates, with some changes occurring up to a year. Compare your before and after pictures with cases that have your age, skin tone, and weight history in order to create realistic expectations, not idealized ones.
Inquire of the provider about average timeframes, complication rates, and revision policies. Know how previous GLP-1 use could impact skin elasticity or wound healing and prepare for staged procedures if necessary.
Body Image
Both dramatic weight loss and body sculpting have different kinds of effects on your self-esteem and confidence. Some experience a quick hit, while others experience slow fulfillment or unshakable despondence even in the face of external success.
Positive body image work is about health and strength and function, not just appearance. Mindfulness, meditation, and simple breathing exercises can bring down anxiety and facilitate recovery.
Lifestyle factors, such as diet, exercise, and sleep, support both mental and physical achievements. Connect with inspiring communities for collective wisdom and motivation. Peer feedback normalizes setbacks and illuminates practical advice for long-term sustainability.

Sustaining Results
Maintaining results following GLP-1–assisted weight loss and body sculpting relies on sustainable healthy habits. It takes six to twelve months for full healing and final contour results as swelling subsides and tissues sink. Weight needs to remain at around 2 to 5 kilograms (5 to 10 pounds) for a minimum of 6 to 12 months in order to maintain the new shape.
Most providers recommend waiting 12 to 18 months after beginning weight-loss medication before elective contouring to give the body time to settle to a baseline. Multi-staged procedures over months are common and impact the timeline for long-term maintenance.
Nutrition
Embrace a nutrient-dense diet to fuel your wound healing, skin, and stable weight. Focus on whole foods, vegetables, fruit, whole grains, good fats, and lean protein like fish, poultry, beans, dairy, or fortified plant-based options. Adequate protein is critical.
Aim for roughly 1.2 to 1.6 grams per kilogram of body weight per day in the recovery and remodeling phase to preserve lean mass and aid tissue repair. Protein timing across meals helps, aiming for 20 to 30 grams with every main meal.
Steer clear of crash diets or radical calorie reductions. Rapid weight loss can stretch or loosen skin, shift surgical results, and increase the risk of revision. Monitor consumption and water with a basic day-to-day log or app to cement behaviors.
Small examples include a mid-morning Greek yogurt with berries, a midday salad with 90 to 120 grams of grilled protein, and consistent water goals around 30 to 35 milliliters per kilogram per day, adjusted for activity and climate.
Exercise
Begin with a slow resumption of activity according to your surgeon’s recommendations. Early rest avoids stress on healing tissues. Once approved, mix in strength training and aerobic work to sustain muscle tone and minimize fat re-gain.
Strength sessions 2 to 3 times per week that emphasize progressive loading maintain metabolism and shape. These sessions feature compound movements like squats, rows, and deadlifts modified to proficiency.
Regular exercise helps maintain skin elasticity and shape. Aerobic activity like brisk walking, cycling, or swimming for 150 minutes each week complements resistance work.
Work with a trainer or physio to develop a customized plan that aligns with objectives and any postoperative restrictions. Small, realistic advancements, such as adding 5 to 10 percent load or 5 to 10 minutes of cardio each week, help adherence and minimize injury risk.
Lifestyle
Sustainable lifestyle shifts matter: manage stress, optimize sleep, and keep regular movement through the day. Going back to old habits jeopardizes regaining weight and losing surgical benefits.
Wear compression garments as directed for a few weeks. They minimize swelling and support the tissue, which helps maintain long-term contour. Mind complications rates differ. Body contouring ranges from 23 to 70 percent and post-op complications range from 17 to 50 percent, but most are minor and wound-related.
Vigilant follow-up catches issues early. Leverage support from clinicians, dietitians, and fitness coaches. Make a checklist of daily habits, including protein targets, step goals, sleep, and hydration, and check back monthly.
Conclusion
Post-GLP-1 body sculpting straddles the line between medical care and lifestyle work. Options span from noninvasive fat-reduction devices to surgical procedures. Both routes provide specific, quantifiable transformations in contour, fat mass, or muscle definition. Consider health, goals, and downtime. Chat with a qualified clinician who can pair a plan to your needs and demonstrate realistic results with pictures and metrics. Add steady habits: protein-rich meals, a mix of strength and cardio, and sleep that lets the body repair. Track progress with photos and measurements. Look for consistent moves, not a magic bullet. Want to discuss your options or book a consult? Contact a clinic or specialist for personalized next steps.
Frequently Asked Questions
What is “post-GLP-1” body sculpting?
Post-glp-1 body sculpting options are cosmetic or non-surgical procedures utilized after glp-1 medication weight loss to refine your shape, tighten skin, and address stubborn pockets of fat.
Who is a good candidate for post-GLP-1 sculpting?
Good candidates have maintained weight for at least 3 months, have reasonable expectations, and are looking to address concerns such as loose skin or small areas of stubborn fat. A medical consult ensures you are a candidate.
What common sculpting options exist after GLP-1 weight loss?
Typical options for post-glp-1 body sculpting include skin tightening treatments such as radiofrequency and ultrasound, non-invasive fat reduction techniques like cryolipolysis and laser, and surgical lifts for more substantial excess skin.
How long after stopping GLP-1 medication should I wait before treatment?
Wait until weight and medications are stable — usually 3 to 6 months. Your provider will evaluate for healing, metabolic status and surgical risk prior to moving forward.
Are results from non-surgical sculpting permanent?
With stable weight and healthy habits, the results can be sustained. Aging and weight changes can shift results over time.
What are the main risks or side effects?
Risks differ by treatment and can involve bruising, swelling, temporary numbness, scarring for surgery, and uneven outcomes. An experienced clinician minimizes risk with good screening.
How can I maintain sculpting results long term?
Sustain stable weight, eat a nutritious diet, do consistent strength and cardiovascular exercise, and participate in recommended follow-up and skin care from your provider.