Key Takeaways
-
Little fat loss and diminished muscle mass make the buttocks appear flatter after weight loss, particularly if muscle maintenance isn’t emphasized.
-
Skin elasticity, heredity, and hormones all get involved in making your butt look flat after shedding the pounds.
-
These pairs of butt muscles get wasted and flat-looking once you lose the fat padding that was previously stretching the skin and making it look fuller.
-
Crash or diet-only weight loss puts you at risk for muscle loss and loose skin, whereas slow weight loss leads to better results in the long term.
-
Targeted glute exercises like squats, lunges, and hip thrusts combined with sufficient protein consumption can help you rebuild that muscle shape.
-
Stay positive, set realistic goals, and be kind to yourself. This is important for overall well-being during the weight loss journey.
Why does your butt look flatter after weight loss? Your body torches fat stored in a variety of locations, including your glutes. Muscle loss from less activity or harsh diets can contribute.
How much of a difference displays is dependent on genetics, age, and weight loss method. Understanding why these transformations occur assists individuals in selecting superior exercise or nutrition programs.
The following parts deconstruct the primary causes and provide advice to maintain shape.
The Anatomy of Change
Weight loss can be a body-shaper. The buttocks, comprised of fat, muscle, and skin, are particularly susceptible to these changes. How much the backside flattens, sags, or loses its perriness is based on a few key things: fat loss, muscle atrophy, skin elasticity, genetics, and hormones.
1. Fat Loss
Fat deposits constitute a significant portion of the buttock’s mass. When pounds melt away, the body draws on these fat stores for energy, contracting them. This can cause the glutes to de-pump, appearing flat.
The shape of your buttocks is closely related to how fat is distributed there. If fat loss occurs primarily from this area, the transformation is more apparent. Rapid weight loss, for example, can defat at a blinding pace, taking skin and muscle by surprise and resulting in a sagging appearance.
A slow, steady weight loss gives the tissues more time to accommodate, preserving some shape. Even slow weight loss can decrease butt volume if the fat percentage was high previously.
2. Muscle Atrophy
Muscle atrophy is a major reason why your butt looks flat post-weight loss. Your gluteal muscles are a huge factor in butt shape. When these muscles atrophy generally from disuse, hours of slouching, or insufficient training, the region collapses.
Saving your muscle mass is important. Hard glutes keep your booty perky. Without targeted strength training, particularly during calorie restriction, muscles atrophy.
This can cause sagging even if fat loss is not severe. Simple actions such as consistent glute exercises can help combat muscle atrophy and maintain contour.
3. Skin Elasticity
Skin elasticity is the ability of your skin to bounce back after being stretched. Post-weight loss, uncontracted skin can dangle, further contributing to a saggy appearance. Collagen and elastin, two proteins in the skin, are key to this bounce.
Age, hydration, and diet all impact these proteins. Adequate water consumption of eight or more glasses a day keeps the skin healthy. A vitamin C and E rich diet supports collagen.
Massage, firming creams, and even medical treatments can sometimes enhance the skin’s elasticity. As we get older, active or not, we all experience less gluteal firmness as the skin loses this important elasticity.
4. Genetic Predisposition
Genes determine where you put on and lose fat. Some of us come out of the womb with flatter butts and some of us hold fullness even after a weight loss. Family history can forecast the course.
Genetics play a role in muscle mass and skin quality, which can influence how the tushie appears after weight loss. When weight loss goals are in place, it helps to be aware of these constraints and instead target what can be enhanced, like muscle tone or skin health, and not anticipate a massive structural transformation.
5. Hormonal Influence
Hormones determine how the body stores fat and preserves muscle. During weight loss, hormonal changes, as during menopause or from medications like GLP-1 agonists, can cause a loss of both collagen and muscle, resulting in a less lifted buttocks appearance.
Hormonal imbalances can alter fat distribution, at times shifting it away from the glutes. Keeping your hormones in check with quality sleep, nutrition, and medical insight can assist in achieving more optimal body composition results.
For example, following surgery or weight loss, final results can take months as hormones settle and tissues heal.
Your Weight Loss Method
Various weight loss methods transform the body in various ways, particularly in the lower body. The buttocks can appear deflated following weight loss because fat and muscle are lost simultaneously. Others find that they lose fat in their buns sooner than in their boots. Your technique counts for post-weight loss butt appearance, therefore it’s worth educating yourself on what each approach yields.
Diet-Only Approach
|
Approach |
Pros |
Cons |
|---|---|---|
|
Diet-Only |
Simple to follow, fast initial results |
Higher risk of muscle loss, nutrient shortfalls, flatter look |
|
Diet + Exercise |
Preserves muscle, better shape, healthy |
More planning, takes time, needs consistency |
Calorie cutting alone can work for weight loss. It can result in losing muscle in addition to fat, thereby deflating the buttocks. Diet-only plans are often lacking in key nutrients, notably protein, which is required to maintain muscle.
When weight falls too quickly, more than 0.5 to 1 kg per week, muscle loss increases and the skin can appear loose. Protein-laden goods such as beans, lentils, fish, tofu, and eggs support retaining muscle as you lose fat.
Another study discovered that while food changes and exercise alone resulted in a loss of 2% of their total weight, holding onto muscle was significantly more difficult without adequate protein and strength training.
Cardio-Heavy Approach
Here’s why doing lots of cardio, running or cycling, can help burn calories and fat. If done alone, it can atrophy gluteal muscles over time, causing the butt to look smaller and less firm. Cardio does accelerate fat loss, but it can rob the lower body of muscle if not paired with resistance moves.
Strength training is essential to preserve muscle. Movements such as squats, lunges, and hip thrusts keep those glutes perky. Without these, too much cardio turns your shape into a potato, softening muscles and making them mushy.
Medications, such as GLP-1 receptor agonists, can assist with weight loss, but they don’t address muscle health, so exercise still counts.
Balanced Approach
-
Combination of sustained fat loss, resistance training, and nutritious food.
-
Boosts protein intake to support muscle.
-
Adds resistance workouts (squats, lunges) for glute shape.
-
Includes regular cardio, but not in excess.
A balanced approach preserves muscle as you burn fat, targeting a safe 0.5 to 1 kilogram a week. Some nutrition counseling and lifestyle tweaks will help you maintain the results long term.
Strength moves help maintain the booty’s roundness even when the fat falls. A healthy diet provides the body with what it needs to repair and maintain muscle after every workout.
Surgery, like a Brazilian butt lift, provides quick results and has dangers including swelling, blood clots, and infection. Most people achieve the best, safest, and most sustainable results with a balanced method that includes continuous support and check-ins.
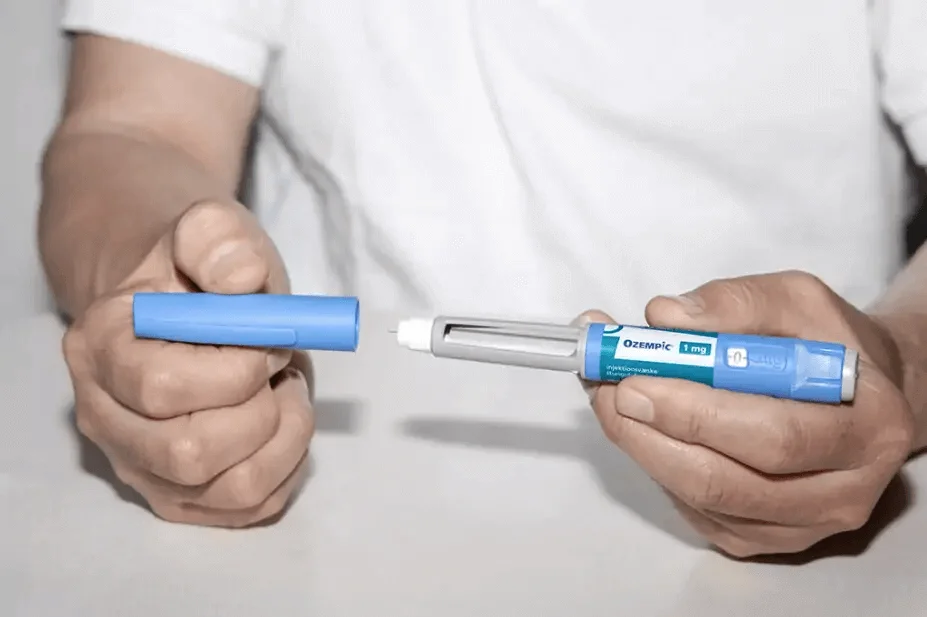
The Semaglutide Effect
Semaglutide, a drug developed initially for type 2 diabetes, is now widely used for weight loss. It does this by increasing the body’s metabolism and suppressing hunger signals to the brain. Users of GLP-1 agonists such as semaglutide can experience weight loss on the order of a 17% reduction in body mass over 68 weeks.
As these results sound promising, the change in body shape — namely the butt — is a side effect a lot of people are noticing.
|
Effect |
Semaglutide/GLP-1 Agonists |
Typical Weight Loss (Diet/Exercise) |
|---|---|---|
|
Weight loss amount |
Up to 17% over 68 weeks |
5–10% over 6–12 months |
|
Appetite suppression |
Strong |
Mild to moderate |
|
Metabolism boost |
Yes |
Depends on activity |
|
Butt shape change |
Flattening or sagging common |
Less common, slower progression |
|
Skin adjustment time |
Weeks to years |
Months to years |
Semaglutide patients may experience what others have referred to as “Ozempic butt,” when the butt appears flatter or begins to sag following rapid weight loss. That’s because fat loses quickly, but skin and muscles don’t always follow suit. The skin may require weeks, months, or years to shrink back, and sometimes it remains loose.
It’s not only about appearance. It can translate into weaker glute muscles which are required for hip support and movements like walking or stair climbing. Weak glutes cause lower back pain and make it difficult to maintain balance.
Fast weight loss from semaglutide accelerates these shifts. When the body drops fat quickly, it typically takes it from areas such as the butt initially. T volume loss could make it appear flattened. This is different from slow weight loss, where the skin and muscle have more time to respond.

Physicians recommend targeting roughly 0.45 to 0.9 kg a week, even with the help of weight loss drugs, so the body can acclimate to new shifts.
There are methods to retain the butt shape in weight loss. Doing resistance or strength training around the glutes is one of the most effective steps. Straightforward actions such as squats, lunges, and hip bridges build muscle in the booty, which can provide a rounder appearance and assist with function.
Consuming sufficient protein assists the body in maintaining muscle mass while losing weight.
There’s more to a full plan for semaglutide and its cousins than the drug itself. It’s most effective when combined with smart nutrition, physical activity, and backing from medical professionals. This method assists individuals in losing weight and maintaining strength and health over time.
Rebuilding Your Glutes
Following weight loss, most of us notice that our butt looks flatter. This occurs because glutes contain fat and muscle. When you slim down, butt fat tends to be the first to disappear. Genetics come into play; some individuals simply do not store as much fat in their hips, which can leave the glutes looking flat.
Muscle loss can contribute to this flattened appearance, so rebuilding your glutes is about rebuilding muscle while maintaining harmony.
Targeted Exercises
-
Squats
-
Lunges
-
Hip thrusts
-
Bulgarian split squats
-
Glute bridges
-
Donkey kicks
-
Step-ups
Resistance training is the secret to building sassy firmness. When you work out with weights or resistance bands, the glutes receive the additional stimulus required for development. Hip thrusts are particularly beneficial as they target the glutes more than most exercises.
For optimal gains, incorporate them into your schedule a minimum of three times per week. A great workout plan combines strength and cardio. This combo of squats and lunges with cardio not only shapes and tones your glutes, but keeps your heart healthy.
Try blending in easy yoga poses, such as Pigeon or Cow Face, to open up your flexibility and release tension. Consistency matters; consistent training over a few months delivers consistent gains.
Protein Intake
-
Select lean proteins such as eggs, dairy, tofu, chicken, fish, beans, and lentils.
-
Check nutrition labels for protein per serving.
-
Take protein shakes if you find it hard to satisfy your daily needs.
-
Space protein intake throughout the day for best effect.
Protein aids your muscles’ recovery after workouts. Eat enough good protein and your glutes have what they need to rebuild stronger. Not getting enough can stall your efforts and make it more difficult to get back in shape.
Supplements like protein powder are great if you have a hectic schedule or dietary restrictions. Check your meal plan to see if you’re hitting your protein targets!
Gradual Weight Loss
A slow weight loss approach keeps your muscles protected. If weight comes off too quickly, the body will cannibalize muscle as well for fuel. This can only serve to make the glutes even flatter and softer.
By losing weight at a low and slow pace of 0.5 to 1 kilogram a week, you assist your body in holding onto muscle. This helps maintain a better shape over the long term.
Monitor your changes with photos or hip and waist measurements. If you catch your glutes shrinking, consider tweaking your workouts or meal plan. It takes time to build muscle and change shape, so patience and slow, steady work are key.
Over months, consistent work results in a glute that is rounder, more alive, and more in line with your natural body shape.
The Psychological Impact
Weight loss can do a plethora of things, not only to your body but your psyche. Because the contour of the butt transforms and can appear flatter, others experience a change in their perception of themselves. The psychological aspect of this trek is as tangible as the corporeal one.
Your mental health is a big player during weight loss, and it’s critical to continue to check in on how you feel alongside your body changing. Body image can change with every transition, so be gentle with yourself and try to embrace who you are. Self-compassion eases the psychological impact of trying to reorient to a new normal that might fall short of your original hopes.
Body Image
Weight loss can sometimes have strange psychological effects on the way we perceive our bodies, particularly when the butt deflates. This can evoke mixed emotions, pride in your weight loss, but shock or concern when your body doesn’t appear as you anticipated. The loss of curves and a deflated butt may not be what the media idealizes, leaving you self-doubting or worse, disappointed.
Our culture maintains harsh body ideals, frequently displaying a specific body shape as the “objective.” These pictures can undermine self-esteem, particularly when the actual result is quite different. For others, they may experience stress in maintaining a hard-to-attain image. This can be even more difficult for those with hormonal imbalances, where additional fat around the midsection can exacerbate body image issues.
By emphasizing health instead of just appearance, it helps alleviate these concerns. There are a million ways to feel great in your own skin, regardless of your body shape. Support groups online or in person can assist. They provide people a forum to discuss actual experiences, not just post ‘polished’ outcomes, and promote a healthy body image.
Goal Setting
Setting something that fits what your body can do is key. When your goals are all about looks, it’s easy to become discouraged. Goals centered on health, such as improved sleep, increased muscle strength, or higher energy, aid individuals in maintaining motivation and morale, even if the glutes appear less toned.
Other times, the body simply doesn’t cooperate with the plan, even with hard work. Hormonal imbalances, adrenal fatigue, or sleepless nights can decelerate efforts, causing overwhelm or despair. Acknowledging little victories, such as improved mood or reduced brain fog, is just as crucial as scale-based transformations.
Flexibility in psychological matters is essential. You will have to change plans if the body doesn’t shed weight as expected. Flexible goals help avoid frustration and keep you on the road to feeling good, not just looking good.
Self-Compassion
Self-compassion is a powerful weapon to keep in your arsenal as you navigate the peaks and valleys of weight loss. Flatter buttocks, shifting shapes, or even weight gain in some spots are all par for the course. Hormonal shifts can bring brain fog, anxiety, or fatigue, which weigh on the mind.
Being gentle with yourself alleviates these emotions. A lot of people self-wound over not witnessing “perfect” results, but the body is complex. Mindfulness, such as breathing exercises or mini-breaks, can assist people in embracing these adjustments and decreasing stress.
Getting rest and managing stress are critical. Sleep deprivation can exacerbate anxiety and depression. Making efforts to repair sleep, stabilize hormones, or just decelerate can boost mental health.
Beyond The Squat
Flat butt after weight loss isn’t always about squatting or not squatting. More shapes the glutes than one exercise. Squats are great, but they only work a few muscle groups. Your glutes require a combination of exercises to remain strong and shapely.
Lunges, hip thrusts, deadlifts, step-ups, and bridges all target different areas of the glutes and legs. Doing these in conjunction with squats makes the glutes grow in all directions, not just one plane. For instance, hip thrusts make a bigger impact on the gluteus maximus than squats, and lunges contribute to balance and stability.
By including single leg bridges or lateral band walks, you can isolate smaller muscles that contribute to roundness and lift. Focusing exclusively on squats can create muscle imbalances. If certain glute muscles are strong and others are weak, the shape can morph.
A balanced workout keeps all the muscles in the chain, like the hips, adductor magnus, and hamstrings, working in conjunction. Just training two to three days per week with this variety can keep the butt firm while you lose weight. By keeping each workout fresh and varying the order and style, your body doesn’t adapt and lose gains.
For everyone who sits long hours, the glutes may get weaker from underuse. That’s what makes it all the more important to stand, walk, or stretch often. Functional movements are the key to a butt that looks and works really well.
Other moves, such as step-ups and deadlifts, mimic activities from everyday life, so you’ll find it easier to lift, squat, or climb stairs. These exercises don’t simply create muscle; they assist in maintaining strength for everyday life. Flexibility work, such as stretching the hips and lower back, keeps the glutes healthy and prevents tightness.
That’s key for all ages, as stiff muscles can alter the way the butt looks and moves. A well-rounded fitness regimen encompasses strength, flexibility, and endurance. Cardio, like walking briskly or cycling, keeps your body fat in check, but it shouldn’t replace strength work.
Staying adequately hydrated, about 8 glasses a day, helps skin remain taut and in good shape. Hormonal shifts, like menopause, reduce collagen and muscle mass, so the butt can appear less full with age. Slow weight loss is superior to quick plunges.
Fast weight loss can lead to more muscle loss, which gives us that flat or saggy appearance. Easy habits such as rising to walk, stretching throughout the day, or standing instead of sitting for hours can assist in keeping these glutes engaged and firm.
Conclusion
Why does your butt look flatter after weight loss? Muscle can atrophy if you lose weight too quickly or neglect resistance training. Certain medications, such as semaglutide, may accelerate fat loss and alter muscle contours. Feelings can get tangled in there as well; body shifts throw self-image or mood for a loop. Lifting, protein, and small daily moves help glutes bounce back. Think about activities like hip thrusts, step-ups, or power walks up an incline. Allow your body to acclimate. If you want to get more shape or just keep what you’ve got, mix up your workouts and stick with it. Have a story or advice? Share your own experience and join the talk below.
Frequently Asked Questions
Why does my butt look flatter after losing weight?
Weight loss takes fat from everywhere, including your glutes. If you lose musculature along with fat, your butt will appear flatter. This is just a natural thing that happens to the body with generalized fat loss.
Can weight loss methods affect glute shape?
Yes. Rapid weight loss, no resistance training, or severe calorie restriction can cause you to lose muscle. This can cause your glutes to drop in volume and lose their shape.
Does semaglutide cause a flat butt?
Semaglutide can cause profound weight loss that includes fat and muscle. If you don’t exercise to keep up muscle, your butt looks flatter as a consequence.
How can I rebuild my glutes after weight loss?
Add glute strength training. Exercises such as squats, lunges, and hip thrusts will help to rebuild muscle and shape.
Is it possible to avoid a flat butt during weight loss?
Yes. Pair a balanced diet with resistance training. This helps preserve muscle while shedding fat and maintains a plumper butt.
Why do squats alone not fix a flat butt?
Although squats are good, a mix of glute exercises is most effective. Add in some moves for all glute muscles.
Does a flatter butt affect self-confidence?
These body changes can affect self-confidence. Building strength and prioritizing health can work wonders on your physique and your mindset.