Key Takeaways
-
GLP-1 weight loss meds can melt fat off the neck and face, sometimes leaving behind what they call ‘stubborn fat’ or ‘loose skin’.
-
Factors such as skin elasticity, genetics, and age are paramount in dictating how the neck and facial skin responds after a significant weight loss.
-
There are effective non-surgical and surgical treatments to address submental fat and skin laxity, including injectables, energy devices, minimally invasive techniques, and surgical lifts.
-
Determining weight stability, skin quality and patient objectives is crucial in deciding the most appropriate submental fat removal treatment.
-
Smart timing, like allowing your weight to stabilize first, is important for maximum impact and safety of your favorite cosmetic procedures.
-
Diligent aftercare, continuous weight control, and skin care are crucial for long-lasting results.
Submental fat removal after weight loss drug usage refers to eliminating the fat beneath the chin that can linger despite medical weight loss treatment. Weight loss drugs get that scale number down, but a little jiggle under the chin can remain.
Submental fat removal can be treated non-surgically or with surgery. Each option carries its own procedure, side effects, and recuperation period. The following sections illustrate what to anticipate and select.
The Drug Effect
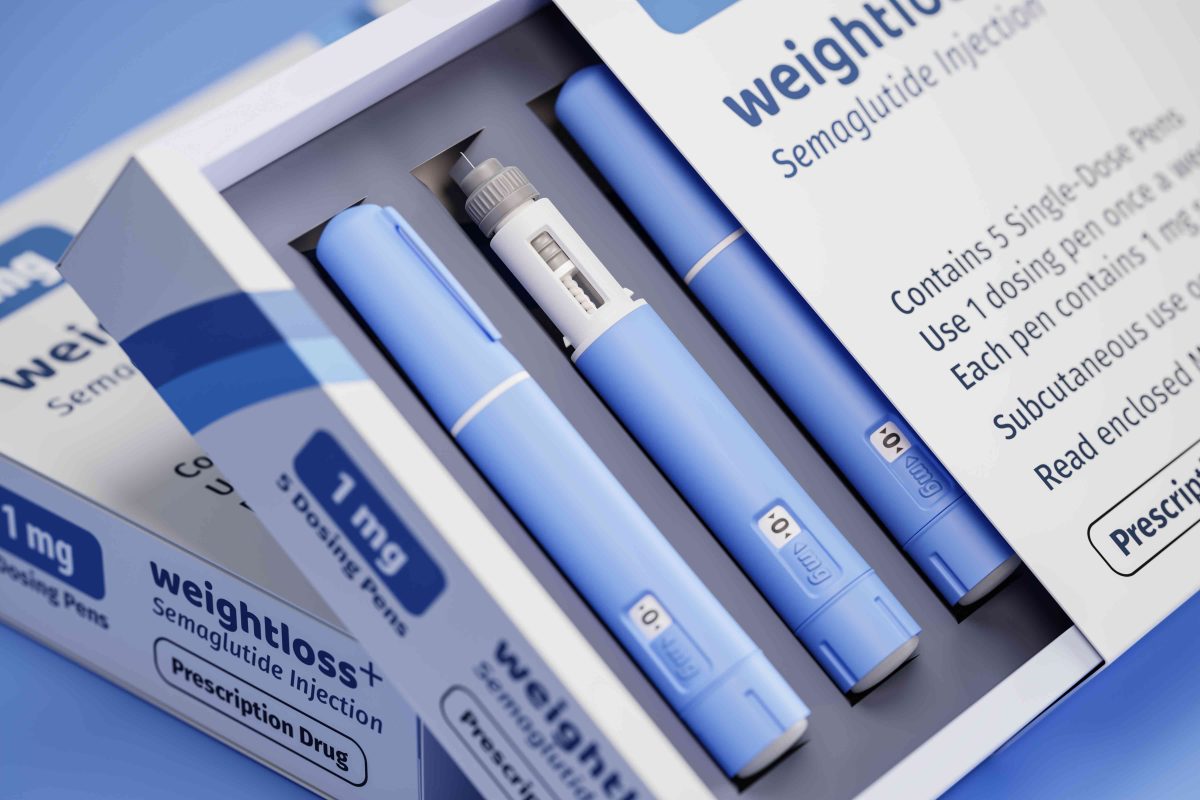
GLP-1 receptor agonists such as semaglutide and liraglutide assist individuals in shedding pounds by inducing an early feeling of satiety and diminishing hunger. These drugs alter the body’s metabolism of fat, causing loss of fat in various places, including the face and neck. Rapid fat loss may cause the skin to become saggy. This is known as “Ozempic face” or “Ozempic neck.
They might observe sagging skin, drawn-in cheeks, or a more sculpted jawline. These shifts aren’t just surface-level; they can influence a person’s perception of their skin and the way it acts.
Fat Loss
GLP-1 drugs aid in weight loss by tricking the brain into believing the stomach is filled and by slowing down digestion. This causes fewer calories to be eaten and more fat to be burned. Most notice fat melting away from the waist, hips, and belly first.
Sometimes the neck and chin area gets smaller, but fat under the chin can be more persistent. Even after dropping a lot of weight, this fat can remain. A trimmer physique doesn’t automatically translate to every fat pocket being eliminated, particularly underneath the jaw.
Fat loss from GLP-1 drugs can be uneven. For instance, certain people will shed the fat in their cheeks quicker than on their neck. The neck and submental area are quick to rebound and can hold on to fat longer. This is why a few folks continue to notice a “double chin” after a significant loss in weight.
GLP-1s do wonders for most, but not all, aspects. We all have that one spot of stubborn fat that just needs that little extra help, like under the chin.
Skin Laxity
Dropping a lot of fat quickly can leave your skin unsupported. Skin is composed of proteins such as elastin and collagen. These provide it with length and solidity. Rapid fat loss reduces these proteins, leaving the skin less resilient.
Drooping and crinkled skin around the face and neck are more prevalent when the weight drops fast. Older adults experience these changes more. They have less fat beneath the skin to begin with, so the plummet is more apparent.
Younger folks might detect a bit of sag, but it’s typically softer. How skin changes depends on genes, sun exposure and how quickly the weight came off. For most, the slow and steady weight loss of around 0.5 to 1 kg per week allows the skin a little extra time to adapt. Others require supplemental procedures to firm sagging skin.
Facial Volume
When you lose weight quickly, your face can lose its plump, soft appearance. Cheeks may look hollow and skin may become thin because the SMAS layer that supports the face can weaken. This shift is more frequent with rapid weight loss and is commonly encountered in patients taking GLP-1s.
To assist, some succumb to cosmetic alternatives such as fillers or fat grafting. These can re-volumise the cheeks or jawline. Skin tightening could assist sagging.
Facial fat changes can impact your feelings about your appearance, and volume restoration can help with confidence.
The Underlying Problem
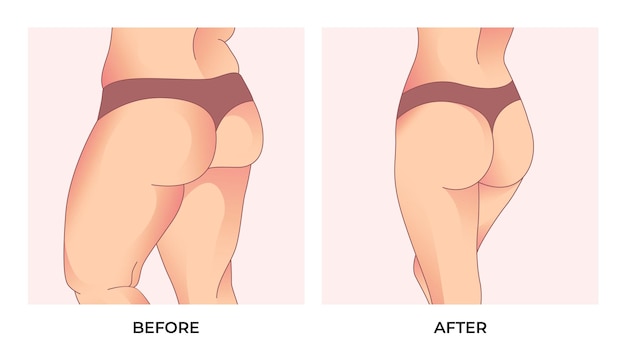
Post semaglutide or other drug-induced weight loss, users often complain about loose skin and residual fat in the neck or submental area. This can cause the jawline to appear less defined, even when weight loss is evident elsewhere. The skin and tissues in these regions do not always contract, particularly after big weight losses, such as about 50 to 100 pounds.
Many things impact how the body reacts, such as skin elasticity, genetics, age, and health history. All of these factors come into play in whether you experience silky success or encounter additional flab and a deep double chin.
Elasticity
Skin elasticity is what allows skin to ‘snap back’ after stretching. With high elasticity, the neck and jawline can appear youthful and tight post-weight loss. If the elasticity is low, then skin can sag, causing the area under the chin to appear loose or creased.
Collagen, the protein that keeps skin taut, decreases with age. For those of us over 40, this shift is usually obvious and the skin loses a bit of bounce. The neck and jawline may never return to their pre-weight state.
Most folks who lose a significant amount of weight, that is, over 50 lbs, experience some degree of skin laxity. Less naturally elastic types might require more than lifestyle tweaks. Others opt for interventions such as collagen shots or energy-based skin tightening.
These strategies can assist, but impact accumulates over months. Hydration is a factor as well. Well-hydrated skin stretches and recovers better, whereas dry skin can appear dull and papery. Daily sunscreen preserves natural collagen, what little remains.
Genetics
Genetics craft an individual’s skin and fat makeup. Certain families are more likely to have loose skin after significant weight loss and some will maintain firm neck and facial contours. Even with the identical number of pounds shed, two people can have wildly different results.
Genes determine how quickly and effectively skin heals and rebounds. When considering submental fat removal, breaks to family history are important. If you had relatives who fought with saggy skin, you’re in for it as well.
The rates at which skin heals vary by genetic background, influencing how quickly your neck and jawline recover post procedure. That’s why some get quick results and others don’t, despite doing the same things.
Age
Seniors have less collagen and more loose skin after weight loss. The underlying issue is that the body’s ability to repair and tighten skin diminishes with age, rendering loose neck skin a common occurrence.
If you’re in your 50s or 60s, some combination therapies could be necessary for visible improvements, whereas younger individuals occasionally experience superior spontaneous healing.
As people age, metabolism creeps down. This can make it harder to hold the weight off and it may affect recovery after submental fat removal. They have to be mindful of age as well as skin condition and healing time when planning treatment.
Older patients should perhaps temper their expectations, as the procedure is slower and results may not be as striking as anticipated.
Treatment Options
Even after losing weight with semaglutide or other medication, some still find submental fat or loose skin under the chin. For most, fat in this region won’t leave with exercise or diet alone. Treatment options vary from conservative to surgical. The best approach varies due to goals, skin elasticity, and overall health.
Options for submental fat removal include:
-
Injectables (Kybella, fillers, Botox)
-
Energy-based treatments (radiofrequency, ultrasound, CoolSculpting)
-
Minimally invasive options (chin liposuction)
-
Surgical lifts (neck lift, lower face lift, platysmaplasty)
-
Facial exercises (chin lifts, neck stretches, jaw clenching)
1. Injectables
Injectables reshape the chin and neck without surgery. Dermal fillers replace lost volume, fill in wrinkles and enhance the contours of the jawline. Kybella, one of the most sought-after treatments, employs deoxycholic acid to disrupt fat cells in the submental region. Treatments are fast, generally taking less than 30 minutes, and the majority of patients require multiple sessions spaced weeks apart.
This approach is ideal for mild to moderate flab and slack skin. Botox can diminish the appearance of sagging by relaxing neck muscles. These injectables have virtually zero downtime. They won’t be effective for those with significant fat deposits or advanced skin laxity.
They don’t last forever, so they need touch-ups to maintain the shape.
2. Energy Devices
Energy-based devices use heat or cold to assist in skin shrinkage and tightening. Radiofrequency and ultrasound devices penetrate the deeper layers of the skin, helping it become tight and minimize fat. CoolSculpting freezes away fat cells, which your body will clear out over time.
These treatments are non-invasive, so no incisions or sutures are required. Most people return to work immediately following treatment. Some swelling or redness could occur, but it dissipates in a few hours or days.
There is a high satisfaction rate and results are slow but definite after a few treatments. These are safe for a lot of skin types and can be paired with additional options for a more impactful combination.
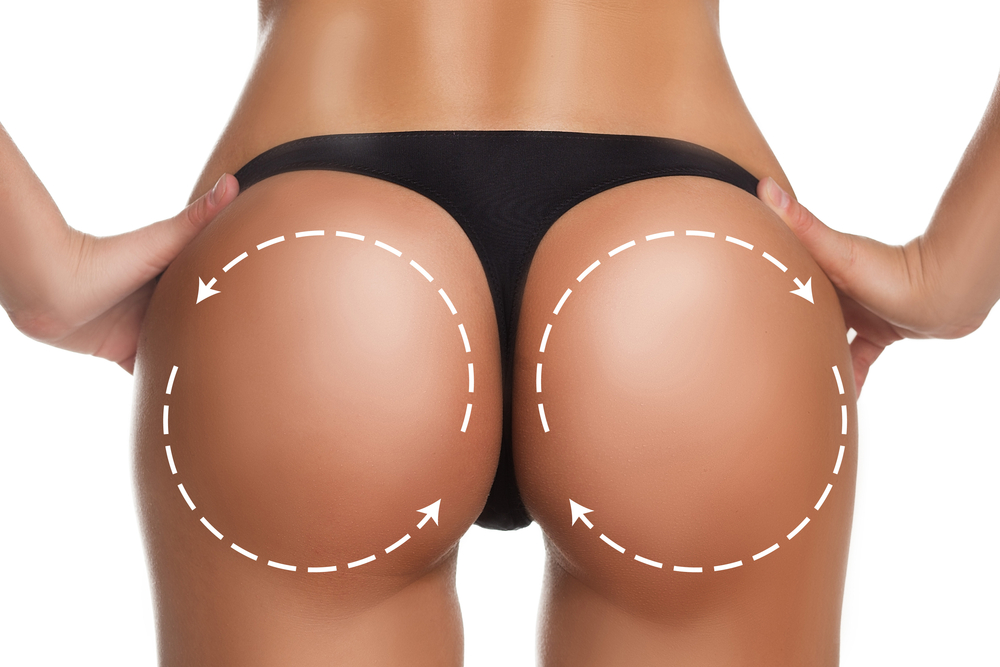
3. Minimally Invasive
More invasive options such as chin liposuction eliminate resistant fat through small incisions and local anesthesia. Liposuction employs a small tube to vacuum out fat beneath the chin. Patients notice a more sculpted neck and jawline post recovery.
It takes around two to four weeks before most can return to work and six weeks before heavy exercise. These techniques provide immediate and obvious alterations, but swelling and bruising may persist for days or weeks.
Local anesthesia reduces risks and makes the experience more comfortable.
4. Surgical Lifts
Surgical lifts are for those with significant skin laxity or excess tissue following weight loss. Neck lifts, lower face lifts, and platysmaplasty all work to remove loose skin and tighten muscles. These surgeries provide immediate, tangible changes in contour.
The healing time is lengthier. Swelling and bruising can be expected for the first several weeks. Others mix surgical lifts with fillers or energy devices for optimal results.
Choosing a qualified plastic surgeon is important for your safety and appearance. The results endure far longer than most non-surgical alternatives.
Candidate Assessment
Candidate screening for submental fat removal post weight loss drugs is crucial. Because every candidate has a unique background and needs, clinics deploy checklists and specific protocols to ensure treatments are safe and effective. Looking at weight trends, skin condition and the patient’s goals leads the direction. These steps mitigate risks and assist in aligning the optimal therapy to each individual.
Weight Stability
Weight maintenance is key prior to any liposuction work. As weight yo-yos, the skin expands and contracts, which can impede healing or lead to new pockets of sagging skin. According to a 2023 study, individuals who shed more than 1.4 kg per week are at a significantly increased risk for facial volume loss.
Most clinics these days recommend consistent weight loss, roughly 0.5 to 1 kg a week, to preserve skin and enhance results. Staying at a stable weight for a few months pre-treatment allows the skin to acclimate and results linger longer. Tips to maintain weight are continued support, check-ins, and a balanced diet.
For persistent outcomes, clinics typically suggest individuals enroll in weight loss programs. These programs assist individuals in modifying habits, monitor ongoing progress, and help prevent the major bounces that can cancel out the work of fat loss.
Skin Quality
Selecting the appropriate treatment involves examining the skin’s condition. Skin with good elasticity snaps back much better after fat removal, making non-surgical options more effective. If your skin is lax or texturally not so good, surgical options could be preferable.
Skin tests check thickness, elasticity, and collagen availability. These checks inform where to target collagen-support treatments, as energy-based methods are most effective in regions that have strong support. A few people require a skincare regimen prior to treatment.
These regimens hydrate and increase elasticity, priming skin for fillers or energy devices. Personalizing this plan gives you the best possibility for smooth healing and a natural contour.
Patient Goals
What people desire from care defines each stage. Some aspire for a chiselled chin line, others desire liposuction. Having clear goals allows clinicians to customize the plan, such as spot treating, applying small filler touch-up doses, and scheduling follow-up appointments every 4 to 8 weeks until the appearance aligns with the patient’s objective.
Education is key; it sets realistic expectations about how long changes take. Final contour and numbness may not settle for up to six months. Time-saving 30 to 45 minute sessions allow busy people to conveniently slot in treatments.
Lifestyle, work schedules, and personal habits are all accounted for in the treatment plan.
Strategic Timing
Strategic timing is at the heart of submental fat removal after weight loss drug use. Strategic timing in deciding your cosmetic intervention can make a difference not only in the outcome but in the safety and satisfaction with results. Timing decisions are dependent on factors such as weight stabilization, skin adaptation, and mental preparedness.
Many weight loss patients need to balance these timing issues in order to achieve optimal and durable results.
The Waiting Period
There’s a strategic period of time you should wait after weight loss before trying something like liposuction or non-surgical fat reduction. Most recommend being at a stable weight within 2-5 kg of your goal for at least 3–6 months before surgery. If you’ve lost 15–45 kg or more, time is usually required for skin to adjust and the body to find a new balance.
This waiting period lets tissues settle, so the surgeon can best judge and strategize for the most natural results. Weight stabilization pre-op is key. Weight fluctuations following surgery can at least partially reverse results or make contour irregularities more noticeable.
Weigh yourself frequently and keep track. Even minor fluctuations can affect your surgical plan as well as your healing process. For most individuals, trying to lose 0.5 to 1.0 kg a week is a safe bet that allows for healthy adaptation of the skin and underlying tissues.
Psychological readiness is key. The wait allows patients time to get used to their new body image and really weigh the risks and benefits of surgery. It helps confirm that expectations are grounded and that the decision to move forward is deliberate.
The mind can be a great deal slower to adjust than the body, particularly following a significant weight change.
The Combined Approach
In other words, mixing it up yields more persistent changes. For submental fat removal, this could involve combining liposuction with non-invasive skin tightening, such as radiofrequency or ultrasound. Such a multi-directional approach can tackle both stubborn fat and loose skin, a common occurrence post significant weight loss.

A specialist team play is important here. Surgeons, derms, and other providers must communicate and coordinate timing. This makes sure treatments are spaced out adequately and recovering from one step does not extend into or push back the next.
For instance, a patient could have non-surgical fat reduction, wait a few months for the skin to adjust, and then do minor surgical contouring. Case studies indicate that patients adhering to a combined schedule, with guidance from multiple providers, achieve improved shaping and increased satisfaction.
Visible improvements can emerge within 2 to 4 weeks following liposuction, but complete results may require 3 to 6 months as swelling diminishes and the tissue adjusts. Most are back to work within 2 to 4 weeks, but this depends on the invasiveness of the procedures and the work.
Risks and Recovery
Submental fat removal after weight loss drugs is commonly requested for anyone with that persistent fullness or loose skin under their chin despite being able to shed the rest of the fat in their body. Picking up the right procedure is all about balancing potential risks and getting you back to safe and smooth recovery.
To heal well and maintain results long term means having good aftercare and a maintenance plan.
Unique Complications
Certain treatments like liposuction, surgical lifts, or fat-melting injections carry their own risks. For instance, unregulated fat-dissolving injections might result in scarring, skin infections, or even infected lumps at the injection areas, which might require additional treatment and leave permanent blemishes.
Surgical approaches can potentially cause bleeding, nerve damage, or slow wound healing, particularly in individuals with excess skin due to large weight loss.
Personal factors come into play. Age, skin elasticity, overall health, and how much weight was lost can all contribute to how a patient might recover or if they are prone to complications. Those with underlying health conditions such as diabetes, poor circulation, or immune disorders are potentially at higher risk.
It’s key to have a comprehensive checkup and candid evaluation from a trusted provider prior to surgery. This helps identify risks, establish clear aims, and select optimal treatment for each individual.
If troubles occur, rapid response is necessary. Early swelling, bruising, or pain may be controlled with rest, cold packs, or medications. More serious complications, such as infection or collection, might need antibiotics or drainage.
Aftercare Protocols
-
Maintain cleanliness and dryness of the treated area for a few days.
-
Wear compression garments as recommended. These assist in decreasing swelling and contouring the neck.
-
No exercise or heavy lifting for at least one to two weeks.
-
Apply ice for 48 hours to reduce bruising.
-
Take medicine and recover. If antibiotics are prescribed, complete the course.
-
Be on the lookout for infections like redness or fever.
Compression garments are key to recovery, providing support to healing tissues and helping regulate swelling. Most swelling and bruising disappear within two weeks.
Follow-up visits aren’t just a formality; they allow doctors to evaluate your progress, remove stitches and address any questions. These visits assist in catching small things before they grow.
Long-Term Results
-
Skin elasticity, compliance with aftercare, and provider skill all influence long-term results.
-
Maintaining a stable weight is key. Weight fluctuations can alter outcomes and lead to additional lax skin or fat rebound.
-
Patient feedback is generally very positive at the two to four week point, with the highest response at three months.
-
Continued skin care, a healthy diet, and sometimes maintenance treatments such as laser therapy can help results persist.
Conclusion
A lot of them notice changes to their chin and neck following weight loss drugs. Pesky fat can linger, even after major weight loss. For individuals seeking a streamlined jawline, liposuction or injectables may do the trick. Physicians usually consider health, timing and skin type prior to beginning. Each approach has its benefits and dangers. Easy things, like chatting with a doc, establish prime coverage. To discover the fit that’s right for your needs, check in with a trained provider. Inquire about what’s effective, what healing entails and what to anticipate. Each case is unique. For additional facts or advice, contact a clinic that understands submental fat.
Frequently Asked Questions
What is submental fat and why does it remain after weight loss drugs?
Submental fat means fat under the chin. Even after weight loss drug use, this fat can linger because of genetics, skin laxity, or uneven fat reduction.
Are there non-surgical ways to remove submental fat?
Yes. Options range from injections like deoxycholic acid to non-invasive treatments like cryolipolysis. These nonsurgical techniques dissolve fat cells.
Who is a good candidate for submental fat removal after weight loss drugs?
Great candidates maintain a stable weight, have good skin elasticity, and understand what to expect. A doctor will evaluate your general health and objectives.
How soon can I consider submental fat removal after finishing weight loss medication?
It’s best to wait until your weight has been stable for a few months. This guarantees enhanced outcomes and fewer complications during treatment.
What are the main risks of submental fat removal?
Other dangers encompass complications such as swelling, bruising, numbness, and infection. Serious complications are rare in the hands of experienced practitioners.
How long is the recovery after submental fat removal?
Recovery time differs by therapy. Non-surgical types often take a couple of days, with surgery healing up to two weeks.
Will submental fat return after removal treatments?
If your weight remains stable, fat won’t come back. Substantial weight gain can cause this new chin fat.