facebook page instagram account youtube account
Es - En

Can I Combine a BBL and Breast Augmentation for Better Results?

Key Takeaways

  • BBL and breast augmentation at the same time can be far more efficient by minimizing overall downtime and simplifying recovery!

  • Patients should be informed of the added surgical complexity and possible complications such as increased infection rates, extended anesthesia time, blood clots, and in particular, fat embolism.

  • Comprehensive health screening and candid discussion with your surgical team is imperative to guarantee your safety and success.

  • Reasonable assumptions regarding aesthetic outcomes and recovery difficulty can result in increased satisfaction and better prepare you for the physical and emotional challenges of healing.

  • Selecting an expert surgical team is key to reducing risk and optimizing the results of combined procedures.

  • Doing both at once could save you money compared to two separate surgeries. You need to consider the financial investment against the rewards and dangers.

BBL and breast augmentation at the same time is fat transfer to the buttocks in addition to breast implants or fat grafting in one operation. This minimizes your downtime and can yield more even outcomes.

Most patients opt for both procedures because they want to save time, reduce costs, and get to their body goals quicker. Here’s what to anticipate, factors to consider, and safety precautions for this simultaneous operation.

The Combined Procedure

Doing breast augmentation and BBL simultaneously is convenient for a lot of individuals. There are many reasons folks decide on this combined approach. It is efficient, cost effective, and provides the opportunity to achieve a more balanced appearance across the body. Each procedure sculpts different areas of the body so when done in combination, the results can complement each other and look especially natural. Many patients desire enhancement to their chest and hip contour, and this combo option assists in achieving those goals in a single surgery.

The primary advantages of combining BBL and breast augmentation begin with time and cost efficiency. Getting them both done at once translates to one day of surgery, one round of anesthesia, and one primary recovery schedule. This can reduce your overall time out of the office or off with the kids. There are reduced hospital and facility fees because the patient isn’t footing a bill for two separate surgical procedures.

Another advantage is that your surgeon can view your physique as an entire piece and establish a more uniform silhouette as opposed to addressing one area at a time. For instance, an individual looking for more curve at the hip and fullness in the chest experiences better overall balance when both areas are done in combination.

The advantage of the combined procedure is obvious in recovery. Instead of recovering from two operations at two separate times, patients experience only one bout of swelling, bruising, and downtime. The initial recovery period typically spans approximately 4 to 6 weeks, with some minor swelling and tenderness persisting slightly beyond this timeframe.

For most, that means scheduling time off work or school only once — a simpler task. Some individuals prefer the convenience of managing just one set of aftercare rather than two, making it easier to stay on top of follow-up appointments and post-op measures. Because only 20 to 50 percent of the fat transferred in a BBL will take and stay put, aftercare is crucial. Patients must keep off the treated area when sitting and lying, and concentrate on maintaining a healthy lifestyle to prolong their results.

The aesthetic results of this merged operation can be powerful. Basically, fat is diverted from areas such as the waist or thighs to the booty, contouring the lower half of the body, while implants or fat transfer can enhance the breasts. By combining the two, patients typically notice a more uniform shape with curves where they should be.

Think of it like this: a girl with a smaller chest and flat hips, post-surgery, has more of an hourglass figure, which was the aim. Handling aftercare and scheduling is simpler with the combined procedure. Patients only have one set of instructions, one healing timeline, and fewer follow-up appointments.

This can aid in travel planning for those visiting from other parts of the country and the world and results in less work and life chaos. The combined procedure is more complicated for surgeons, as it involves two areas of the body and time under anesthesia. Still, a lot of people think the tradeoff is worth it for the convenience and balanced outcomes.

Combined Procedure Risks

Combined Procedure Risks If you combine a BBL with breast augmentation simultaneously, your overall surgical complexity and risk goes up. Patients thinking about both surgeries need to know about the possible complications, the extra stress on their bodies, and the need for unhurried planning. All deserve careful consideration to make informed decisions.

1. Anesthesia Duration

More time in surgery means more anesthesia, which increases the risk of complications such as breathing problems or heart issues. When combined procedures last longer than six hours, the incidence of such events goes up. Surgeons attempt to keep combined procedures below six hours for this reason.

BBL and breast augmentation together can test this threshold, rendering proficient anesthesiologists a matter of importance. General anesthesia is the norm. While safe for most people, it slows recovery and can trigger side effects such as nausea or confusion. Patients should be informed of anesthesia choices and inquire about effects on recovery times.

2. Blood Clots

Getting two surgeries at the same time increases your risk for blood clots, particularly in your legs. Immobility during and after surgery is a key contributor. To prevent clots, doctors use compression devices or blood thinners.

Patients are encouraged to walk shortly after surgery, as movement promotes blood circulation and decreases risk. Symptoms such as swelling, calf pain or sudden shortness of breath require immediate medical attention. It is important to be aware.

3. Fat Embolism

Fat embolism is another risk of BBL which occurs when fat enters the bloodstream. It is rare but very serious, especially if the surgery is long or the fat is injected too deep. These combined cases should only be done by seasoned surgeons to minimize risk.

Be on the lookout for symptoms of heart attack including chest pain, confusion, or difficulty breathing which require immediate attention. Selecting an experienced doctor and adhering to directions are important to minimize this risk.

4. Infection Rates

Infection risk is greater with extended and intricate surgeries. Employing rigorous sterile procedures in the OR and meticulous wound management post-op contribute to maintaining low infection rates.

Patients should follow all aftercare steps, such as cleaning incisions and taking prescribed antibiotics. Neglecting these can result in slow healing or more severe infections, potentially requiring additional treatment.

5. Recovery Strain

The body needs more time and energy to heal after two procedures, even if there is just one recovery period. Recovery after BBL and breast augmentation can extend by days or a week, and full healing may take months, mainly for the fat transfer.

Patients can’t sit on their buttocks for weeks, making daily tasks tricky. Eating well and resting will help, and having people to help with chores or provide emotional support can ease strain. Only 20 to 50 percent of transferred fat cells survive, so results may change over time.

Ideal Candidacy

Candidates Considering BBL and Breast Augmentation. They’re the perfect mix of health, body type, and mindset for people thinking about BBL and breast augmentation at the same time. Surgeons consider several factors to determine if it’s safe and beneficial to perform both procedures together. The ideal candidates know the dangers and boundaries, desire positive transformation, and possess a physique perfectly compatible with the procedure.

Health Status

One of the first things surgeons look at is being in good health. They seek individuals without active medical issues such as heart disease, diabetes, or coagulopathies. If they have chronic illnesses, they may heal more slowly or be more at risk during and after the surgery. A complete health exam is required prior to any surgery. This assists in identifying covert issues that may complicate recovery.

Candidates should disclose everything about previous surgeries, medicines, allergies, and even supplements to their doctor. This open talk allows the surgical team to plan well and avoid surprises. If you smoke or take certain drugs, you might not heal as well. Most physicians recommend that patients quit smoking weeks in advance of surgery.

If a patient has had major surgeries before, like a tummy tuck or breast lift, the scar tissue or altered anatomy can complicate the combined surgery.

Body Fat

The BBL portion utilizes fat harvested from the patient’s own body, typically the hips, belly, or thighs. Individuals with a stable BMI, generally between 18.5 and 25, perform well. Surgeons require sufficient body fat to transfer yet not too much that the surgery risks increase. If you’re someone who is very lean, you might not have sufficient fat for a full BBL.

Patients with a high BMI may need to shed some pounds before surgery to keep health risks at a minimum. It’s not only the quantity of fat that counts; its quality is important as well. Fat harvested from a fit, active individual is more likely to survive the transplant.

Maintaining a healthy lifestyle, eating right, exercising, and avoiding major weight fluctuations helps the results stick around longer. Weight gain or weight loss post surgery can transform your new shape, sometimes not to your liking.

Realistic Goals

These are very good ways to impress your ideal candidacy. Some of us wish for a ‘perfect’ body. I want you guys to know that every body is unique. Surgery can do dramatic transformations, but it can’t alter things like your bone structure or skin type.

If they anticipate too much, they may be let down even if the surgery is successful. Being clear in consultation with the surgeon about what is and isn’t achievable sets the right tone. The best results occur when the patient and doctor agree on what can be accomplished.

Being aware of the risks, such as scarring, asymmetrical results, or potential additional surgery, tends to make individuals more satisfied with the outcome.

Recovery Challenges

The recovery process from a Brazilian Butt Lift (BBL) and breast augmentation at the same time can be complicated for many patients. Every surgery has its recovery curve and when you pair them both together, the difficulties tend to accumulate. It may require more care and time than most people expect, so understanding what to encounter can help define clear goals and avoid surprises.

Common recovery challenges include:

  • Significant downtime, sometimes weeks, creates hard lines around activity.

  • Increased healing difficulties occur as the body strives to mend more than one place.

  • Recovery challenges, such as requiring special equipment like a pillow for sitting after a BBL.

  • Restrictions on how to sleep, sit, or move in daily life.

  • Swelling, bruising, and aches in multiple locations simultaneously.

  • Slower healing, as the body splits its energy.

  • Greater likelihood of additional days off work or away from daily responsibilities.

  • The emotional roller coaster because recovery can be lengthy and occasionally overwhelming.

Pain and discomfort are par for the course after these surgeries. When done in tandem, it can feel overwhelming and stretch out. Handling this well is crucial. Physicians typically discharge pain plans consisting of medicine, rest, and possibly ice packs for swelling.

Patients need to understand that pain can radiate from both your chest and your butt, causing you to struggle with finding a comfortable position. Adhering to easy instructions, such as sitting on a unique pillow post BBL or lying on one’s side or stomach, can minimize strain on vulnerable healing areas. The more you listen to your body, request help when needed, and adhere to your pain plan, the more bearable and safe this period will be.

Follow-up appointments aren’t just busy work. They play a significant role in a safe recovery. These appointments allow physicians to examine wounds, monitor for complications and modify treatment if something isn’t healing correctly. If swelling or pain are worse than expected, doctors might switch medicine, provide advice on easier movement or recommend additional rest.

Patients shouldn’t miss these check-ins because small catches along the way keep little issues from becoming big ones. Honest conversations with the care team at every appointment can assist patients in addressing relapses and regaining a sense of control over their recovery.

There are physical and emotional challenges during this recovery. It’s OK to be exhausted, stressed, or distraught as the body and mind acclimate. Patients might have to adjust sleep, work, or family schedules to find adequate time to rest and heal.

Preparing in advance, such as organizing assistance around the house, time off from work, or easy meals, can reduce tension. Revealing concerns to physicians or support groups can aid in navigating mood swings or skepticism. Recovery is unique to every individual. Therefore, planning in a way that suits your personal needs and communicating frequently with your healthcare team will ease the process.

A Surgeon’s Perspective

Surgeons see a clear trend: more people want both breast augmentation and Brazilian Butt Lift (BBL) at the same time. The big allure is the opportunity to achieve a silky-smooth, hour-glass shape with a single treatment. It can save time, save money, and provide a new look for the full-body makeover seekers.

However, it’s not an easy decision. It makes special demands and requires good hands and coordination. How surgeons perform these hybrid operations is brutal. They have to use meticulous techniques to sculpt the body just right and maintain patient safety.

Breast augmentation, implant size, shape, and placement all matter. The fat for the BBL needs to be processed just right, typically removed from the stomach or thighs and then placed back into the buttocks. Surgeons strive to strike a balance between the two so the result is natural-looking. If one part seems misplaced, the entire appearance can be off.

When you knock them both out at once, the body encounters stress in two locations. In other words, the surgeon has to save for every step from the initial incision to the final stitch. An experienced surgical team makes a world of difference. They assist in protecting the patient and ensuring a smooth procedure.

Everyone on the team has their role, whether it’s maintaining anesthesia, monitoring vital signs, or assisting with precise maneuvers in the OR. Good teamwork reduces the risk of things like blood clots, infection, or more bleeding. It’s crucial for comfort, too. Nurses and assistants know how to shift patients safely during and after the operation.

This becomes relevant because post-BBL, patients cannot sit directly on their buttocks for a period of time, which can be challenging if implants were inserted. Surgeons invest a lot of time choosing who is suited for these joint operations. Not everyone is going to be a good fit.

Physicians consider wellness, objectives, and the volume of fat to transplant. A solid candidate is typically healthy, weight-stable, and goal-oriented. Others recommend waiting six months between surgeries so that the body can recover. Some will do both together if it suits the patient.

Recovery is extended when both are performed simultaneously. Breast implant recovery is two to four weeks. With a BBL, patients cannot sit on the buttocks, so life can be difficult for a bit. If both are healing, your body is going to be slower to bounce back.

Cost and Value

When comparing the price for a BBL and breast augmentation simultaneously, it’s useful to see how the costs compare side by side. When you pay for two surgeries together, it frequently signifies only one fee for the operating room, anesthesia, and a majority of the surgeon fees. That can result in genuine savings, particularly compared to conducting each treatment individually, months or years apart.

Below is a table that shows rough price ranges for standalone and combined procedures, based on average data from the American Society of Plastic Surgeons and common international clinic rates:

Procedure

Average Cost (USD)

Notes

BBL alone

$6,000 – $11,000

Includes surgeon, facility, anesthesia

Breast augmentation (implants only)

$4,875 – $7,000

Surgeon fee; total may be higher

Breast lift (mastopexy) alone

$5,817

ASPS 2023 avg., surgeon only

Combined breast aug + lift

$10,000 – $20,000+

Includes all major fees

Combined BBL + breast augmentation

$12,000 – $25,000+

Depends on location, complexity

Revision surgery (any procedure)

$8,000 – $15,000+

For corrections or updates

Implant removal and replacement

Starts at $10,500

Long-term cost consideration

Implant removal with lift

Starts at $11,500

By booking a BBL and breast augmentation in one session, patients are only paying for anesthesia and the operating room one time. This bundled approach can save thousands compared to paying separate fees for each procedure. For instance, an individual could pay $6,000 for a BBL and then another $7,000 for implants if performed separately, incurring additional fees for multiple anesthesia and facility charges.

All told, the total might be $12,000 or $13,000, so the benefit is evident. Clinics in big cities might be higher, but the principle stands almost everywhere.

The true worth of having both done at once is not just the cost savings. A lot of folks would love to get a bump in their hourglass figure and equilibrium all at once. That can translate to less recovery, less time away from work and less stress of planning two surgeries.

Creating your dream silhouette with a single procedure can translate to a reduced chance of expensive, insurance-less revision surgery. Patients should still plan ahead, though, as implants may need to be replaced, and these costs, sometimes north of $10,000, should be remembered.

Financing makes the upfront cost more manageable. Most clinics have zero percent interest for a period of time or longer term plans. Establishing a savings account or allocating a small sum each month brings the target within reach without huge debt.

Conclusion

Having a BBL and breast augmentation at the same time is possible for some individuals. It really depends on your health, your body shape and your objectives. Some people like the one-surgery route. This can translate into less time off and lower costs. Risks increase a bit with two procedures completed at once. Recovery can be prolonged and arduous. Doctors look for secure steps to schedule these procedures. Some folks fare better with two smaller surgeries, not one big one. It pays to consult with a board-certified surgeon who will listen to you and answer your questions. Inquire about every step, cost and healing. Need more info or ready to chat with a pro? Contact a reputable clinic to begin.

Frequently Asked Questions

Can I have a BBL and breast augmentation at the same time?

Yes, a lot of patients combine the two. This can save you time, reduce overall recovery, and achieve a balanced body contour all with one surgery and anesthesia session.

What are the main risks of combining BBL and breast augmentation?

It risks longer anesthesia time, an elevated risk of complications, and an increased recovery burden. Selecting a skilled plastic surgeon assists in minimizing these dangers.

Who is a good candidate for combining these procedures?

Ideal candidates are in good health, have realistic expectations, and wish to enhance both their breasts and buttocks. A full medical evaluation is necessary to confirm suitability.

How long is the recovery after both procedures?

It can take up to 6 weeks to heal. Sit directly on your buttocks and limit upper body movements during the initial healing stage.

Is it more expensive to combine BBL and breast augmentation?

This helps keep your surgeries cost-effective, more than if you had them separately. Our patients can save on facility, anesthesia, and surgeon fees with one single combined procedure.

Will I need special aftercare for both areas?

Indeed, you’re going to be wearing compression garments, avoiding certain positions and following rigorous post-surgery instructions on both the breasts and buttocks to facilitate proper healing.

How do I choose a surgeon for combined BBL and breast augmentation?

Find a board-certified plastic surgeon that has experience doing combined procedures. Research their qualifications, before and after pictures, and patient testimonials to confirm safe and effective outcomes.

Best Scar Care for Incisions After Liposuction

Key Takeaways

  • Begin scar care promptly and adhere to your surgeon’s advice to minimize complications and enhance cosmetic outcomes. Start simple wound hygiene right away and then incorporate silicone therapy as soon as incisions have healed.

  • Your best scar care for incisions post lipo is a multi-pronged approach. This includes keeping incisions clean, wearing compression garments as directed, applying silicone daily, gently massaging when safe to do so, and strict sun protection with SPF 30 or higher for a minimum of a year.

  • Check scar type and risk factors every few weeks as genetics, skin type, incision technique, and overall health influence flat versus hypertrophic versus keloid scars. Have abnormal changes evaluated professionally.

  • Professional options – such as laser, microneedling or steroid injections – should be reserved for stubborn or elevated scars. Consider anticipated results, treatment sessions, downtime and side effects before moving forward.

  • Support healing with holistic practices like a nutrient-rich diet high in vitamin C, vitamin E, zinc, and protein, proper daily hydration, and consistent sleep, as these enhance collagen formation and tissue repair.

  • Sun exposure, picking at scabs, harsh scrubs, tanning beds, and ignoring prescribed steps contribute to darkening, widened, or thickened scars. Record progress with photos and be patient as maturation can take several months.

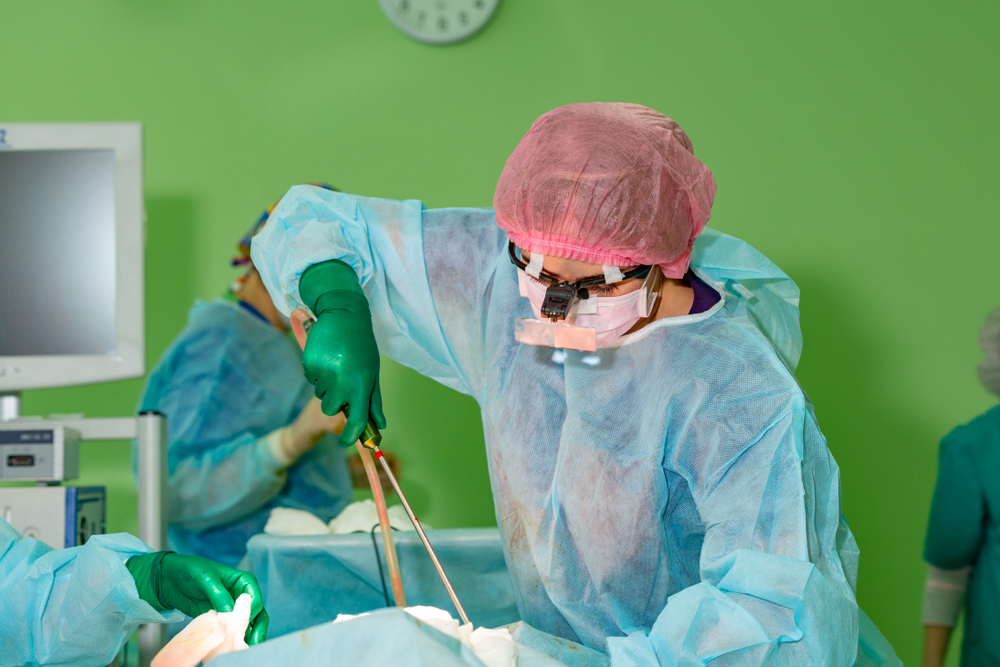
Best scar care for incisions after lipo refers to utilizing the best steps to assist wounds in healing with minimal marks.

Begin with mild cleansing, sun protection, and silicone-based dressings once skin is closed. Monitor healing and adhere to your surgeon’s schedule for massage and topicals.

If you have a stubborn red or raised scar, explore professional solutions such as steroid injections or laser therapy.

The following sections detail targeted products, timelines, and easy regimens for each healing stage.

Understanding Lipo Scars

Liposuction incisions are tiny entry portals where cannulas are inserted to suction away fat. These entry wounds are not like big surgical incisions in that they are quite short, under tension from the instrument movement and sometimes located in areas of differing skin thickness. Scar formation occurs when the body deposits collagen as it closes the wound.

The type and quantity of collagen varies with the depth of tissue trauma, local circulation, and mechanical forces of movement or compression from tight clothing.

The Healing Timeline

Acute inflammation begins right away and lasts around 3 to 7 days. The zone is red, warm, and perhaps slightly swollen, while the white cells sweep away debris and prepare the ground for reconstruction. Anticipate tenderness and fluid discharge initially.

Proliferation comes next, typically day 4 through 6 weeks. New tissue and capillaries grow. Collagen type III is deposited, wounds contract, and the surface skin starts to smooth. Scars at this point appear pink or bumpy and can be tender.

Maturation can take 3 months to 12 to 18 months. Collagen remodels to type 1, strength increases, and color fades to surrounding skin. Flat, soft scars are the probable end result, but some scars continue to be raised or spread.

Initiate foundational wound care by cleaning and applying a mild dressing right away. Silicone sheets and gels are most effective after the skin has closed, typically after one to two weeks. Sun protection should start as soon as the wound is healed enough to expose; UV can darken a scar at any point.

Scar Variations

Hypertrophic scars remain confined to the incision area and are elevated and erythematous in color for months. Keloids spread beyond the initial wound and have the propensity to keep growing. They are more common on the chest, shoulders, and in darker skin types.

Flat scars are fine and light in color, typically the outcome following smooth healing of minor incisions. Genetics are a big factor. If you have a family history of keloids, the risk increases.

Fitzpatrick skin type aids in predicting pigment alterations and hypertrophic propensity. Surgical technique matters. Smaller ports, gentle handling, and layered closure reduce tension and lower scar risk. Watch for indications of dysplasia, such as fast expansion, constant discomfort, itch, or extension outside of the incision, and notify your surgeon.

Key Factors

Clean, dry wounds are less prone to infection and produce better scars. Change dressings as instructed and keep incisions out of water until they are healed.

Collagen turnover is the biggest factor, which is why younger skin scars more visibly and older skin less so, but heals more slowly. Nutrition counts. Protein, vitamin C, and zinc all aid repair. Smoking restricts blood flow and slows healing.

Adhere to post-op guidelines regarding activity restrictions, garment usage, and topics. Compression garments manage swelling and can potentially reduce scar stretch.

Sun exposure will brown scars for years. Make sure to apply broad-spectrum sunscreen with at least SPF 30 or cover scars when you’re outdoors to protect healing tissue.

The Best Scar Care

What works for the best liposuction scar care are time-dependent, evidence-based interventions that synergistically decrease scar thickness, pigmentation, and stiffness. Early treatment is key, says Dr. Moll, who recommends starting wound care and scar protection the moment the surgeon gives the all-clear to the site.

Then, stack therapies such as physical support, topical treatments, sun protection, and manual intervention for improved long-term outcomes.

1. Immediate Post-Op Care

About the best scar care. Adhere to surgeon directions on showering and utilize only the recommended cleansers or saline. Do not submerge wounds in bath or pool water until sealed.

Change dressings as directed. Sterile technique cuts contamination. Don’t pick or scratch scabs. This keeps inflammation going longer and increases scar elevation.

Be on the lookout for spreading redness, pus, increased pain, fever, or wound separation and reach out to your clinic right away if they develop.

2. Silicone Therapy

Apply silicone sheets or medical-grade silicone gel after the wound has completely closed and crusting has disappeared. Silicone works by hydrating the scar environment and modulating the signals that spur collagen overproduction, which flattens and fades raised scars.

Use sheets for 12 to 24 hours per day if tolerated and use gels twice daily. Persist with treatment for a minimum of 8 to 12 weeks and frequently longer for more substantial scars. Go with something marketed as scar care and adhere to manufacturer instructions.

Product type

Ease of use

Best for

Silicone sheets

Moderate

Overnight, large areas

Silicone gel

Easy

Small scars, daytime use

Silicone tape

Easy

Flexible sites, active patients

3. Sun Protection

UV shield scars from hyperpigmentation. Newly healed scars can darken for months, so apply SPF 30+ broad spectrum sunscreen to exposed areas every day.

Dress in UPF-rated or wide coverage clothing when outside. Most importantly, continue strict sun protection for at least 12 months to enable scar remodeling without pigment changes.

4. Gentle Massage

Start soft scar massage once the incision is closed and your surgeon is on board, typically 2 to 4 weeks post-surgery. Utilize circular motions and light to moderate pressure to mobilize tissue and break up adhesions.

Massage improves local blood flow and assists tissue in regaining flexibility. Do this 2 to 3 times a day for 5 to 10 minutes per area, with strength and time tailored to comfort.

5. Compression Garments

Wear surgeon-recommended compression garments as directed to minimize swelling and help sculpt tissues. Compression decreases edema and may minimize hypertrophic scar development by minimizing tension on healing skin.

Make sure clothes are snug but not painful, and change them when they stretch and adhere to the wear schedule, usually during the day for a few weeks.

Topical Treatments

Topical care is the primary treatment for incisions following liposuction. OTC and prescription products can calm redness, soften raised scars and brighten texture when applied properly. Selecting among them is based on the scar’s age, your skin type, and any previous sensitivities.

Adhere to your surgeon’s timelines for beginning treatments. Many suggest waiting until wounds are fully closed and sutures or steri-strips are removed.

Active Ingredients

Onion extract: Found in many OTC gels, it may reduce redness and firmness by limiting excess collagen formation. The data are ambiguous on this point; some studies demonstrate a modest advantage for newer scars and others show no difference.

Apply twice daily and discontinue if there is any persistent irritation or contact dermatitis.

Vitamin E: Commonly used but controversial. Topical vitamin E attempts to moisturize and shield skin lipids. For some, it calms itch and flaking. For others, it causes allergic contact dermatitis and makes things look worse.

Put a little on for a few days and stop at the first sign of rash.

Silicone (sheets and gels): Silicone forms a semi-occlusive barrier that helps normalize hydration and collagen remodeling. Topical treatments have clinical evidence for flattening and lightening scars.

Apply daily for hours a day, often for months, for best results.

Retinoids (tretinoin, adapalene): Prescription retinoids speed epidermal turnover and can help remodel scar tissue over time. As such, they can thin hyperpigmented scars and enhance texture.

Begin with low frequency to minimize irritation and do not use on open wounds.

Steroid creams: Topical corticosteroids reduce inflammation in hypertrophic scars. Under medical supervision, they have the ability to flatten thick, raised scars.

There are allergic risks for every ingredient, particularly sensitizers such as vitamin E and onion extract. Use patch test products on a small area for 48 to 72 hours prior to broad use.

Ask your clinician before mixing actives like retinoids and steroids.

Popular scar treatment brands (examples):

  • Mederma (onion extract gel)

  • ScarAway (silicone sheets)

  • Kelo-cote (silicone gel)

  • Bio-Oil (multi-oil formula)

  • Differin (adapalene gel)

  • Aquaphor (ointment for barrier and hydration)

Natural Remedies

Aloe vera: Soothes and hydrates. Apply pure gel to closed incisions twice daily. It can diminish inflammation but has poor evidence for altering long-term scar architecture.

Coconut oil: Moisturizes and may improve pliability. Use with caution to prevent clogged pores on hairy regions. Massage lightly to increase circulation.

Honey: Medical-grade honey has antimicrobial and moist-healing properties. It’s safe to use under supervision, but raw honey differs in quality.

Limitations: Natural oils and gels help surface symptoms such as dryness, itch, and mild discoloration, but rarely produce dramatic scar rewrites. They’re most effective early and as complements to silicone or prescribed compounds.

Patch testing: Put a small dab on the inner forearm for 48 hours. Discontinue use if redness, burning, or itching occurs. If you’re unsure, see a dermatologist.

Advanced Professional Options

Professional intervention is warranted when conservative care, such as silicone, sun protection, and massage, does not decrease visibility, when scars are symptomatic, like itching and pain, or when scar texture and pigment impact quality of life significantly.

Here are three popular advanced strategies, how they operate, what to anticipate, and a concise summary of standard expenses and healing durations.

Laser Treatments

Laser therapy addresses both pigment and texture by heating certain layers of the skin or pigment, triggering remodeling and pigment breakdown. Fractional ablative lasers microscopically injure to resurface texture while non-ablative heat stimulates the deeper dermis to stimulate collagen without top layer removal.

Vascular lasers work on red or purple scars by targeting hemoglobin. Common types used for post-liposuction incisions include fractional CO2, erbium:YAG, pulsed dye laser (PDL), and fractional non-ablative lasers like 1550 nm.

The majority of patients require two to six sessions, spaced four to eight weeks apart, to experience meaningful change, with deeper or older scars often necessitating additional treatments. Side effects are mild and include temporary redness, swelling, crusting, pigment changes, and rarely infection or scarring if done by an unskilled practitioner.

Downtime is two to fourteen days based on laser aggressiveness. For example, fractional CO2 may provide dramatic texture improvement but has longer healing, whereas PDL reduces redness with minimal downtime.

Microneedling

Microneedling utilizes tiny needles to create targeted micro-trauma in the skin, triggering a healing cascade and fresh collagen and elastin production. The treatment typically includes topical numbing, multiple passes with a device, and at times adjunctive platelet rich plasma (PRP) to enhance effects.

They’re 20 to 45 minutes in the clinic. Benefits include smoother texture, less shallow acne scarring and better pigment uniformity. It assists newer scars through orderly collagen repair guidance and older scars through scar remodeling.

Advanced professional options consist of three to six sessions, spaced four weeks apart, for incremental progress. Aftercare includes keeping the area clean, using gentle moisturizers and sun protection, avoiding strenuous sweat for 48 hours, and following provider guidance on topical actives.

Mild redness and some pinpoint bleeding are typical but they settle in days.

Steroid Injections

Steroid injections are reserved for raised, thick hypertrophic scars and keloids. Steroid shots to scar tissue reduce inflammation and fibroblast activity, and flatten and soften the scar over time.

Standard courses are shots every 4 to 8 weeks, with 3 to 6 treatments generally required. Risks encompass skin atrophy (thinning), pigment loss, and telangiectasia in the vicinity of the injection site.

Steroids are excellent at reducing bulk but not necessarily width or pigment, and they are frequently used in conjunction with other therapies such as laser or excision.

Treatment

Typical Cost (USD)

Recovery Time

Fractional CO2 Laser

800–2,500 per session

7–14 days

Pulsed Dye Laser (PDL)

300–800 per session

1–5 days

Microneedling (with PRP)

200–1,200 per session

2–7 days

Steroid Injections

100–400 per session

Minimal, few days

A Holistic Perspective

Recovery from liposuction incisions is about more than serums or clinic visits. Scar results are comprehensive, showing general well-being, lifestyle, and the way medical treatment is integrated with personal care. The subsequent sections dissect essentials—eat, drink, wait—and illustrate how to incorporate academy treatments within. Practical steps and examples make routines usable anywhere.

Nutrition

A healthy diet fuels tissue repair. Vitamins C and E and zinc are directly involved in collagen formation and antioxidant protection. Add citrus fruits, strawberries, bell peppers, sunflower seeds, almonds, spinach and lean meats to span these requirements.

Collagen-rich foods like bone broth, fish and chicken offer amino acids utilized in scar repair. Plant-based choices such as soy, legumes and pumpkin seeds come to assist.

Eat less processed foods and added sugars as they increase inflammation and can impede healing. For instance, trade a sugary treat for Greek yogurt and berries or a fistful of almonds.

Your meal plan for a week might look like oatmeal with fruit and seeds for breakfast, a salad and grilled salmon for lunch, and quinoa with roasted veggies and tofu for dinner, with snacks of citrus or zinc-fortified trail mix to keep nutrient balance.

For those with dietary restrictions, consider a short-term supplement under clinician guidance. A daily intake of 500 to 1000 mg of vitamin C, 15 to 30 mg of zinc, and 200 to 400 IU of vitamin E can be useful in some cases. Be sure to check interactions with other medications.

Hydration

Consume sufficient liquids to encourage skin elasticity and cell regeneration. Strive for a minimum of around 30 to 35 milliliters per kilogram of weight per day as a rough starting point. Adjust accordingly for activity, climate, and medical recommendations.

Well-hydrated skin is more flexible and better absorbs the stress of flexing and compression while healing. Monitor consumption with a reusable bottle marked in 250 to 500 ml increments or use an easy app to maintain consistency.

Add in some hydrating foods, like cucumbers, watermelon, oranges, tomatoes, and leafy greens, which combine fluids and micro-nutrients. Refrain from caffeine and alcohol in early healing because they can increase fluid loss.

Patience

Scar maturation takes its time. There’s no quick fix. Visible improvement often requires months and sometimes even a year or more. Set reasonable milestones and notice differences in color, thickness, and sensitivity as opposed to complete vanishing.

Document progress with standardized photos: same light, angle, and distance each month. Diligence with daily care—sun protection, silicone sheets or gels as recommended by your clinician, and gentle massage when allowed—pays dividends.

Regular, small doses can be much more effective than occasional intensive infusions.

  • Holistic practices that benefit scar outcomes:

    • Healthy balanced meals.

    • Consistent intake of fluids and hydrating foods.

    • Sufficient sleep and stress control.

    • Light stretching of the psoas muscle appropriate to stage.

    • Sun protection and wound care.

What To Avoid

Postoperative scar care is important because your habits during those first weeks and months lay the foundation for long-term appearance. Steering clear of a couple of common mistakes keeps discoloration, puffy scars and slow healing at bay. What to avoid, with explicit where, why, and how to steer clear.

Warn against exposing scars to tanning beds or harsh sunlight

Direct UV exposure darkens scars and highlights them. Even pale scars can become brown or red if exposed to sun or tanning-bed UV in the first 12 months. Steer clear of sunbathing, tanning salons and long-term outdoor sun exposure in and around your incision areas.

A Note On Scars: When outdoors, protect scars with clothing or broad spectrum SPF 30+ sunscreen on healed skin, reapplying every two hours and after sweating. For more coverage, use physical blockers with zinc oxide if the skin is still tender. If you do need to be out for a short time, schedule shade and a hat or wrap to block UV from the treated area.

Advise avoiding harsh chemicals or abrasive scrubs on scars

Strong acids, alcohol-based toners and exfoliating scrubs can strip delicate new skin and irritate it. Avoid glycolic acid, high-grade retinol, benzoyl peroxide, and physical scrub beads on incision sites until fully healed and cleared by your surgeon.

These agents can thin or inflame regenerating tissue, increase the risk of scar formation, or result in discoloration. Instead, opt for mild, fragrance-free cleansers and soft cloths. If you want chemical exfoliation later, ask your clinician which concentration is safe and when to start.

Caution against skipping prescribed scar care steps

Surgeons often prescribe specific steps: silicone sheets or gels, massage, gentle moisturizer, and sun protection. Skipping these sabotages results. Silicone helps flatten and soften raised scars by keeping the area hydrated and protected.

Stop using it too soon and the scar can re-harden. Massage enhances pliability and lyses tight bands. Avoid it and tightness or spreading might remain. Adhere to timing and frequency of dosing. Apply silicone as prescribed, massage your scar for the recommended minutes each day, and wear dressings for the directed amount of time.

If directions are ambiguous, call the clinic. Don’t just assume less care will be okay.

List common mistakes that can worsen scar appearance

Avoid scab picking, tight clothing rubbing on your incision, smoking, and dismissing signs of infection. Picking reopens wounds and invites bacteria. Tight waistbands create friction and wider scars.

Smoking reduces oxygen circulation, which delays healing and makes scars larger. Ignoring redness, warmth, pus, or increased pain can allow minor issues to become infections that exacerbate scarring. Steer clear of over-the-counter “miracle” creams with mystery ingredients, and opt for physician-approved products instead.

To sum it up, guard, don’t aggravate, and listen to the doc.

Conclusion

Best scar care for incisions after lipo Begin with clean, dry wounds and maintain your follow-ups. Use silicone gel or sheets for 12 weeks to reduce redness. Spritz on a gentle, unscented moisturizer to maintain skin softness. Use SPF 30+ and cover wounds for the first year to prevent darkening. If you have thick or painful scars, contact a board-certified provider for laser or steroid options. Consume protein and hydrate to assist tissue in healing. Be alert for infection or unusual pain and seek help early. A little, but often, is the best formula. Know your choices, select what suits your lifestyle, and consult with your surgeon prior to initiating new scar care.

Frequently Asked Questions

How long do lipo incisions take to fade?

Most incision lines smooth and fade within 6 to 12 months. Early care hastens healing. Deep or wide scars may take longer and will not disappear altogether.

When should I start using topical scar treatments?

Start light silicone or scar gels when the wound is completely closed and sutures are out. This is typically one to two weeks post-surgery, or as recommended by your surgeon.

Are silicone sheets better than creams?

Both silicone sheets and silicone gel are effective. Sheets provide uniform occlusion. Gels are better for small, mobile areas. Both decrease scar elevation, erythema, and pruritis when applied appropriately.

Can sunscreen help lipo scars?

Yes. Apply broad-spectrum SPF 30 or higher on scars for a minimum of 12 months. Sun protection avoids darkening and enhances long-term aesthetics.

When should I see a professional for scar revision?

Consult a specialist if a scar is painful, causing functional limitation, raised (keloid), or not improving after 12 months. Steroid injections, laser, or surgical revision may assist.

Do natural remedies like vitamin E or aloe vera work?

Proof for vitamin E is slim and variable. Silicone-based products have more robust clinical support. Aloe vera might be soothing but it won’t consistently reduce the size or thickness of a scar.

How do I prevent infection and poor scarring after lipo?

Follow your surgeon’s wound care instructions. Keep your incisions clean, do not soak, avoid smoking, and keep your follow-up appointments. Early infection control reduces the chance of poor scarring.

Preventing DVT After Liposuction: Travel Tips for Safe Flights

Key Takeaways

  • Take surgical and travel precautions together since liposuction and long-haul travel both increase the DVT risk. Consider personal factors such as age, weight, and medical history prior to planning any trip.

  • Wait until your surgeon provides written clearance and construct your own timeline that maps surgery, recovery milestones, and a safe-to-travel window.

  • Pack and wear prevention essentials such as surgeon-recommended compression garments, your prescribed anticoagulants in your carry-on, hydration supplies, and local healthcare contact information.

  • Travel tips: Keep moving when you travel. Either get up, stand, or walk every 1 to 2 hours. Do seated leg exercises and select seating that makes this easier.

  • Watch for warning symptoms such as leg swelling or abrupt chest pain and respond promptly by obtaining medical attention. Keep a symptom checklist and your surgeon’s emergency instructions close at hand.

  • Customize prevention to your travel type and length. Choose transportation that permits you to move, modify measures around seating limitations, and ensure travel insurance covers potential post-op complications.

DVT prevention after liposuction travel tips are measures to reduce clotting risk during travel after surgery. They involve compression garments, frequent ambulation, and hydration.

Timing guidelines from your surgeon and short breaks on long trips are also important. Travel smart for DVT prevention after liposuction: Carry your medical records and compression stockings, and don’t wear tight clothes that restrict blood circulation.

These steps can assist in making travel safer while you recover.

The Combined Risk

Liposuction and long flights both increase the risk of deep vein thrombosis (DVT), and combined, these create a compounded risk that necessitates planning. Surgical tissue damage initiates an inflammatory response and transient changes in coagulation. Compression of tiny vessels and the body’s clotting response to liposuction render veins prone to clotting in that crucial one to two weeks following surgery.

Meanwhile, pain, soreness, and enforced rest decrease mobility, slowing circulation in a patient’s legs. They account for why the early postoperative range is the maximum-risk window for DVT after lipo.

Long-haul travel brings its own distinct risks. Remaining stationary for long periods on planes, trains, or in automobiles diminishes the calf-muscle pump that assists in sending blood back to the heart. Cabin pressure and mild dehydration on flights make blood thicker.

Snug underwear, meager armrests, and no place to vent increase stasis in the deep veins. For instance, a 10-hour flight within two weeks after surgery can significantly increase clot risk over a quick local jaunt. Travel in which you’re immobile and have limited options to stretch is where the surgery-induced clotting risk will multiply.

Personal risk factors modify how those two risks combine. Older age, BMI above healthy ranges, previous clot, active smoking, hormonal medications, cancer, and inherited clotting disorders all increase baseline DVT risk. Recent immobilization, infection, or other surgeries increase risk.

Prior to travel, discuss these considerations with the surgeon or primary care clinician. They might recommend blood tests, short duplex ultrasound in certain situations, or medication changes. A practical example is a 55-year-old person with a BMI of 32 who takes estrogen and had liposuction. This person should be treated as higher risk than a healthy 28-year-old non-smoker.

Prevention must target surgery and travel together. Wear graduated compression stockings (20–30 mmHg or as recommended) during travel and while ambulatory recovery permits. Begin simple calf and ankle pumps every 30 to 60 minutes of any extended seat time, and stand and walk at least hourly if possible.

Stay hydrated in metric terms; water should be about 30 to 35 milliliters per kilogram per day unless otherwise instructed. Watch the alcohol and over-caffeinating before and during travel. For higher-risk individuals, clinicians might prescribe perioperative low-molecular-weight heparin or short-term DOAC therapy and follow dosing and timing precisely.

Schedule travel so you get the most important early healing time at home and reserve airplane seats with extra leg room when possible.

Your Travel Timeline

Post-liposuction, when you travel makes a difference both to reduce your risk of DVT and to promote healing. Let your body recover enough to be able to walk with minimal pain, adhere to compression and medication regimens, and deal with any surprises. Coordinate with your surgeon and transport providers so dates correspond with medical recommendations and logistical travel considerations.

Schedule your trip to allow adequate recovery time post-liposuction before traveling

Try to avoid long travel for at least 1 to 2 weeks following small volume liposuction. For larger or combination procedures, this should be more in the 3 to 4 week range. Early travel increases DVT risk since swelling, restricted mobility, and inflammation are at their highest in those initial days.

If you must travel sooner, choose short trips and arrange in-flight or in-car measures. Wear compression garments, take low-dose anticoagulants only if prescribed, and break trips into short segments. For example, a 2-hour domestic flight at day 7 may be acceptable with surgeon approval, while an 8-hour international flight at day 7 is not.

Map out key milestones: surgery date, initial recovery, and safe-to-travel window

Create three clear dates: surgery day, a 48 to 72 hour check for bleeding and early complications, and a one to four week “safe-to-travel” window based on your procedure. Record daily pain, swelling, and mobility, noting fever or indications of infection.

Share this timeline with your surgeon and travel companion. Example milestone set: surgery on June 1, first check June 3, walking unassisted by June 7, signed off for travel June 22. Modify if bruising or range of motion is still present.

Factor in the length and type of travel when planning your return or onward journey

Short car rides of under two hours are less risky than long flights or bus journeys of more than four. For extended travel, segment trips into one to two hour increments with standing and light walking at every hour.

Select aisle seats on planes and ask for wheelchair assistance to circumvent marathon airport walks. If you are driving, schedule frequent breaks where you can walk around and stretch. Consider travel class; more legroom reduces immobility and upgraded seating can be a practical health choice.

Create a timeline checklist to track recovery progress and travel readiness

Build a checklist with daily items for the first month: pain level, ability to walk 10 to 15 minutes, swelling score, wound checks, compression wear hours, medication taken, and any abnormal signs.

Add travel tasks: confirm medical clearance, pack extra garments and dressings, print surgeon contacts, secure travel insurance covering post-op complications, and prearrange ground transport. Utilize a straightforward table or app to check off readiness. Postpone travel if two or more checklist items remain incomplete.

Pre-Flight Checklist

Pre-Flight Checklist Get your important papers together and a game plan before you take off. Collect recent operative notes, discharge summaries, and any imaging or lab results that pertain to coagulation or wound status. Bring printed clearance from your surgeon that specifies the suggested travel window and any restrictions.

Add a printed, legible list of your current medications, doses, and timing, and a brief note from your provider outlining why you are at increased DVT risk if applicable.

1. Medical Consultation

Get explicit clearance from your surgeon regarding when travel is safe and what restrictions, if any, exist. Inquire if your recovery, wound drainage, and ability to get around are adequate for flights or long-distance drives.

Talk about your personal DVT risk profile. Consider age, weight or BMI, personal or family clotting history, smoking, and hormonal medications. Request written directions for in-flight care and emergency measures, including when to pursue urgent care, and ensure these are easily accessible.

Clarify symptoms that require immediate action during travel: new leg swelling or pain, sudden shortness of breath, chest pain, fainting, or unexplained rapid heart rate.

2. Compression Garments

Use surgeon-prescribed compression garments during the flight and for the duration of your recovery as directed. Make sure your clothes fit properly.

Too tight and they’ll damage your skin, too loose and you won’t get the benefit. Pre-Flight Checklist – Try them on before travel and stroll around the house for 15 to 20 minutes to test comfort.

Pack a spare for anything over a day away or if laundry isn’t readily accessible. Adhere to care instructions. Hand or gentle cycle wash and air-dry your garments to preserve elastic properties and ensure consistent compression.

3. Hydration Plan

Stay hydrated with water in the hours leading up to, during, and after travel to thin your blood and aid circulation. Skip alcohol and cut back on caffeine as both of these increase fluid loss.

Set a phone alarm or use a hydration app to remind you to sip every 30 to 60 minutes on flights. Bring your own refillable bottle of water, as allowed by local security regulations, on long drives and stop every hour to refill.

Check urine color as an easy hydration check; pale straw color is good, darker is a sign that you need to increase fluids.

4. In-Transit Movement

Pre-Flight Checklist: Stand and walk at least every 1 to 2 hours on flights and during long car rides to reduce clot risk. Do seated leg exercises: ankle circles, heel-toe lifts, and foot pumps.

Perform sets of 10 to 20 reps every 30 to 60 minutes. Go for an aisle seat — more room to stretch and easier access to the aisle. Use a timer, watch alarm, or dedicated app to nudge you into action so you don’t lose track of time.

5. Medication Protocol

Take anticoagulants or other prescribed drugs as directed and keep them in your carry-on. Pre-Flight Checklist: Keep your dosing regimen on track across time zones by converting times prior to travel and use pill organizers, complete with alarm reminders.

Pay attention to side effects such as abnormal bleeding, excessive bruising, or frequent dizziness and be prepared to document them to a physician.

Recognizing Alarms

Recognizing alarms is knowing which signs indicate a potential deep vein thrombosis (DVT) or pulmonary embolism (PE). This enables you to respond quickly if you travel to or from liposuction. Read each point as actionable, immediate steps and examples you can apply on a plane, in transit or at a hotel.

Learn the warning signs of DVT: leg swelling, pain, redness, and warmth

Swelling that comes on in one leg, typically around the calf or ankle, can be a warning sign. Feel on both legs. If one side appears significantly more full or shoes seem smaller on one foot, record the difference.

Pain from a DVT can feel similar to a cramp or a dull ache that doesn’t subside with rest. Press gently over the calf. Increasing pain with pressure or flexing the foot can suggest a clot. Skin over the area can appear red or darker than surrounding skin and feel warm.

Track these signs with photos and brief notes on time and activity, for example: “left calf swollen after a 5-hour flight; started 4 hours after landing.” That record aids physicians in determining how rapid the symptom onset.

Watch for symptoms of pulmonary embolism: chest pain, shortness of breath, rapid heartbeat

PE symptoms could be immediate and severe. Chest pain can be sharp and worse with deep breaths or feel like pressure across your chest. Shortness of breath may be at rest or with minimal exertion and often has a different quality than post-op breathlessness associated with pain or anxiety.

A racing heartbeat, dizziness, or loss of consciousness are emergency warning signs. If coughing generates blood-tinged sputum, consider it an emergency. For example, during a taxi ride after a flight, you feel sudden breathlessness and a racing heart; that warrants immediate medical evaluation.

Create a symptom checklist to reference during and after travel

Create a plain old one-page checklist to stash in your carry-on and phone. Include items: one-sided leg swelling, new calf pain or tenderness, redness or warmth of leg, sudden chest pain, unexplained shortness of breath, rapid pulse, coughing blood, fainting.

Include time stamps when symptoms initiate and an input for recent activity, such as a plane ride or long drive. Maintain emergency contacts, your surgeon’s phone, and local emergency numbers on one convenient page.

Use metric distances walked or time seated to sync with global readers. Example entry: ‘Flight: 8 h; symptoms started 6 h after landing; left calf swelling noted.’

Act immediately if any alarm symptoms develop, regardless of location

Don’t wait. Go to urgent care or ER where you are. Tell your doctors about your recent liposuction and your travel history. If car transport is the only choice, try to prevent long waits and keep the leg elevated whenever possible.

If you’re overseas, head to a local emergency room or call your embassy for a medical referral. Early imaging and blood tests can detect DVT or PE and initiate treatment right away, reducing the risk of complications.

A Surgeon’s View

Surgeons consider risks and benefits to recommend for patients who intend to fly after liposuction. The real issue is avoiding DVT while having the patient able to live life again. Liposuction induces tissue trauma, inflammation, and temporary immobility that combine to increase DVT risk. A surgeon considers the length of the procedure, the patient’s pre-operative health, and the timing of travel to determine what is safe.

Patients need to appreciate that a customized plan according to these considerations is more valuable than a blanket guideline.

Value your surgeon’s perspective on balancing recovery and travel safety

Your surgeon evaluates clot risk by combining operation size (small local versus large multi-area liposuction), operative time, and patient factors such as age, body mass index, smoking, hormone use, and history of clots. For example, someone who had limited liposuction under local anesthesia and walks soon after may face minimal added risk from a short flight.

Extensive liposuction under general anesthesia with limited mobility for days raises concern. Surgeons factor in planned travel duration and mode. A direct two-hour trip is different from a 12-hour flight with long layovers. Trusting the surgeon’s view helps align safety with real-life plans.

Incorporate professional recommendations into your travel plans

Surgeons usually advise postponing elective long-haul trips until some healing and mobility have returned. They tend to recommend at least 1 to 2 weeks for short trips following minor cases and 4 to 6 weeks for larger procedures, but advice is individualized.

Practical things are wearing compression garments when you fly, graduated compression stockings (15 to 30 mmHg or stronger if prescribed) and abstaining from alcohol and sedatives that make you too lazy to move. Surgeons can prescribe low-dose anticoagulants for high-risk patients. Adhere to the precise dose and duration they determine.

Secure medical clearance or a letter for airlines and pack wound care and prescriptions in carry-on.

Understand the rationale behind specific post-op restrictions and advice

Limitation attempts to minimize stasis, inflammation, and endothelial damage, which are three components of thrombogenesis. Early ambulation decreases venous stasis. Compression reduces limb swelling and venous pressure. Anticoagulants prevent clot formation at times of highest risk.

By shunning extended immobilizing travel in those initial weeks, you target the most dangerous risk period. Surgeons break down these steps so patients can balance the risks of travel against benefits such as work or family obligations.

Use your surgeon’s insights to inform your personal prevention strategy

Translate the surgeon’s plan into specific steps: book aisle seats for easier walking, schedule flights with breaks, set alarms to move every 30 to 60 minutes, hydrate with water measured in liters, avoid tight clothing, and follow garment and medication schedules exactly.

Discuss travel dates clearly with your surgeon and obtain written instructions.

Travel Mode Matters

Travel increases the risk of DVT after liposuction because immobility, sitting position, and cabin or vehicle environment impact blood circulation. Pick travel that moves you, schedule breaks, and tailor precautions to time and seat room.

Air, Car, Train, Bus: risk comparison and movement options

Air travel is frequently assumed to have greater DVT risk for extended flights because of extended periods of immobility, decreased cabin humidity, and constrained seating space. Flights under two hours pose a low additional risk, but anything over four hours is worrisome.

In economy, legroom restricts ankle and calf movement. Getting up in the aisle every 60 to 90 minutes and performing seated calf pumps helps. Business or exit-row seats enhance space and reduce risk.

Car travel enables you to control stops and posture. Periodic breaks at 45 to 60 minute intervals to walk 5 to 10 minutes and light leg stretching reduce pooling of blood. Fixed seats and limited leg movement on long drives increase risk like long flights.

Good lumbar support and keeping legs uncrossed aid venous return. Trains often provide additional space to stand and stroll. Numerous trains provide convenient access to aisles, bathrooms or car vestibules, making it easy to wander.

On trips longer than three hours, try to stand and stride every 45 to 60 minutes. Best reserved seating with room to stretch your feet out. Buses are a mixed bag. Long distance ones can be as risky as a plane when seats are cramped and stops infrequent.

Planned stops allow for walking, but many services operate for hours with very few. Opt for services that pull in often or reserve aisle seats to hop up when permitted.

Adjusting preventive measures by duration and seating

For trips under 2 hours, concentrate on lightweight compression apparel and calf work. For medium trips of 2 to 4 hours, insert planned walking breaks and contemplate low-dose anticoagulant only if prescribed.

For long trips greater than 4 hours, increase your walking frequency, wear medical grade compression stockings of 15 to 30 mmHg or as recommended, hydrate, and adhere to any pharmacologic prophylaxis physician orders.

Tight seating means more frequent in-seat exercises: ankle circles, heel lifts, knee lifts, and short isometric gluteal squeezes. Wider seats allow you to stretch out your legs and switch positions.

Use that to switch between feet flat and propped on a small carry-on to stimulate flow.

Pros and cons of each travel mode for post-liposuction patients

Air: pro — fast, predictable stops. Con — cramped economy seating, cabin dehydration.

Car: pro — full control of breaks and temperature. Con — driver fatigue limits movement opportunities for one person.

Train: pro — easy to walk and stretch. Con — variability in seat design and crowded cars.

Bus: pro — often economical with aisle access. Con — long stretches without stops and tighter seats on many routes.

Conclusion

DVT prevention after liposuction travel tips. Try to walk as much as possible, flex your calves, and wear compression garments on any flight that is longer than four hours. Choose aisle seats and schedule stops for quick strolls. Discuss blood thinners with your surgeon, timing of travel, and any urgent signs. Be aware of DVT and PE symptoms, and get moving quickly if you experience pain, swelling, or sudden loss of breath.

For short trips, limit sitting and hydrate. For extended journeys, supplement with calf pumps and light leg massage. If you have additional risk factors, postpone traveling or opt for ground travel with frequent stops. Research your airline’s seat and mobility options beforehand. Schedule a post-travel follow-up within a week.

If you want, I can create a one-page checklist or printable travel plan customized for your surgery date and flight.

Frequently Asked Questions

What is the safest time to travel after liposuction to reduce DVT risk?

Wait at least 1 to 2 weeks if it’s a short trip and 4 to 6 weeks if you’re flying long haul or doing an extended trip, unless your surgeon clears you earlier. Recovery and personal risk factors dictate the specific timing.

Which signs after travel suggest a possible DVT or PE?

Watch for calf swelling, pain or redness, or sudden shortness of breath, chest pain or lightheadedness. Go to the emergency room right away for symptoms involving your breathing or chest.

What can I do during a flight to lower my DVT risk after liposuction?

DVT prevention after liposuction travel tips — Move every 30 to 60 minutes, wear graduated compression stockings, stay well hydrated, and do ankle pumps and leg stretches while seated. Consult your surgeon regarding blood-thinning medicine if you have high risk.

How does the type of travel (car, plane, train) affect DVT risk after surgery?

Any long, sedentary trip increases the risk of DVT, no matter how you’re getting there. Schedule regular walking breaks on road trips and extend movement and compression strategies to train and plane travel.

Should I use blood thinners before travel after liposuction?

That is unless your surgeon prescribes them. They evaluate bleeding versus clot risk and for high-risk patients, sometimes suggest short-term anticoagulation around the time of travel.

When should I contact my surgeon about travel-related concerns?

Touch base with your surgeon for increased swelling, redness, unrelenting pain, fever, wound concerns, or any breathing or chest symptoms. Early reporting helps prevent serious complications.

Are compression garments helpful during travel after liposuction?

Yes. Graduated compression stockings or prescribed garments combat swelling and boost circulation. Take them as directed by your surgeon for additional coverage when you travel.

Awake Liposuction: Weighing the Pros and Cons

Key Takeaways

  • Awake liposuction can minimize recovery times and anesthesia risks compared to general anesthesia, which may appeal to patients desiring quicker downtime and fewer systemic side effects.

  • Local-only cases may restrict how much fat can be safely removed. Candidates should talk to a qualified surgeon about realistic expectations for volume.

  • Pain and discomfort are usually controlled with local anesthesia and mild sedation. Patients should prepare for days of soreness following their procedure and adhere to aftercare instructions to minimize complications.

  • Infection, contour irregularities and uneven results can still occur, so choosing an experienced board-certified surgeon and reviewing before-and-afters is important.

  • Price is generally less than procedures utilizing general anesthesia. Patients should consider surgeon experience, facility quality, and post-op visits when comparing cost.

  • While awake liposuction may sound tempting, ask the right questions at your consultations about technique, expected results, recovery timeline, and contingency plans so you can make an informed decision that suits your goals and health.

Awake liposuction pros and cons means advantages and disadvantages of awake liposuction. Its potential to reduce recovery time, anesthesia costs, and provide real-time patient feedback are significant benefits.

However, risks encompass intraoperative discomfort, limited utility for large volume fat extraction, and risk of contour irregularity. Patient selection, surgeon skill, and technique influence results, making these factors crucial for successful outcomes.

The body of the text discusses who is ideal for this procedure, recovery expectations, and safety advice. Understanding these elements can help patients make informed decisions about awake liposuction.

Conclusion

Awake liposuction provides definite benefits and definite restrictions. You get faster recovery, lower cost, and less risk from general anesthesia. You encounter increased sensation during the procedure, more rigorous pain management requirements, and limitations on how much fat your crew can safely extract. For individuals with mild to moderate fat pockets, awake lipo does the trick. For some large-volume cases or medical conditions, a surgeon might favor general anesthesia.

For instance, a patient with small pockets of stubborn belly fat can exit the clinic the very same day and return to light work within days. A patient requiring large-scale contouring might require hospital time and more extensive care.

Balance objectives, wellness, and the surgeon’s history. Book a consult, request before and afters, and have transparent pricing and recovery protocol.

Frequently Asked Questions

What is awake liposuction?

Awake liposuction is liposuction done under local anesthesia while you’re awake. It is fat removal with minimal sedation. You sidestep general anesthesia and frequently experience quicker recovery and less anesthesia-related risk.

Who is a good candidate for awake liposuction?

Good candidates are healthy adults close to their ideal weight with localized fat pockets. They need to be realistic and have no major medical issues that require general anesthesia.

What are the main benefits of awake liposuction?

Advantages are decreased anesthesia risk, faster healing, outpatient surgery, and frequently reduced swelling and bruising. You can typically resume light activity earlier than with general anesthesia.

What are the risks and complications?

Risks are infections, bleeding, uneven contours and numbness. There can be pain and fluid retention. Significant complications are uncommon but do occur, particularly with large volume cases.

How long is recovery after awake liposuction?

Most return to light activity in 1 to 3 days. Swelling and bruising take weeks to subside. Final results show in 3 to 6 months as tissues settle.

Does awake liposuction hurt during the procedure?

You can experience pressure, pulling, and slight pain. Local anesthesia and tranquilizers keep pain to a minimum. Surgeons sense comfort and can easily adjust local anesthetic and tumescent fluid amounts.

How do I choose a qualified surgeon for awake liposuction?

Select a board-certified plastic surgeon or seasoned cosmetic surgeon with before and after pictures, patient testimonials, and detailed risk and expectation disclosures. Inquire about their awake liposuction experience and rates of complication.

Laser Lipo vs Traditional Lipo: Which One Is Right for You?

Key Takeaways

  • Laser liposuction liquefies fat using laser energy and typically results in less tissue trauma and provides slight skin tightening, making it ideal for small, localized areas and reducing recovery time.

  • Traditional lipo physically suctions larger volumes of fat and remains the option of choice for more dramatic reshaping when deep fat removal is necessary.

  • Decide based on goals, health, and skin quality since laser lipo aids skin contracture and traditional lipo extracts more volume and may require supplemental skin procedures.

  • Anticipate varying recoveries with compressive garments necessary for both. Traditional lipo requires more downtime and swelling. Laser lipo allows for a quick return to activities.

  • Consider risks, costs, and provider expertise as well since both have complication potential and results are surgeon dependent and require good aftercare.

Laser lipo vs traditional lipo.

Laser lipo applies low-level laser energy to liquefy fat prior to extraction, typically resulting in reduced bruising and quicker recovery times.

Traditional lipo uses suction to literally remove fat, generally providing greater volume extraction and more expansive contouring.

It depends on your target area, how much fat you want removed, recovery time, and health factors.

The lists below break down advantages, dangers, and recuperation specifics.

Understanding The Procedures

Laser liposuction and traditional liposuction are both surgical methods of eliminating fat that doesn’t go away with diet and exercise. They aim to reshape body contours, but the methods differ. Laser lipo uses focused light to break down fat before removal, while traditional liposuction relies on mechanical suction through a cannula.

These distinctions influence invasiveness, recovery, and secondary results like skin tightening. An in-depth consultation with a doctor is important prior to deciding on a route, so patients are aware of risks, downtime, and if more comprehensive approaches such as Lipo 360 are suitable.

Traditional Liposuction

Conventional liposuction is a surgical procedure in which a slender metal tube, known as a cannula, is inserted through tiny cuts to suction fat from specific pockets. Surgeons commonly use the tumescent technique: they inject a saline solution with lidocaine and epinephrine into the area to reduce pain, swelling, and blood loss. This helps loosen fat for easier removal.

The process typically takes a couple of hours depending on how many areas are treated, and most patients leave the same day. If the goal is a bigger volume or multiple sites, say combining abdomen, flanks, and thighs, recovery is a bit longer and significant reshaping can be achieved. Nearly everyone arranges at least a week off work or school, and downtime could be anywhere from a day or two to a few weeks in duration.

Lipo 360 takes away fat around the entire circumference of the waist, provides even extraction, and a smoother, more natural shape but generally requires a longer recovery than single-area procedures. All forms have risks and necessitate careful preoperative counseling.

Laser Liposuction

Laser liposuction, known as laser-assisted lipolysis, is performed by inserting a thin laser fiber through tiny incisions to target and liquefy fat cells. The surgeon then suctions out the liquefied fat or lets your body absorb some of it. Since the instrument and incisions are smaller, trauma to surrounding tissue is often less.

The laser’s heat encourages collagen and elastin production, giving you mild skin tightening and enhanced surface tone once healed. Laser lipo is well suited to smaller, localized deposits—think chin, inner knees, or small abdominal pockets—and for patients seeking modest contour refinement.

Procedure times are generally brief, and recovery may be quicker than with conventional lipo when only small areas are addressed. Patients need to discuss risks and realistic results with their doctor.

Key Differences

Both focus on eliminating undesirable fat, but they do it in very different ways, with unique impacts on tissue, recuperation, and end contour. Here’s a targeted look at the vital distinctions so you can decide which aligns with your objectives and wellness status.

1. The Method

Traditional liposuction leaves fat by inserting a cannula and physically suctioning fat cells from the treated area. The surgeon employs manual motion to disrupt and evacuate tissue, which can be well-suited for larger-volume removal.

Laser lipo initially uses laser to heat and liquefy fat cells, which are then removed with suction or absorbed by the body. Laser uses heat to target fat and possibly some surrounding tissue through a controlled thermal effect.

Both require small skin incisions, but the devices and mechanisms differ. One is mechanical, the other is thermal-assisted. For example, treating a large abdomen often favors a cannula technique, while a small submental (under-chin) pocket can respond well to laser melt.

2. The Invasiveness

Classic liposuction is more invasive, employing bigger cannulas and inflicting more tissue trauma under the skin. The technique is surgical and tends to cause more bruising and swelling due to the mechanical trauma.

Laser liposuction is often described as minimally invasive because it uses finer probes and smaller entry points. The concentrated laser minimizes blunt trauma. Less trauma usually translates to less bruising and less immediate inflammatory response.

The level of invasiveness guides candidacy. Patients with certain health issues may be steered toward less invasive options or advised against either technique.

3. The Recovery

Recovery from traditional liposuction is longer, with soreness, bruising, and swelling that can last weeks to months. Typically, patients require additional rest and a more gradual reintroduction to intense activity.

Laser lipo usually has less downtime. Numerous treatments complete in around 20 to 30 minutes for small areas, and patients can frequently return to activity sooner.

Both have compressive garments to help contour and decrease swelling. Results appear as swelling subsides; weeks for laser and months for large-volume traditional lipo.

4. The Results

Traditional liposuction provides more volume loss and more dramatic reshaping for large areas. It is the default for serious fat removal.

Laser lipo delivers more subtle contouring and typically some skin tightening from the heat effect, which is great for small pockets. Final results are predicated on aftercare, weight stability, and skin laxity.

Patients within approximately 20 percent of their ideal weight and with good skin tone experience the most optimal “shrink-wrap” effects. Both are able to address the chin, hips, abdomen, knees, flanks, chest, arms, and thighs when performed by skilled clinicians.

5. The Ideal Candidate

Ideal traditional lipo patients want big-volume reduction and have pretty good skin elasticity to re-drape. Laser lipo is best for individuals with mild to moderate fat pockets seeking both sculpting and skin tightening.

Both are optimal for dieters close to their goal weight, fit and with reasonable expectations. Consider side effects including numbness, bruising and tenderness that can persist for weeks.

Discuss your health history with a surgeon.

The Recovery Journey

Recovery post laser lipo or standard liposuction is a journey of healing and un-swelling. Shape differences are typically noticeable even on day one, yet the journey to final results involves swelling, healing, and contour settling over time. Below are action steps, milestone expectations, and nursing care notes to help direct healing and minimize complications.

Immediate Aftercare

Wear compression garments as directed. These will decrease swelling and support your new contours. These pieces assist skin re-drape and prevent fluid accumulation. The majority of surgeons will advise wearing them 24/7 for 1 to 2 weeks, then part-time for a handful of weeks more.

Monitor incision sites for signs of infection: increasing redness, warmth, pus, or severe pain that does not ease with medication. Slight redness and tenderness are typical. When you experience abnormal pain or spreading redness, reach out to your provider immediately.

Limit activity and rest the first days. Short walks encourage circulation and reduce clot risk. Don’t do any heavy lifting or intense exercise for at least two to four weeks depending on how much fat was removed. Gradually reintroduce activity to minimize stress on recovering tissues.

Prescribed pain meds and cold compresses for comfort. Follow your surgeon’s plan for over-the-counter pain relievers. While some patients notice a cooling sensation when the laser applicator is initially applied during treatment, that typically dissipates once the treatment concludes. Ice packs can help reduce swelling and soreness.

Checklist — Immediate Aftercare Essentials:

  • Compressive garments (fit guidance from surgeon)

  • Prescription pain meds and any antibiotics

  • Ice packs or cold compresses

  • Wound care supplies and sterile strips

  • Scheduled follow-up appointment within 48–72 hours

Long-Term Outlook

Complete results can take weeks to months as swelling decreases. Most patients experience significant improvement by the third or fourth month, when progress typically plateaus. Skin tightening from laser lipo continues to get even better over the next few months as well.

Maintain a balanced diet and exercise regimen to sustain results. While both remove fat cells from treated areas, gaining weight can bring back bulk and alter contours again. Surgery and long term weight management lead to staying toned for years.

Anticipate numbness, tingling, bruising, and tenderness that are patient specific. These can stretch on for weeks to a few months. Any lingering sensory changes should be addressed during your follow-up appointments. Swelling and inflammation are par for the course. Combat this with compression, rest, and if advised by your clinician, lymphatic massage.

Checklist — Long-Term Milestones:

  • 2–4 weeks: reduced swelling, return to most daily activities

  • 6–12 weeks: more visible contour, decreased bruising

  • 3–4 months: typical result plateau, final assessments

Adhere to post-surgery instructions to avoid complications and safeguard results. Recovery depends on how much fat was removed and the method employed. Personalized attention yields superior results.

Risks And Realities

Laser lipolysis and traditional liposuction both minimize localized fat but have risks and limitations. Typical side effects include bruising, swelling, numbness, temporary tenderness, and mini-scars, which often dissipate within weeks. All surgeries can result in infection, bleeding, delayed wound healing, and contour deformities.

Realistic expectations are vital. Neither method replaces weight loss, and the final shape depends on skin quality and overall health. A concise side effect table with average durations allows patients to weigh outcomes and organize recovery.

Potential Complications

Bleeding, poor wound healing and temporary tenderness can occur with either method, although frequency and severity differ by technique and patient variables. Conventional liposuction relies on larger cannulas and is more tissue traumatic, resulting in more bruising and a longer period before swelling subsides.

Contour deformities, such as irregularities, divots, or asymmetry, occur more often following traditional lipo, particularly when uneven amounts of large volume are removed. Laser lipo utilizes tinier tools and laser energy to liquefy fat and cauterize tiny blood vessels as it operates.

That softer touch tends to minimize bleeding and reduces bruising and tissue trauma. Major complications are uncommon, with reported major complication rates for laser lipolysis under 0.1%. Still, laser energy can burn or discolor skin if misdirected or if safety guidelines are ignored.

Infection can occur with any invasive procedure. Thorough sterile technique and immediate wound care are important. Nerve irritation or numbness can persist for weeks to months but frequently lessens. Selecting an experienced board-certified plastic surgeon or competent operator mitigates risk.

Facility standards, device type and experience of the operator directly influence complication rates.

Managing Expectations

Make reasonable expectations for how much fat can be safely extracted and what shape transformation is possible. Think modest contour improvement per session, not dramatic weight loss. Neither laser lipolysis nor traditional lipo treat generalized obesity; they address localized pockets.

Skin quality and elasticity impacts results. Patients with lax, redundant skin may require skin-tightening procedures or excisional surgery for best results. A few individuals need a few sessions or mixed procedures to achieve their desired results.

Periodic touch-up sessions every 6 to 12 months can maintain results for certain patients. Post-treatment care impacts recovery and outcomes. Mild swelling and bruising generally dissipate within 1 to 2 weeks, with the majority of bruising clearing up by three weeks.

Wearing your compression garments as prescribed, 24/7 for the first week and then just during the day for 1 to 2 additional weeks, helps with contouring and swelling. Standard over-the-counter pain relievers handle trivial pain for the vast majority of patients.

The Financial Aspect

–– Laser liposuction and traditional liposuction both come with obvious expenses beyond the operation. Upfront price estimates typically don’t include associated costs like anesthesia, facility fees, post-op garments, and follow-up visits. Readers should treat quoted figures as a starting point and construct a complete cost picture before making a decision.

Cost Factors

Prices depend on the size of treatment areas, the amount of fat extracted, and patient location. Smaller areas, such as under the chin, can be significantly less expensive than several larger areas, such as the abdomen and flanks. Surgeon fees typically scale with complexity. Extracting more fat or addressing uneven areas requires additional time and expertise, which increases the cost.

Pinnacles like SmartLipo, ProLipo, or other laser-assisted systems are added to the total. Laser devices bear capital costs that clinics pass on to patients, and some providers bill by laser handpiece or per session. Each laser lipo session runs anywhere from $1,000 to $3,000 typically, and you may need more than one depending on your goals and how your tissue responds.

Anesthesia and facility fees contribute a significant portion. Local anesthesia might keep costs down, while general anesthesia and an operating room drive facility fees up substantially. Factor in the cost of compressive garments and anticipated follow-up visits. Plan financially for at least one to three follow-ups and occasionally imaging or contouring as well.

Surgeon expertise and clinic reputation factor into the equation. Top-notch surgeons or recognized centers might cost more, but they might decrease the risk of complications and revision. For instance, a famous surgeon in a metropolitan area might be able to command a fee premium that certain patients are willing to pay for superior results.

Overall Value

It’s worth considering both objective results and subjective values. A better shape and confidence are great, but these are subjective. Laser lipo’s skin-tightening benefit can be a value-add for patients with mild skin laxity who might have otherwise required a separate tightening procedure.

Long term value linked to weight staying in place. When a patient maintains a stable weight, the results stand the test of time. If not, cranioplasties may ensue. For others, laser lipo’s shorter downtime and lower complication profile is cost-effective in the long run if you factor in fewer lost work days or fewer follow-up procedures.

As a value judge, review before-and-after photos, patient testimonials and complication rates. Factor in financing where available and create a budget worksheet that includes procedure fee, anesthesia, facility, garments, travel and repeat sessions to gauge affordability and real cost.

Beyond The Brochure

Regardless of whether it’s laser or traditional liposuction, fat is fat is fat removed. Consider practice expertise, facility quality, your own body and reasonable healing timelines. Think about skin quality, potential for combined procedures and a definitive personalized plan that impacts safety and long-term outcomes before selecting a technique.

Practitioner Skill

It’s the surgeon’s experience and technique that determines both safety and aesthetic result. Board certification and a proven track record in both laser and traditional liposuction are critical. Ask for actual case experience, not practice claims.

Browse before and after galleries that correspond to your body type, and hear from patients on their complications, recovery time and ultimate contour. An experienced surgeon will talk you through when to take out more fat versus when to stop to avoid irregularities and will discuss overnight stays when large-volume removal necessitates observation.

A skilled surgeon customizes their approach to anatomy and goals, selecting cannula size and energy settings for laser lipo or hybrid lifts when necessary. Practical questions: How many similar cases have you done? What complication rates do you monitor? How are you going to control pain and swelling?

The Skin Factor

Skin elasticity is what dictates the body’s ability to retract following fat removal. Nice elasticity usually produces smoother lines. Inadequate skin elasticity threatens sagging skin and contour deformities.

Laser lipo provides thermal collagen stimulation that can enhance retraction and surface smoothness in certain patients. Conventional liposuction eliminates fat without collagen stimulation, and patients with loose skin might subsequently require a surgical lift like a tummy tuck.

Evaluate skin quality during consults with photos and hands-on exams. Inquire about age-related thinning, sun damage, and weight-loss history. Expect honest guidance. If skin won’t retract enough, combining procedures or planning for staged treatments may be advised.

Combining Treatments

Synergizing treatments can provide more holistic outcomes than one approach in isolation. Laser lipo and a surgical lift can remove fat and tighten loose skin in the same area, while adjunct cellulite therapies can help with surface texture.

Some clinics provide hybrid options, manual lipo with energy-based tightening, as a compromise between fat extraction and skin treatment. Staged treatments months apart can tackle fat first, followed by skin laxity if needed, giving swelling a chance to subside before additional treatment.

Chart a goal and timeline aligned treatment plan. Include recovery realities: possible overnight stay for large-volume cases, wearing compression garments for 1 to 2 weeks, avoiding intense exercise for up to six weeks, and expecting swelling, bruising, and soreness for weeks to months.

The fat removed is permanent, but weight control is key for enduring results.

Conclusion

Traditional lipo cuts fat by mechanical means, resulting in considerable damage to the surrounding tissue. Traditional lipo slices and suctions bigger quantities in a single pass. Recovery from laser lipo is usually milder and briefer. Recovery after traditional lipo can involve more swelling and bruising but can remove more volume per session. Both pose risks of infection, uneven contours, and numbness. It depends on the clinic, the scope, and where you go.

For an individual who desires mild contouring and rapid rebound to the office, laser lipo is logical. If you require big-volume removal or wide-area sculpting, then traditional lipo fits better. Consult with a board-certified surgeon. Request before-and-after photos, specific fees and a recovery plan.

Compare side by side and then choose the one that aligns with your objectives and schedule.

Frequently Asked Questions

What is the main difference between laser lipo and traditional (suction-assisted) lipo?

Laser lipo vs traditional lipo Traditional liposuction mechanically suctions fat without heat. Laser lipo might bruise less and recover quicker. Traditional lipo can more predictably remove greater volumes.

Which procedure has a faster recovery time?

Laser lipo usually has a faster recovery. Patients say there is less swelling and they feel they’re back to normal activities sooner. Recovery depends on the area treated and your overall health.

Are the results from laser lipo permanent?

Fat cell removal is permanent in treated regions. The existing fat cells can still grow if you gain weight. Long-term results will depend on stable weight, healthy eating habits, and regular exercise.

Is one method safer than the other?

Both have risks with good surgeons. Laser lipo introduces thermal risks, such as burns, and traditional lipo has a higher risk of contour irregularities and fluid loss. Select a board-certified plastic surgeon and discuss safety.

How do costs compare between laser lipo and traditional lipo?

Laser lipo is often more expensive because of the specialized equipment and technology. The actual price varies based on the area of treatment, the location of the clinic, and the experience of the surgeon. Get itemized quotes and compare.

Which procedure is better for body sculpting and skin tightening?

Laser lipo can enhance skin tightening as a result of heat stimulating collagen. Traditional lipo is a great volume removal technique that may require adjunctive skin tightening treatments. Your anatomy and skin elasticity dictate what is best.

Who is an ideal candidate for laser lipo versus traditional lipo?

Optimal laser lipo patients have small to moderate fat deposits and good skin tone. Traditional lipo is best for larger volumes of fat, even if you have loose skin. A consultation with a qualified surgeon will determine your suitability.

Lumpiness After Liposuction: Causes, Management

Key Takeaways

  • Lumpiness after liposuction can be caused by natural inflammation, fluid buildup, liposuction unevenness, internal scarring, or fat necrosis.

  • Selecting an experienced surgeon and modern liposuction methods reduces the chances of unevenness and promotes smoother healing.

  • Your skin quality, prior health conditions and some healing responses can all impact the lumpiness seen after surgery.

  • The key to avoiding liposuction lumpiness is proper aftercare. Wearing compression garments, gentle massage, and light movement reduce swelling and support even skin texture.

  • Most lumps and bumps do soften and dissipate over weeks to months, but for any persistent problems, consult a trained medical professional.

  • If lumpiness persists, consistent follow-up and non-surgical or revision procedures can help with these concerns and enhance overall outcomes.

Liposuction lumpiness causes are uneven fat removal, swelling or scar tissue beneath the skin. Lumps or bumps can appear in the areas where fat was removed.

Sometimes healing variances, skin type, or the body’s reaction to surgery contribute. With the proper technique and expert attention, it reduces the risk.

To discover what causes lumpiness, it’s useful to be aware of typical culprits and the impact each has on healing.

Understanding Lumpiness

Lumpiness after liposuction can be disconcerting. It’s a known and usually transient aspect of recovery. Most patients get lumps and bumps in the first few weeks after surgery as tissues settle. Recovery timelines typically estimate that swelling and firmness peak within 2 to 4 weeks, and lumps or irregularities may become more apparent during this time.

Getting to know what causes lumpiness will help you set expectations and take care of your recovery properly.

1. Natural Inflammation

Inflammation, a normal healing response of the body, begins shortly after the treatment. This irritation causes swelling and a firm, lumpy sensation in the area that received needles. These symptoms typically peak in the first two to four weeks.

As the swelling subsides, those smoother contours start to peek through. If swelling is severe or lasts a long time or if it’s accompanied by other symptoms such as redness or pain, it may require medical intervention.

2. Fluid Accumulation

Fluid accumulation is a natural response to surgical injury and suctioning. It can become inflamed and cause lumpiness. Compression and hydration help reduce fluid retention.

Occasionally, fluid can collect in pockets called seromas. These might need some drainage if they don’t resolve. Lymphatic drainage massage may aid fluid movement and accelerate healing.

3. Uneven Removal

Uneven fat removal can leave skin looking or feeling lumpy, particularly in the abdomen or flanks. Variations in fat thickness or the appearance of the surgeon’s technique can accentuate these imperfections.

Minor lumpiness tends to subside as time passes, but consistent lumps should be addressed with revision. Selecting a surgeon who has done it before is key to reducing the risk of lumpiness and encouraging smoothness.

4. Internal Scarring

Internal scarring — fibrosis — is a common part of the body’s healing process after liposuction. This starts a few days post surgery and can last for weeks. Scar tissue can be firm or develop hard lumps, known as adhesions.

Most scar tissue will eventually become soft; however, sometimes it causes long-term lumpiness. Fibrosis can be softened with gentle massage, and collagen is integral to scarring.

5. Fat Cell Death

Fat necrosis is a natural consequence of liposuction. Necrotic fat cells can cause hard lumps in the treated areas. The body naturally dissolves and expels them through normal healing.

Most of these lumps are self-limited, but persistent or painful nodules can represent fat necrosis, which may require additional management.

Surgical Influence

Liposuction results are contingent upon the surgery. The technique, the instruments and the surgeon’s skills can contribute to the risk of lumpiness. Factors such as surgical planning, method of fat extraction or even type of aftercare can alter the body’s healing response and smoothness of your result.

The table below shows how different surgical techniques can affect the risk of lumpiness:

Technique

Impact on Lumpiness

Example

Micro-cannula (≤3 mm)

Less trauma, smoother results

Used in delicate areas like arms or chin

Fat layer preservation

Reduces contour irregularities, less bleeding

Leaving at least 5 mm under skin and fascia

Ultrasound-assisted

Breaks up fat evenly, reduces tissue damage

Vaser lipo for improved skin retraction and less swelling

Manual technique

Higher risk of unevenness, more tissue trauma

Older, larger cannulae and aggressive suction

Individualized planning

Matches approach to skin elasticity, anatomy

Tailored fat removal for each patient’s body and goals

Technique

Distinctive forms of liposuction mold recovery and risk for lumps. Soft liposuction, performed with micro-cannulae 3 mm or less with blunt tips, can reduce edema and hematoma. Surgeons employing these scalpel-thin instruments can bypass rough abuse to skin and muscle.

This is particularly useful in thinner-padded regions. Some surgeons prefer to leave a thin fat layer, approximately 5 mm, under the skin and on the fascia. This easy trick can reduce contour issues and diminish the danger of prominent lumps.

It helps the skin ‘snap back’ after fat removal, which is an important feature for patients with less elastic skin. Personalized surgical schedules count as well. Surgeons who study a patient’s individual anatomy and skin quality can make more informed decisions on where and how much fat to extract.

This lowers the likelihood of overcorrection or patchy results. If irregularities do pop up, surgeons typically wait 6 to 12 months for tissues to settle before considering corrective surgery.

Technology

Technology matters for silky smooth liposuction results. Devices such as Vaser lipo utilize ultrasound energy to disrupt fat cells in a targeted manner. That means less pressure is required, reducing the risk of tissue bruising and post-operative lumpiness.

Ultrasound-assisted liposuction aids skin tightening. It heats the tissue, allowing the skin to retract and adhere to the new shape more readily. Pioneering technology translates to smaller incisions and quicker recovery.

These help reduce swelling, bruising and uneven healing. They provide surgeons with greater control, allowing them to sculpt the body with greater precision. Over the years, this tech has resulted in fewer incidences of lumps and patients of a lot of different backgrounds are experiencing smoother outcomes.

Expertise

A talented plastic surgeon will make all the difference in preventing lumpiness. Years of in-the-trenches experience teach a surgeon how much fat to remove, how to manipulate the cannula, and how to tailor technique to every individual body.

Verifying a surgeon’s training, board certification and patient outcomes track record outlines transparent expectations. Patients should always request before-and-after photos to get a feel for the surgeon’s results.

Top surgeons think ahead to aftercare as well. They might recommend compression garments daily for two to six weeks, surgical-site massages, and manual lymphatic drainage a week or two after surgery.

These promote healing, manage swelling, and assist the skin in settling nicely. If lumps persist at six months, additional treatment such as autologous fat transfer can be considered.

Your Body’s Role

It matters how your body heals after liposuction — it’s not all about the surgery. Personal healing varies based on skin type, medical history and post-treatment care. These things determine whether lumpiness, fibrosis or other problems emerge. Knowing the body’s role can help manage expectations and, more importantly, help guide smarter recovery decisions.

Skin Quality

Your skin is the single most important factor that alters how your body is shaped and feels after liposuction. If your skin is very elastic, it tends to respond well, draping over new curves as post-operative swelling subsides. Weak or thin skin is less likely to ‘snap back’ and can display lumps, bumps, or sagging.

Collagen plays a starring role here. It helps keep skin taut and elastic. If you’re rocking some collagen recovery, you tend to experience less of these ripples or dents. Collagen declines with age or illness, so results are hit or miss.

Hydration counts. Adequate hydration assists skin cell repair and maintains skin elasticity. Others apply retinoid or vitamin C-based creams to help give skin a lift, but these are slow to make changes too. Easy things like gentle massage and maintaining moist skin can aid healing.

Healing Response

Each body responds to surgery differently. Your body’s first reply is inflammation—swelling, redness, and hardness. This is natural and healing. Within the initial couple of weeks, your body might develop fibrous tissue or fibrosis, causing hard lumps beneath the skin.

Swelling is at its worst during the first week and subsides over the course of a few weeks, although some areas of firmness may persist for months. We all worry about lumps, but the ones we have tend to contract as the healing process progresses.

A gentle massage and compression garment, if your provider recommends, can help even out the tissue. Some people get seromas or pockets of fluid that require treatment to prevent permanent lumps. Recovery is almost never fast. Your body needs time, months even, to settle.

Respect the care instructions, be patient and don’t miss a check-up — all good things to keep healing on point.

Pre-existing Conditions

Not all of us are entering the arena on equal footing. Obesity, diabetes, or previous poor wound healing will exacerbate recovery and increase the likelihood of lumpiness. Similarly, prior surgeries in the same vicinity may leave behind scar tissue that decreases the likelihood of smooth skin healing.

Tackling these factors pre-surgery is crucial. A comprehensive pre-op evaluation assists in identifying potential risks in advance and enables your care team to anticipate them. Controlling weight, blood sugar, or skin conditions prior to the surgery provides your body a greater chance to heal without the added bumps or detours.

Aftercare Importance

Aftercare is crucial to the healing of the skin and the tissues post-liposuction. Errors or disregard during this phase can increase the risk of lumpiness. Every detail from how you wear compression to how you move impacts the ultimate appearance and comfort of your post-surgical self.

Patients frequently experience swelling, bruising, and pain at its worst in the first week. Over the next six to eight weeks, hard swollen areas begin to soften, but it can take six months to a year for full results. Listening to the surgeon, attending follow-ups, and maintaining a sodium-restricted diet for two weeks can go a long way.

Essential aftercare tips:

  • Wear compression garments as advised.

  • Keep up with follow-up appointments.

  • Avoid salty foods for two weeks.

  • Elevate knees after lower body liposuction.

  • Watch for signs of infection.

  • Keep the incision area clean.

  • Gently massage with guidance.

  • Avoid hard exercise until cleared by a doctor.

  • Use extra padding if directed to manage seromas.

Compression

A compression garment post-liposuction is par for the course. It minimizes swelling, promotes healing and enhances skin retraction. For patients with skin laxity, they may require wearing the garment longer, up to 8 to 12 weeks instead of just six, to help the skin tighten as much as possible.

Compression aids the body form to settle and prevents fluid build up, reducing the possibility of seromas or lumps. It’s equally important to ensure the garment fits properly and to adhere to your surgeon’s recommendation of how many hours per day you should wear it.

If it’s an area vulnerable to seroma, additional padding inside the garment can help flatten the spot within a week or two. Some discomfort is to be expected, particularly during the initial days when swelling and pain reach their peak. Easy actions like wearing breathable fabrics and loosening fits can alleviate irritation.

Massage

Lymphatic drainage massage is frequently recommended to reduce swelling and break up lumps. Tender massage may assist to soften any skin hard spots and increase circulation, hastening healing. Most surgeons suggest beginning light massages a few days to a week later once the pain and bruising subside.

Patients should give deep pressure a miss and stick to slow, gentle strokes. These can be conducted solo at home or with a professional therapist. Timing and frequency are important as well because beginning too early or massaging too hard can be more detrimental than beneficial.

Expert guidance gets it right and prevents issues.

Movement

Early mobilization post-liposuction can expedite recovery. Gentle activities such as walking encourage circulation and help prevent swelling or thrombosis. Elevating the knees after lower body liposuction can reduce swelling.

Rest is still key in the first week. Small walks can begin when it feels safe. Pushing it with intense workouts or sudden movements can delay healing or provoke new inflammation. Finding the right balance of resting when you need it and moving when you can produces optimal outcomes.

The Healing Timeline

The liposuction healing timeline is not the same for everyone. Factors like age, health, and vigilant adherence to your aftercare instructions can adjust that timeline either faster or slower. Swelling, firmness, and lumps are all part of the natural process.

Here are the main milestones after liposuction:

  • Swelling is on the rise for the first 72 hours, then peaks and starts to subside by a week.

  • Firm lumps emerge in the first few weeks.

  • Lumpiness starts to ease as swelling subsides over the following months.

  • Most swelling and unevenness resolve within 3–4 months.

  • Small areas of swelling or lumpiness may persist for as long as six months or even longer.

  • Complete scar healing takes about a year.

  • Regular check-ins with your surgeon are advised throughout.

Early Lumps

Early lumps are nearly inevitable following liposuction, commonly surfacing during the initial two weeks. These lumps are from swelling and trauma to the tissue. Your body is correcting to the modifications, and fluid can gather in little pockets where fat cells used to be.

Others might feel hard, raised, or strange lumps under the skin. These initial lumps often evolve over time. They could feel larger or harder prior to shrinking. By weeks 3 and 4, a lot of the swelling decreases and the lumps start to soften.

It can be quicker or slower based on the size of the area treated and your individual healing rate. Sticking to your doctor’s aftercare plan is crucial. Compression garments, light massage and activity avoidance control swelling and keep lumps from worsening.

Be on the lookout for significant changes, such as lumps that increase in size, heat up or become more painful, as these may require a doctor’s intervention.

Maturing Lumps

As time progresses, lumps undergo changes. The firm, swollen patches you experienced early on begin to transform in shape and texture. A few become softer or smaller by three or four months.

This is your body dissolving excess fluid and allowing tissue to calm. It is normal for some spots to take longer to even out, depending on how much tissue was taken and healing variances. Not every lump disappears at the same rate.

Some last as long as six months or beyond. Surgeon follow-ups during this period are important. They can verify the healing timeline is on schedule and provide tips if any pesky lumps require extra care.

Persistent Lumps

When lumps linger for more than six months, it’s time for a closer look. Persistent lumps could indicate scar tissue, residual fat, or other problems. These don’t necessarily resolve on their own and may require more than just time.

Treatment may be massage, steroid shots or, in rare instances, revision surgery. Both options are contingent upon what the lump is caused by. Always keep your surgeon informed if a lump remains the same, worsens, or begins to cause pain.

Tackling problems early can help you achieve a smoother outcome and prevent more serious issues down the road.

Seeking Solutions

Lumpiness after liposuction is a frequent issue, typically resulting from irregular fat extraction, edema or the body’s reparative process. Keeping these changes under control demands pragmatism and reasonable expectations.

Options for addressing post-liposuction lumpiness include:

  • Wearing a compression garment as directed

  • Using prescribed cold packs for swelling in early recovery

  • Trying manual massage or lymphatic drainage massage with surgeon approval

  • Following medication plans for pain or inflammation

  • Staying hydrated and eating a balanced diet

  • Avoiding long periods of sitting or standing still

  • Using compression pads, foam inserts, or guided stretching

  • Considering non-surgical therapies for texture and comfort

  • Visiting a surgeon if lumps persist longer than three to four months.

Professional Assessment

Routine follow-ups allow the surgeon to observe healing and identify any issues in time. Swelling can persist for two to four weeks, even months, so these continued checks show the true status of healing.

Specialized testing can reveal if the bumps are in the scope of typical healing or require additional attention. Simple, candid conversations with the surgeon do wonders to manage expectations and relieve anxiety.

If lumps worsen, remain painful, or don’t go away after a few months, speedy care is crucial. Surgeons might recommend additional treatments or run tests to exclude uncommon problems like infection or seroma.

Non-Surgical Treatments

Treatment

How It Helps

When to Use

Surgeon Approval Needed

Lymphatic drainage massage

Moves fluid, reduces swelling

2+ weeks post-surgery

Yes

Manual massage

Softens tissue, smooths lumps

Several weeks post-surgery

Yes

Compression garments/pads/foam inserts

Supports tissue, shapes area

Daily, per instructions

No

Topical creams or gels

May help skin feel smoother

After incisions close

Sometimes

Cold packs

Lowers early swelling

First few days

Yes

Stretching, guided positioning

Helps skin settle evenly

As advised

No

Topical creams or gels might do something for minor surface changes, but dramatic results without professional treatments are hard to come by. Keeping well hydrated and eating nutrient-dense meals promotes skin healing and diminishes the risk of long-term textural concerns.

Non-invasive therapies such as massage or guided movement should be initiated only after the surgeon indicates it is safe, typically a few weeks post-surgery. These actions may encourage ease and better outcomes without increased danger.

Revision Procedures

If lumps persist beyond 3 to 4 months and don’t respond to conservative care, revision liposuction may be required. This can re-mold lumpy areas and give a smoother appearance, but it’s not necessarily easy.

Revision surgery requires a talented surgeon experienced in body contouring. It might look better than before, but no surgery can guarantee perfect symmetry or texture. Explicit conversations about risks, recovery, and objectives assist in maintaining realistic expectations.

Conclusion

Liposuction lumpiness can occur for a couple of reasons. Your plastic surgeon’s skill, your skin’s response and post-surgical care all have a role. Some lumps fade as you recover, while others persist and require the assistance of a physician. Almost everyone who does good aftercare and consults their provider achieves superior results. As real stories demonstrate, open conversations with your care team and consistent follow-up can make an impact. For those considering liposuction or struggling with lumps, transparent information and tangible support reduce stress. Have additional questions or want to share your story? Connect with a care provider or group chat for advice and feedback.

Frequently Asked Questions

What causes lumpiness after liposuction?

Lumpiness caused by liposuction can be due to either uneven fat removal, swelling, or scar tissue. It is a typical side effect in healing and frequently gets better with time with appropriate aftercare.

Is lumpiness normal after liposuction?

Yes, mild liposuction lumpiness is normal. It typically happens as your body heals and the swelling goes down. In most cases, it resolves within a few weeks to months.

How long does lumpiness last after liposuction?

Lumpiness can last for weeks and may persist up to three months. How long it will last varies based on your body, the technique used, and your aftercare.

Can aftercare reduce lumpiness after liposuction?

Yes, proper aftercare will help minimize lumpiness. Compression garments, gentle massage, and your doctor’s instructions are key to encouraging smooth healing.

When should I be concerned about lumpiness after liposuction?

If lumpiness is painful, or getting worse, or accompanied by redness or fever, call your surgeon. If the lumps are very pronounced, or do not go away, you should see a doctor.

Does the surgeon’s technique affect lumpiness?

Yes, the surgeon’s ability and technique definitely play a huge role in the risk of lumpiness. Selecting a seasoned, board-certified surgeon can minimize this risk.

Can all types of liposuction cause lumpiness?

Lumpiness can happen after any kind of liposuction, though certain methods are less likely to cause it. Discuss options with your surgeon.

How to Eliminate Bat Wing Arms: Discover Effective Exercises and Solutions

Key Takeaways

  • Genetics, aging, weight gain or loss and muscle tone all play a role in the dreaded upper arm “bat wing,” so it’s important to know what you’re working with when seeking solutions.

  • While surgical procedures like brachioplasty are an effective upper arm “bat wing” solution, they’re not your only options.

  • Minimally invasive treatments such as radiofrequency, ultrasound, and cryolipolysis provide alternatives with faster recovery times and less discomfort than surgery.

  • Surgical options, such as liposuction and brachioplasty, might be more effective for individuals with surplus fat or skin. They should be approached thoughtfully and with consultation from experts.

  • If you want to go all in on the mental game, here’s a great post about how to reframe your goals so you don’t get caught chasing a moving target.

  • A comprehensive approach of both exercise, healthy habits, and customized treatments is best in addressing and improving the look of the upper arm “bat wing.”

Upper arm ‘bat wing’ solutions refers to how to address loose skin or soft tissue on the backs of the upper arms. We all see this as we get older, lose weight or muscle tone.

These solutions range from at-home workouts and nutrition shifts to occasional medical interventions. Both ways work best for different needs and health goals.

To get the best fit, it’s useful to understand how each can assist day-to-day life.

Underlying Causes

Bat wing arms – that flapping ‘skin’ or fat that drapes from the underarm area, plague people all over the world. This shift is frequently due to a combination of genetics, aging, fluctuations in weight, and musculature. All these factors are distinctive in how they affect the development of arm shape and its transformation. Hence, it’s crucial to know the underlying causes of the condition for those pursuing remedies.

Genetics

Family history sets the scene for bat wing arms. Genetics determines how skin stretches and where fat is stored, including in the arms. Other people’s skin is just naturally looser and less elastic, so sag can be more of a natural tendency as they get older or fluctuate in weight.

Others might have a little more fat stored in their upper arms, even if the rest of their body is lean. These genetic factors may impact whether you have a problem with this, regardless of lifestyle. Understanding your genetic foundation allows you to establish reasonable targets and anticipate when pursuing treatment, whether surgical or non-surgical.

Aging

As we age, our skin’s collagen and elastin levels decrease, making the skin more susceptible to sagging and wrinkling. Hormonal changes, such as those associated with aging, can affect fat distribution in the body and increase the appearance of upper arm fat.

Arm muscle mass declines with age, contributing to that flabby appearance that many refer to as bat wings. We all experience these changes, but the rate and intensity vary. Early intervention, such as consistent weight lifting or collagen-friendly skin care, can help impede these effects.

Weight Changes

Here’s why rapid weight loss like after a pregnancy or bariatric surgery can leave behind skin that cannot shrink back if the skin’s elasticity is low. Big or frequent weight fluctuations stretch the skin, and after a while, it just doesn’t bounce back and sags.

Gaining can exacerbate the problem by introducing additional fat to the region, making the bat wing appear even more distinct. Genetics and age are factors, but maintaining a consistent, healthy weight gives you the best opportunity to prevent these shifts. Proper nutrition and physical activity are fundamental to skin health as well as maintaining a lean physique.

Muscle Tone

Muscle tone is crucial to how arms appear. Flaccid or under-utilized biceps and triceps can exacerbate sagging skin whereas stronger muscles help provide the arm a tauter, more toned appearance.

Regular strength training, such as push-ups or weight lifting, exercises these muscles and can counteract the impact of age or fluctuating body weight. Even light activity, when done frequently, goes a long way toward staving off muscle loss with aging.

Poor diet and inactivity can accelerate fat gain and muscle loss, making bat wing arms more difficult to control.

Non-Surgical Solutions

Most people want to get rid of those upper arm “bat wings” in a non-surgical way. Non-surgical solutions are limited, but they can assist with muscle tone, skin texture, and overall health. They work best with mild to moderate problems and often need patience.

1. Targeted Exercise

Strength training can tone and sculpt your upper arms. Targeting triceps and biceps not only strengthens the muscles but can increase arm definition, giving you a leaner-looking appearance. Easy moves such as triceps dips, push-ups, and overhead triceps extensions attack this zone.

Biceps and hammer curls are effective. Resistance bands and mini hand weights provide an added challenge and can be utilized at home or at the gym.

Cardio burns fat as a supplement to strength training. Brisk walking, cycling, or swimming for a minimum of 150 minutes a week will trim fat all over your body, including your arms, so that those muscles have a chance to shine. Rotating days between strength and cardio provides the best results.

2. Nutritional Strategy

Eating right fuels fat loss and maintains weight stability. Dishes packed with lean protein, like fish, chicken, or beans, combined with nutrient-dense fats from olive oil, nuts, and seeds, help repair your muscles and keep you satiated longer. Fresh fruits and veggies add fiber and vitamins.

Hydration is key for skin health and elasticity. Drinking a sufficient quantity of water, approximately 2 liters per day, keeps skin supple. Mindful eating, listening to hunger signals and eating slowly, can avoid overconsuming calories and keep weight in check.

3. Skin Health

As we all know, taking care of skin can make an impact on the texture and firmness. Topical moisturizers, particularly those containing collagen or elastin, used on a daily basis help skin appear smoother. Non-surgical solutions exist.

While others turn to professional treatments such as peels or facials, these can raise skin quality in the arm region, particularly if performed regularly. Non-surgical options like laser treatments or CoolSculpting can provide a subtle enhancement for some, particularly when the issues are minimal.

Results are less dramatic than surgery, and multiple sessions are often required. They can work best for minor laxity, and the impact is inconsistent.

4. Lifestyle Factors

Daily habits are what sculpt long-term results. Exercise and nutrition are beneficial for your weight and your skin. Not smoking and avoiding too much sun keep skin taut.

Stress management through meditation, yoga, or even just deep breathing can support overall well-being and skin appearance.

Minimally Invasive Procedures

Minimally invasive procedures provide viable choices for individuals seeking to target upper arm “bat wings” without open surgery. These techniques, such as BodyTite or CoolSculpting, utilize tiny incisions or no incisions and frequently do not necessitate drains. Procedures are frequently performed on an outpatient basis.

Few patients may need to wear a compression garment for up to 6 weeks post treatment. Such approaches are ideal for individuals with mild to moderate skin and fat redundancy. Recovery is typically quicker than with traditional surgery, such as brachioplasty.

Results can take time, though, with many experiencing improvements in a matter of months. They can be combined with other treatments such as liposuction for added impact. Certain individuals, particularly those with excess loose skin, are not ideal candidates.

Radiofrequency

RF employs carefully applied heat to increase collagen in the skin. It shoots energy beneath the skin to shrink tissue and tighten loose areas. This can assist in making your skin appear more taut as the days go by.

  1. Consult with a skilled provider to discuss your goals and medical history.

  2. The provider will check the amount of excess skin and fat.

  3. They will explain the benefits, risks, and expected recovery.

  4. Based on your needs, they will decide if radiofrequency is a good option.

Radiofrequency is non-invasive, with no stitches and no big cuts. It makes it a favorite among those seeking a minimally invasive procedure. Be sure to check with a qualified professional to see if this treatment is right for you.

Ultrasound

Ultrasound operates by propagating sound waves into the deep layers of the skin. These waves warm the tissue, which can liquefy fat cells and help skin tighten. The fat is eliminated by the body gradually.

This approach does not require incisions or extended recovery periods. Some people experience mild swelling or redness. Side effects are uncommon.

The vast majority can get back to daily activities immediately. This is why ultrasound is a good match for those seeking a non-invasive solution. It’s smart to consult with a provider about whether ultrasound can assist in achieving your goals.

Cryolipolysis

CoolSculpting is the preferred cryolipolysis to deal with annoying arm fat. The device freezes fat cells until they disintegrate. Over weeks, the body expels these cells.

There are no needles and no surgery, and the majority of individuals can return to work or daily life shortly thereafter. Cryolipolysis is an option for those with diverse body types.

It is most effective in targeting small pockets of resistance. Thinking of CoolSculpting as one part of a larger body contour plan can deliver more rounded results.

Procedure

Main Benefit

Main Risk/Drawback

Recovery Time

Suitability

Radiofrequency

Tightens skin

Temporary swelling

Short

Mild to moderate bat wings

Ultrasound

Fat reduction, skin tightening

Redness, minor discomfort

Short

Mild fat, mild laxity

Cryolipolysis

Non-surgical fat loss

Numbness, bruising

Very short

Small, stubborn fat deposits

BodyTite

Combined fat & skin tightening

Swelling, bruising

1–2 weeks

Mild to moderate excess

Surgical Interventions

Surgical treatments for upper arm “bat wings” target excess skin and fat removal to provide a more slender, toned appearance. These surgeries can provide dramatic transformations for individuals with resistant fat or loose skin, particularly post weight loss. The key is consulting a qualified plastic surgeon because not everyone is an appropriate candidate.

Surgical interventions depend on body type, goals, and health. The results can last years, and surgery is something to think carefully about due to the recovery, scarring, and potential risks.

Liposuction

Liposuction addresses resistant fat deposits in the upper arms. A surgeon employs a slender tube (cannula) to vacuum out fat via mini-incisions. This can contour the arms and assist them in better blending with the body. It is ideal for those with good skin tone and who have more fat than loose skin.

There are various types of liposuction. Tumescent liposuction utilizes a saltwater solution to loosen fat, making it easier to extract. Laser-assisted liposuction is a special form of liposuction where laser heat is used to pre-melt fat before it is extracted. This can help to tighten skin. Surgeons occasionally pair these approaches with other treatments.

You should have reasonable expectations. Liposuction can’t mend loose skin or halt aging. Recovery typically takes a few weeks. Swelling, redness, or soreness is to be expected. Most surgeons recommend compression garments for a few weeks to assist the skin in accommodating and to decrease swelling.

Selecting a talented, reputable surgeon is crucial. Look into their experience, review their reviews, and inquire about their aftercare philosophy. We can’t liposuction everyone. Individuals with significant amounts of loose skin may require an alternative surgical procedure.

Brachioplasty

Brachioplasty, or arm lift, is a surgery that eliminates excess skin and fat from the upper arm. Surgeons incise along the arm, excise skin and fat, and then suture closed. This tightens the arm and creates a firmer, tighter appearance.

It’s an excellent option for individuals with sagging skin, typically post significant weight loss or aging skin. The primary advantage is a significant transformation in the appearance of the upper arms, which can increase self-esteem. Many folks find it easier to wear short sleeves or feel comfortable in public again.

Scarring is probable, as the incisions are larger. Scars tend to fade, but some do remain. Recovery is six to eight weeks with compression wraps and limited movement initially. Infection, swelling, or tenderness can occur. Not everyone is a candidate; serious health problems or some skin conditions may disqualify you.

Results take months to settle, but they can last for years.

Pros and Cons of Surgical Interventions

Pros

Cons

Effective fat/skin removal

Scarring from incisions

Long-lasting results

Infection and risk of complications

Can combine with other procedures

Not suitable for all patients

Improved arm contour

Recovery period (6–8 weeks)

Boost in confidence

Temporary swelling and redness

The Mental Component

How you feel about your upper arms is about more than just looks. The flabby shape of the arms, or so-called ‘bat wings’ can impact self-confidence and self-esteem, particularly in cultures that equate worth with body type. Excess flab in the arms or loose skin, which can accompany aging, can make some feel embarrassed or even depressed.

They can affect your mental state and comfort level in public or in your wardrobe.

Body Image

We live in a society where we are constantly held to unrealistic standards of beauty. For others, these ideals make it easy to feel body dissatisfied, particularly when skin on the arms begins to sag or lose its form. The aging process only compounds the difficulty.

Skin loses stretch, which is natural, but not necessarily embraced. Even mild adjustments can result in self-berating or teetering concerns about what other people think of us. Developing a good body image involves ignoring what’s stylish or anticipated.

What’s really important is that it helps you to concentrate on what your body does, not just what it looks like. Self-compassion is key here. Being nice to yourself, particularly on challenging days, makes a big difference for your psyche.

Seeking out groups or friends who appreciate honesty and acceptance can assist in reorienting away from judgment. A good support system can help, both with useful tips and the reminder that we all go through body struggles.

Realistic Goals

Making the goals achievable makes the process less fraught. Targeting arm toning with an exercise, such as strength training, allows plenty of us to feel like we’re in control of our health. Study after study shows that frequent exercise not only transforms your physique, but also improves your moods and reduces stress.

Results won’t come overnight, so you’ll need patience. Everyone is different. Body shape, age, and starting point all factor in. It’s preferable to select targets that suit your own life rather than mimic someone else.

Small tweaks, such as incorporating a healthy meal or a simple workout, allow individuals to see cumulative improvement. Even small victories boost confidence and sustain motivation.

Personal Choice

Ultimately, everyone’s comfort level and needs should dictate any decision regarding how to deal with bat wings. For others, surgery just feels right. For the rest, non-invasive techniques such as workouts or skin combos rule.

What’s magic for one individual might not appeal to someone else, and that’s fine. Discussing with a doctor can help individuals balance their alternatives and obtain information.

You should be asking questions, sharing worries, and so on before making a decision. Ultimately, the right choice is the one that makes you feel the most satisfied and confident, not what others may desire.

A Holistic Perspective

A holistic perspective considers the entire body, not just one specific concern such as upper arm “bat wings.” It observes how body, mind, and emotional well-being collaborate. This holistic perspective is relevant to anyone seeking authentic transformation. As we know with body changes, fast solutions rarely hold. No hype or crash, but real results and real growth from steady, holistic effort.

Concentrating exclusively on workouts or quick fixes can miss the forest for the trees. A person’s mood, stress, and daily decisions influence how their body evolves. Toning the triceps requires more than a single fix. It’s a good thing to balance exercise with nutrition and, when necessary, complementary treatments.

Triceps and shoulder strength training tones the upper arms. Basic exercises such as push-ups, triceps dips, or resistance bands are simple to initiate at home or a gym. Exercise by itself is rarely sufficient. What someone eats, how much water they consume, and whether they get enough sleep all contribute.

Sufficient protein in a balanced diet can assist in muscle repair and growth. Hydrating with clean water fuels your metabolism and keeps your body functioning optimally. Stress counts too. When you’re highly stressed, you tend to make bad food decisions, lose sleep, and feel less motivated to exercise.

Techniques such as meditation, yoga, or even just a brief walk outdoors can reduce stress. It’s simple to incorporate both of these rituals into your daily life, and they can keep your motivation buoyant. Others seek out complementary treatments like acupuncture to relax or help manage stress. Not everyone will experience the same outcome, but these choices can fall into a more comprehensive lifestyle approach.

Thinking big means thinking about the environment where someone resides. Fresh air and water are new as medicine. If you reside in a region with polluted air or no access to clean water, these will impede advancement. Each individual’s journey will be different because of things like their age, genes, and life history.

There is no ‘one size fits all’ solution. A holistic plan leaves room for everyone to discover what suits them, from habit changes to experimentation.

Conclusion

Upper arm ‘bat wings’ rear their ugly head for a ton of people, regardless of age or weight. These loose skin and soft tissue changes can feel hard to fight, but there are a lot of obvious solutions to assist. You can work on it with daily moves, test out some skin care, or consult a pro for effective and safe options. Some choose the slow track of at-home habits, while others desire faster assistance from a doctor. Both are great if you discover what works for your life and your needs. Even these little baby steps can inject a good dose of confidence into your everyday self-esteem. To read more, consult a trusted health professional or search for additional tips from reputable sources. Be open to suggestions and discover what works for you.

Frequently Asked Questions

What causes “bat wing” appearance in the upper arms?

The ‘bat wing’ appearance is typically caused by loose skin and fat. With aging, genetics and weight fluctuation, arm muscles can weaken and skin loses elasticity causing sagging.

Can exercise help reduce upper arm “bat wings”?

Yes, consistent resistance training will sculpt arm muscles. Exercise alone will not necessarily eliminate extra skin or fat, particularly after experiencing rapid weight loss.

Are there non-surgical ways to improve upper arm appearance?

That’s right, you can exercise, wear compression sleeves, eat clean, and so on. Topicals don’t do much, but they can help with skin texture.

What are minimally invasive treatments for “bat wings”?

Minimally invasive options include laser therapy, radiofrequency, and injectable fat-dissolvers. Non-surgical skin tightening and fat reduction occur with minimal downtime.

When is surgery recommended for upper arm sagging?

About: upper arm “bat wing” fixes. Best for those with a sizable amount of loose skin or fat.

Is the emotional impact of upper arm sagging important?

I know, I know, everyone’s arms are their worst insecurity. From a body image perspective, this can be enormously helpful and counseling might be warranted.

How can I choose the best solution for “bat wings”?

See a doctor! They will evaluate your needs and suggest the best course of treatment according to your objectives and health.

Hydration Strategies for Managing Water Retention and Swelling

Key Takeaways

  • By identifying the early warnings of swelling, such as skin indentations, stiff joints, weight gain or loss, and tight clothes, a person with lymphedema can treat the fluid retention before it becomes more severe.

  • Hydration supports fluid balance and dehydration, inflammation, and hormones can all cause swelling.

  • Daily water intake goals, electrolyte balance, and selecting hydrating foods and drinks are smart proactive ways to manage swelling.

  • Exercise, elevation, compression, and hot and cold therapies can alleviate pain and increase circulation.

  • Hydration requirements differ based on age, exercise intensity, and comorbidities. Modifying fluid regimens and seeking advice from medical professionals is crucial.

  • Consult a doctor if swelling is severe, occurs suddenly, or is accompanied by pain, redness, or warmth to exclude any underlying medical conditions.

Hydration and swelling management involves maintaining the body’s water balance to assist in reducing swelling. Adequate hydration promotes circulation and nourishes tissues. Hydration helps swelling go down faster post-injury or surgery.

Swelling, or edema, is usually the result of health problems, hot weather, or hours spent standing. Certain foods and daily habits manage swelling as well. Up next, discover what actually helps on both fronts.

Recognizing Swelling

Swelling or edema, which impacts millions of people across the globe, stems from an excessive accumulation of fluid in the body’s tissues. It typically aches, restricts motion, and can be indicative of other medical problems. A lot of people confuse swelling with inflammation, as they’re two separate things. Both require consideration, as dehydration and swelling are frequently companions.

Detecting swelling in its early stages can assist individuals in taking measures before the issue worsens.

Skin Indentations

Skin indentations, known as “pitting,” occur when pressure from a finger leaves a persistent mark on the skin. This is a classic indicator of swelling, particularly in the ankles, feet, and shins. It’s easy to check for these marks—simply press a thumb or finger hard into the skin for a few seconds, then watch to see if the mark stays when you release.

If the skin doesn’t bounce back quickly, this could indicate trapped fluid. These marks are common and one of the most obvious signs your body is water-logged. Identifying swelling early prevents more severe swelling and accompanying discomfort.

Stiff Joints

Joint stiffness can indicate swelling or inflammation, particularly following inactivity such as after sitting or standing. It’s frequent in knees, ankles, and fingers. When joints are tight or difficult to bend, it could indicate fluid accumulation.

Attempt to move the joint through its usual range. If it moves less or is sore to touch, swelling may be the culprit. Joints that are swollen often feel warm or appear enlarged. Monitoring joint movement over time can help identify trends and detect problems before they impact everyday activities.

Drinking sufficient water helps maintain tissues in a soft state so that fluid can easily flow and joints can function smoothly.

Weight Fluctuations

  • Swift shifts in weight over a couple of days can indicate swelling, not just body fat.

  • Even small increases in salt consumption can make your body retain water and appear swollen.

  • Some medications, like blood pressure medicine, can cause swelling and weight gain.

  • Hormonal fluctuations, such as pregnancy or menstruation, can cause temporary water retention.

Swelling-related weight gain is rapid and unaccounted for by food or exercise. Hydration is important. Drinking 8 to 10 cups per day can assist in controlling these shifts, providing good circulation and tissue health.

Tight Clothing

Tight clothes can exacerbate swelling by putting pressure on the skin and restricting normal circulation. They observe that shoes or socks leave impressions or that pants are tight around the waist or ankles.

Changing into loose-fitting clothes diminishes this effect and can assist in keeping the swelling under control. For individuals who must stand or sit for extended periods, breaks to stretch or change positions might assist.

The Hydration Paradox

Hydration plays a key role in swelling management. The “hydration paradox” points to the idea that both too little and too much water can lead to health issues. Dehydration can spark swelling, and overhydration may cause problems like low blood sodium, known as hyponatremia.

Health experts have debated the right level of hydration for decades, with some research showing that moderate intake is often enough for most people. This paradox means people need to think about their own needs, such as age, sex, and how active they are, instead of following a one-size-fits-all rule.

Factor

Dehydration

Inflammation

Fluid Retention

Trigger

Low intake

Immune response

Hormonal shifts

Result

Swelling

Swelling

Swelling

Example

Hot climates

Injury, infection

Menstrual cycle

Dehydration’s Role

Dehydration is a source of swelling for most people. When your body detects this lack of hydration, it clings to the fluids it’s been given, sometimes causing puffiness in your hands, feet, or face. This is a defense mechanism the body utilizes to conserve water where it’s most desperately needed.

In the real world, this can manifest itself after long flights, workouts, or heat spells, particularly if people aren’t adequately hydrated. Easy moves such as observing urine color or quantifying fluid consumption assist hydration monitoring.

Dark urine means you need more water, while clear urine is overhyped. Each individual is unique, so listen to your body and make adjustments for things such as working out or hot weather.

Inflammatory Response

Inflammation is your body’s natural defense against damage, like infection or trauma. When this occurs, cells known as cytokines are discharged. Cytokines instruct the body to direct additional blood and fluid to the site of trauma to facilitate recovery.

This causes swelling as the area takes on extra fluid. Sometimes inflammation overstays its welcome or occurs without an obvious reason. Chronic inflammation is associated with persistent swelling in diseases such as arthritis or allergies.

In such instances, fluid retention can turn into a chronic issue that requires careful management. Those with persistent swelling should monitor for indications of long-term inflammation and consult a medical professional.

Hormonal Triggers

Hormones have a silent yet crucial part in water equilibrium. Shifts in hormones such as aldosterone and antidiuretic hormone signal to the body when to retain or eliminate water. These changes may exacerbate swelling, particularly in individuals with preexisting conditions.

Swelling women tend to see more of it around their periods. This is because fluctuations in estrogen and progesterone can make the body retain more water. Others might notice swelling rise before a period and fall again after.

Stress hormones like cortisol impact water balance as well. When individuals are chronically stressed, cortisol causes the body to retain more sodium and water, which results in puffiness. Stress management with sleep, exercise and relaxation can help keep swelling down.

Strategic Hydration

Taking care of swelling begins with smart hydration. Fluids assist in transporting nutrients, maintaining healthy tissue, and supporting the body’s indigenous systems. Strategic hydration keeps swelling in check if you customize daily intake, electrolyte balance, and timing to your specific needs.

1. Water Intake

  1. Set a Daily Target: Experts suggest a range of 0.5 to 1 ounce (about 15 to 30 ml) per pound of body weight each day. For a 70 kg individual, that is 1.7 to 3.4 liters per day, though exact requirements vary based on activity, climate, and health. This can come from plain water, teas, and water-rich foods.

  2. Use a Refillable Bottle: Carrying a reusable bottle helps track intake and builds steady habits. Strategic Hydration marking lines or times on the bottle can help spread out drinking through the day, which avoids overloading the kidneys and supports even fluid absorption.

2. Electrolyte Balance

Nailing the electrolyte mix is critical to fluid balance. Bananas, oranges, leafy greens, dairy, and nuts provide your potassium, calcium, and magnesium. These minerals assist your body in moving fluids in and out of your cells.

Excess sodium, frequently from processed foods, can cause fluid retention and swelling. One of the smartest ways to prevent unwanted fluid buildup is to watch sodium intake, which should be under 2,300 mg per day for most adults.

3. Dietary Fluids

Hydrating foods like cucumbers, watermelon, and strawberries, all high in water content, contribute to your daily hydration. Meals with soups or broths do count.

Herbal teas and infused waters provide hydration without the added sugar or caffeine. These options are great for anyone seeking some flavor or who dislikes the taste of plain water.

4. Timing Matters

Consume 503 to 591 ml of water or sports drink 2 to 3 hours prior to exercise and 207 to 295 ml 10 to 20 minutes before activity. During extended activity, replace fluids in accordance with your sweat loss, which can be anywhere from 0.5 to 3.0 liters per hour.

Athletes frequently monitor their urine color. Ninety-two point five percent see it as a reliable dehydration indicator. Don’t have a big drink right before bed to reduce the risk of nighttime swelling or waking to urinate.

5. Beverage Choices

Choose beverages that are low in sugar and caffeine to minimize dehydration. Sodas, energy drinks, and some juices add sugars that can pull water from tissues.

Herbal teas, dandelion, and certain green teas are mildly diuretic, so they may help with fluid retention when swelling is an issue.

Beyond The Glass

Hydration goes beyond adequate water consumption. It’s about nourishing the body’s myriad systems to help control swelling. Water comprises more than half of our body weight and its role in tissue fluid management is critical at any age.

Controlling inflammation, or edema, typically requires more than a glass of water. Below is a checklist of steps and techniques that people can use, no matter where they live, to help reduce swelling and stay healthy:

  • Drink enough water throughout the day

  • Keep moving and stretch often

  • Elevate swollen limbs when resting

  • Use compression garments or wraps

  • Experiment with warm or cold packs to ease sore and inflamed areas.

Movement

Even gentle, daily movement can help keep swelling down by promoting circulation of blood and lymph through the body. Walking, cycling, or gentle yoga are all excellent choices. Exercise doesn’t need to be rigorous.

Quick, regular walks or some arm circles can assist. They aid the lymphatic system, which drains excess fluid from tissues. Stretching is equally important. It can keep joints loose and prevent stiffness, which occasionally comes with swelling.

Some gentle stretches for your ankles, wrists, and neck can be performed at home or in the office. Even minutes a day can add up.

Elevation

Elevating one’s legs above the heart can assist in returning fluid that has become ensnared back into the bloodstream, relieving foot or ankle swelling. It’s a good technique for sitters and standers.

Prop your legs while resting or sleeping. Try to elevate the legs for twenty minutes a few times a day. Elevating the legs while watching TV or reading is an easy way to sneak this step into your day.

Multiple pillows provide more support and stabilize the legs.

Compression

Compression stockings are a solid piece of medicine for people with swollen legs. These stockings assist veins in pumping fluid back toward the heart, which can minimize swelling and pain.

These are incredibly handy for travelers or those who are on their feet all day long. For swelling in a single location, compression wraps provide targeted relief. Wraps are rated at different levels of firmness, so it may take some trial and error to find the right fit.

Temperature

Warm compresses can loosen tight muscles and assist blood to flow through swollen tissues. That’s helpful for regions that feel knotted, such as the hands or feet. Use a warm towel or pack for 10 to 15 minutes.

Do not burn. For new wounds or when swelling is associated with inflammation, cold packs can anesthetize tender areas and reduce fluid accumulation. Wrap ice or a cold pack in a thin cloth and apply for short periods.

Never apply ice directly on the skin.

Personalized Plans

Customized plans for hydration and swell management aim to suit each individual’s specific requirements. These plans consider age, activity, health conditions, and daily routines. Research demonstrates that personalized plans beat general, platitude-driven guidance. They assist individuals in maintaining their course, establishing defined objectives, and adjusting to life’s fluctuations.

Many people leverage technology, like mobile apps or wearables, to help them record their fluid intake, send reminders to drink, and monitor progress. SMART goals—specific, measurable, achievable, relevant, and time-bound—are commonly used to get people results. Personalized plans build a sense of ownership, which makes it easier to adhere to healthy habits. Some craft their plan with professionals, while others use online or self-help resources.

  • Drink 2 to 3 liters of water daily. Listen to your body and keep in mind your age, weight, and environment.

  • Reduce caffeine and alcohol, which can cause fluid loss.

  • If you’re in hot or dry locations, increase liquids to prevent dehydration.

  • If you work out a lot, you may require more water before, during, and after workouts.

  • Use technology, such as apps or reminders, to monitor daily hydration.

  • Check urine color; pale yellow means well-hydrated.

  • Choose water-rich foods, such as fruits and vegetables.

  • As for seniors, opt for smaller and more frequent sips if swallowing is difficult.

  • If swelling is an issue, consult your healthcare provider before making significant changes.

  • Check in and calibrate your plan as your life shifts.

Age

Hydration requirements can shift as we age. Young kids and teens often require more water to keep up with development and energy. As we age, the body stores less water and thirst is no longer felt as intensely. This implies that seniors are more prone to dehydration and edema, particularly if they are on medications or have medical conditions that impact fluid regulation.

It is useful to screen elderly adults for symptoms such as dry mouth, confusion, or leg swelling. FAMILY/CAREGIVERS – SET REMINDERS OR USE HYDRATION TRACKING TOOLS TO HELP OLDER ADULTS STAY WELL-HYDRATED AND MANAGE SWELLING.

Activity

Exercise affects your hydration requirements. Short walks require less water than extended workouts or sports. If you’re sweating a lot, more water is necessary to replace lost fluids. We’ll have some people use electrolyte drinks if activity lasts longer than an hour or is in hot weather.

Overuse or injury-related swelling might require both rest and judicious icing. Consider seasoning and climate when adjusting fluids. Runners, bikers, and other athletes need to schedule water breaks and pay attention to how their body feels.

Health Conditions

Health Condition

Hydration Effect

Swelling Risk

Kidney Disease

May need to limit fluid intake

High if fluid builds up

Heart Failure

Often need strict fluid limits

Common, especially in legs

Diabetes

Can lose fluids faster

Swelling if blood sugar is high

Hypertension

May need to track salt and fluids

Higher risk with poor control

Pregnancy

Need extra fluids for healthy balance

Swelling common in late stage

Specialized plans for chronic illnesses such as kidney or heart disease that require meticulous fluid monitoring. Physicians might have patients measure liquids or watch for puffiness. Diabetics may need to drink more but not too much and be mindful of swelling if blood sugar isn’t controlled.

Pregnant women require additional water and should consult their physician for the appropriate amount. Your plan should be tailored to your health, medications, and needs.

When To Worry

Recognizing when swelling or hydration changes require rapid intervention is crucial. Not every swelling or change in your water intake is perilous. A few signs indicate larger health risks. Swelling that is rapid in onset, progressive, or unrelenting can indicate a more serious issue.

If one foot, hand, or lip swells up out of the blue, or if the swelling is spreading without apparent cause, it’s wise to get it checked immediately. Pain, redness, or warmth in swollen spots can indicate infection or blood clots. That’s not something to wait on. Sudden swelling with shortness of breath or chest pain should never be dismissed. These signs may indicate heart, kidney, or vein trouble that require a doctor’s attention immediately.

Monitor your body’s sensation when swelling begins. Pain with puffiness usually indicates inflammation. If the skin over swollen areas is hot or sore or it’s hard to move, something more than extra water may be at play. Sometimes, swelling is accompanied by more serious issues.

For instance, persistent headaches, nausea, or even vomiting can indicate swelling is causing pressure in the wrong areas. These symptoms may indicate the brain is involved. Waiting it out at home is a bad plan.

Watch for swelling that occurs spontaneously or appears quickly. While swelling from trauma or an injury is normal, swelling that appears overnight without injury is not. If you begin to feel disoriented, lightheaded or have difficulty concentrating, this can be a sign of water intoxication.

Others experience muscle weakness or trembling after excessive water consumption. Swelling of the feet, hands or lips, as well as these issues, warrants a medical check. Too much water can disrupt the body’s salt balance.

If you wake up a lot at night to pee, or still go all the time even after drinking less, this could be an alert. These urination changes require a doctor’s attention, particularly if they are accompanied by swelling.

Persistent swelling that won’t quit or comes back always warrants further investigation. If you get headaches and nausea that persist, or feel ill after increasing your hydration, it’s best to scale back and consult a physician.

Swelling that won’t go away, or gets worse, can indicate the body is retaining fluid for treatable reasons.

Conclusion

Keeping swelling at bay involves more than just hydration. Obvious indicators such as tight skin or swollen fingers require rapid examination. Overhydration and dehydration can affect it. Smart hydration means small, steady sips throughout the day. Salt, snacks, and motion or sugar too. Every body does its own thing. Some people have to adjust their water or salt intake more than others. Persistent or strange-feeling swelling warrants a doctor’s visit. Health thrives with attention tailored to your unique life. Deal with swelling or not sure about your routine? Contact a professional for advice tailored to your situation.

Frequently Asked Questions

What causes swelling in the body?

Swelling is typically caused by fluid retention, trauma, or certain medical issues. Typical culprits are prolonged standing, excessive salt consumption, or health issues.

Can drinking more water help reduce swelling?

Hydration means drinking water and keeping the body well-hydrated. This actually allows the body to balance fluids and can reduce mild swelling. Too much or too little water can both aggravate swelling, depending on the source.

How much water should I drink daily to manage swelling?

For adults, this usually means approximately 2 to 2.5 liters of water per day. Personal needs will differ according to activity, climate, and health. See your doctor.

What is the hydration paradox?

This hydration paradox implies that both dehydration and overhydration can cause swelling. It’s a balance thing. The body requires exactly the right amount of fluids.

Are there foods or habits that help manage swelling along with hydration?

With the swelling, eating foods low in salt and high in potassium, such as bananas, and staying active can really make a difference. We find that elevating any swollen areas is helpful.

When should I see a doctor about swelling?

Consult a doctor if swelling is acute, intense, painful, or associated with other symptoms, such as breathlessness. Persistent swelling could be a serious medical problem.

Is swelling always related to hydration?

No, swelling can occur from numerous causes, including injury, infection, or medical conditions. Hydration may be a factor, but it is not the sole culprit.

What to Wear After Your Brazilian Butt Lift Surgery for Optimal Recovery

Key Takeaways

  • Wear quality compression garments and loose clothing after BBL surgery.

  • Opt for breathable fabrics like cotton or bamboo blends to stay cool, avoid irritation and enhance comfort during your recovery.

  • Cannondale’s Bbl Pants are stylish and can be easily paired with a t-shirt, hoodie, or jersey.

  • Choose seamless or high-waisted underwear and soft sleepwear to minimize friction and offer gentle support during your recovery.

  • Take it easy and wear loose clothing for at least two weeks after BBL surgery.

  • Put comfort, support, and your mental health first by dressing in pieces that feel good and fit your healing needs.

For what to wear post-bbl surgery, people should wear loose clothes and a compression garment to help healing and cut swelling. Soft, thin fabrics do the best job of preventing skin irritation.

Steer clear of skinny jeans or leggings that squeeze the surgical zone. Most doctors recommend wearing the compression garment for a few weeks, day and night.

Selecting the best attire allows skin to breathe and maintains maximum comfort during your recovery. The following segments provide additional tips and everyday wear inspiration.

The Clothing Foundation

Following a BBL, what you wear can have a direct impact on your body’s healing and comfort. Recovery is formed by the right support, fabric, and fit. Every layer and piece of clothing should assist your body in recuperating, keep inflammation to a minimum, and simplify everyday living.

1. Compression Garments

Compression garments are the primary layer for the initial weeks post-BBL surgery. They underpin new curves and assist in controlling swelling, which tends to be prevalent early on. Our top pick is a premium piece of recovery clothing, typically extending to the upper thighs and butt region for post-BBL healing.

A snug fit, but not too tight, is important. Too much pressure restricts blood flow, while too loose won’t aid with swelling. Something with adjustable closures or straps assists as your body changes shape and swelling goes down. Surgeons typically suggest wearing these 24/7 for a number of weeks, so it’s smart to have more than one for convenient washing and switching.

2. Breathable Fabrics

Light airy fabrics are best. Moisture-wicking blends, such as bamboo or cotton, pull sweat and heat away from healing skin. Avoid synthetic fabrics. Polyester and nylon trap heat, resulting in stickiness and potentially slower healing.

Always test the texture against your skin for a few minutes. The softest materials help you stay away from itch, rash, or friction. Most women discover a soft compression sports bra assists, particularly if swelling flares up in the chest or upper body.

3. Loose Silhouettes

Flimsy clothes go a long way. Flowy tops, zip hoodies, or button-up blouses keep pressure off the butt and give you space to move. Dresses and tunics are fantastic, particularly in that initial week when you’re feeling achy.

Elastic waist pants or shorts that won’t rub against incisions are ideal. Ditch skinny jeans, tight leggings, and anything that constricts your body. Experiment; what feels best will shift as your body recovers.

4. Smart Underwear

Underwear should be soft and seamless. High-waisted styles provide soft support without compressing the healing area. Stretchy fabrics, such as modal, flex to the swelling.

Avoid underwear with heavy elastic bands, seams, or lace that could chafe skin or press into swollen tissue. A soft, non-wire bra is perfect for daytime wear. Comfort trumps style in those first few weeks.

5. Layering Strategy

Schedule wardrobe shifts as you recover. For the initial week, outer layers such as loose shirts or hoodies do the trick. As swelling diminishes, you can transition to closer fitting options.

Most folks can wear normal clothes at six weeks, but it depends. Monitor your healing and consult your surgeon prior to transitioning into tighter or structured pieces. Allow yourself months to shift into your new shape prior to purchasing a new wardrobe.

Your Recovery Timeline

Recovery from a BBL demands sensitive clothing decisions. What you wear during these initial weeks impacts how you recover, feel, and move every single day. Stick to the proper schedule to control swelling, soreness, and maintain your results. Compression garments remain key throughout, but your clothes will transition as you recover and return to your regular activities.

First Week

Compression garments need to be worn pretty much all day, up to 23 hours, during the initial week. This assists in decreasing swelling and helps maintain the new contours. Baggy button-down shirts, oversized T-shirts, soft robes, and similar items work best. Skip over-the-head tops or outfits with tight zippers that stress your body and complicate dressing.

As mild soreness is common, stick to stretchy fabrics and elastic waistbands for less work and more comfort. Do not sit on your tailbone except when going to the bathroom. This preserves your gains. Take it easy this week. Be sure all clothing is simple to get on and off without bending or twisting. Rest is essential.

Try to keep sodium under 1500 mg per day to help control inflammation. Even silly things like where the seams are matter, so go for minimal seams or seamless underwear. Compression garments should be snug, not tight, and checked frequently for wrinkles or bunching that could irritate the skin.

Weeks 2–6

As swelling subsides, you can begin experimenting with soft leggings or joggers that offer a loose fit. Compression garments still remain in place for approximately 23 hours a day, typically for up to 6 weeks. Others can begin wearing low-impact athletic gear with their surgeon’s approval. Jeans or fitted pants can be tempting, only initiate these once your surgeon gives you the green light on a follow-up visit, generally after weeks 3 or 4.

Stay away from high waistbands or anything that puts pressure on your middle. Monitor your body’s response to each new addition. If you experience irritation or skin changes, switch fabrics or styles. Be mindful of soreness, which can persist for as long as six weeks. You can start low-impact exercise during this time, but be sure to check with your surgeon first.

Mark mini-milestones, perhaps a new top or cozy dress, but don’t forget to keep healing as the number one priority!

After 6 Weeks

Wardrobe selections expand with healing progress. Incorporate flexible pieces that complement your new shape, such as wrap dresses, baggy pants, or tunics. Seek out pants that complement style with comfort that continues, like soft denim or athleisure. Have a couple of easy switch-up items handy in case you need to change your outfit during the day.

Experiment with various styles, identify what complements your figure and resonates with your skin. Be mindful of assistance. Some still like light compression or seamless underwear for shape and comfort. If you get swelling or soreness that returns, return to looser garments and consult your care team.

Routine follow-up with your surgeon at 6 weeks, 3 months, and 6 months ensures you’re healing beautifully and can gradually add to your wardrobe.

Beyond The Basics

Post-BBL recovery requires more than just some wardrobe changes. Each garment you choose to wear can impact your comfort, recovery, and final outcome in the upcoming weeks. Swelling is common, and patients typically wear a compression garment 23 hours a day for as long as six weeks. Medical-grade garments with adjustable closures and seamless, breathable fabric fit most.

As the swelling can sometimes last for six weeks or more, watching for changes and checking in with a plastic surgeon if it does is prudent. Select outfits and shoes that slip on easily, are soft on skin, and allow you to skip with ease.

Footwear

Shoes should be flexible, supportive, and simple to put on. Steer clear of stilettos or anything that pinches your foot, which can disrupt your balance and pressurize where you don’t need it. Slip-on shoes and sandals are easy, particularly if bending is hard after surgery.

Seek out thick, soft-soled pairs that cushion your step. This reduces pressure on your feet. Supportive shoes with a non-slip sole are crucial for steady footing, particularly if you are feeling weak or unstable. Stick with shoes that won’t bind or pinch.

Opt for styles that stretch or have adjustable straps, allowing your feet to swell or relax as necessary.

Sleepwear

Fluffy, baggy jammies assist you in snoozing and tossing and turning easily. Breathable fabrics, such as cotton or bamboo, keep you cool and comfortable. If you get cold, a light robe can provide some heat without encumbering you.

Select pajamas without tight cuffs or seams, which can aggravate skin or press on incision sites. If you have to dress or check wounds overnight, then button and zipper-front sleepwear is easier to access. Swelling can alter your body shape from one day to the next, so be sure your PJs accommodate or stretch accordingly.

Outerwear

Layering is the optimal means of keeping warm post surgery without sacrificing comfort and mobility. Lightweight jackets or cardigans with loose sleeves are great. Select jackets with zippers or buttons you can easily manipulate.

Heavy coats are suffocating, so steer clear of anything bulky or rigid. A soft poncho or wrap provides additional warmth and is easy to slide on and off. Warmth is key, but cozy always comes first this season.

Waistbands and Pockets

Waistbands that dig or squeeze only cause pain and slow healing. Adjustable bands are ideal because they provide you space as swelling fluctuates. Seek out pants or skirts with soft, elastic waists or drawstrings.

Steer clear of seams that go over incision sites. They should be slick and soft inside out with pockets located far away from tender regions. If you want pockets, choose ones that are low on the hips or high on the chest where they won’t compress healing tissue.

The Pressure Problem

Pressure is a big component of BBL recovery. Fat in the buttocks is friable after surgery and any additional pressure can decrease the survival of transferred fat. Sitting down directly on your butt isn’t recommended for weeks post-op, and even the wrong type of clothes can endanger results.

Compression garments are advised by the American Society of Plastic Surgeons for a minimum of 6 to 8 weeks, with numerous surgeons recommending 24/7 wear for 2 to 6 weeks. This should taper to 12 to 18 hours a day through week 8 and nightly up to 12 weeks. PODsy Garment fit, waistband, seams, pockets – they all help in healing and comfort!

Waistbands

Wide waistbands distribute pressure and are less prone to digging into swollen or healing areas. Skinny or snug bands can impede circulation, create irritation, and exacerbate puffiness around your tummy or hips. High-waisted styles aid in supporting the midsection, particularly as swelling fluctuates across the recovery timeline.

Elastic waistbands that stretch with the body adjust nicely to size fluctuations, which is frequent in aftercare. Clothes that utilize flat, wide elastic or soft, stretch fabrics are preferable to rigid, thin bands that cut off blood flow. The right waistband can help patients feel more secure and stable, making it easier to return to light activity sooner.

Seams

Flat seams minimize irritation to the skin, which is sensitive post-surgery. Bulky seams can chafe and cause sore spots or even skin breakdown in areas of compression. Seamless clothing is the epitome of comfort by eliminating raised stitching altogether.

If that’s unfeasible, smooth, minimal seams are the next best alternative. It is smart to try a garment on for an hour or so at home before you wear it all day. For some, pressure from even small seams can cause redness or discomfort, particularly when wearing compression garments for long hours as instructed.

Pockets

Pocket clothes have to be selected carefully. Deep pockets can cause uneven pressure that endangers the healing in the buttocks or hips. Hidden or flat pockets provide utility without bulk or pressure points.

Firm stitching is necessary so pockets don’t drag on or twist the garment, particularly when active. For those who want to pack light, choose styles with discreet, strategically placed pockets that won’t disrupt compression or comfort.

Social Outfits

Planning ahead to align comfort and confidence at social events is essential. Clothing should be loose and not rub on tender or healing spots. Your clothes need to accommodate your recovery needs, particularly when you’re away from home.

It’s a good idea to inform friends or family about comfort thresholds or the need for pauses, so excursions proceed smoothly. Most patients discover that transparent, open discussions about their recovery alleviate pressure and simplify social events during this time.

Navigating Social Life

Post-BBL surgery, everyday life changes a little, particularly in terms of your outside-the-house attire. Your outfits should strike that delicate balance between comfort and style, make you feel like a rockstar, and assist the healing process. You might have to put your life on hold for a few weeks, and it is natural to struggle with social plans or your work schedule while you are healing.

Casual Outings

Loose, soft fabrics such as cotton or bamboo are your best bet for out on the town. These allow your skin to breathe, help you stay cool, and minimize the chance of chafing. Flowy dresses, oversized shirts, and wide-leg pants can be combined to create both laid-back and fashionable ensembles.

Adding light layers, like a cardigan or a thin scarf, keeps you comfortable if the weather shifts. Don’t wear skinny jeans or tight skirts for the first six weeks. Snug waistbands can scratch tender regions, impeding healing and making you miserable.

We often bring supportive pillows when sitting for longer stretches at cafes or parks, so outings are relatively less stressful. Flats or low heels are more manageable than high heels, particularly if you’re still hobbling. Accessories such as hats, sunglasses, or crossbody bags bring a dose of style without putting pressure on the healing areas.

Compression garments, per your doc’s advice, should still be worn under your clothes. They provide support and mold the body as you recover.

Special Occasions

Formal occasions may appear intimidating while healing. You can still pull off a dressed-up look without sacrificing your comfort. Go for dresses or suits with elastic waistbands, wrap closures, or adjustable ties, which are easier to put on and take off.

Silk blends or soft knits provide an elegant drape without hugging your body too tightly. A one-piece jumpsuit with a front zip or loose-fit maxi dress are excellent examples of event-ready outfits that won’t restrict your body.

Trade those stiletto heels for dressy flats or padded sandals. Statement jewelry and a sleek clutch can enhance your look without the additional weight or discomfort.

Work Attire

Returning to work post BBL means selecting outfits that appear sleek yet don’t constrict or pummel. Tailored trousers with stretch, A-line skirts, and loose blouses allow you to move freely and look professional. If your office is cool, a soft blazer or cardigan injects polish and warmth.

Others require the supportive cushion of their desk for a few weeks. Opt for pants with elastic or adjustable waists instead of stiff jeans or pencil skirts. As your strength returns, gradually bring back more organized bits only if you’re up for it.

Clothing and Mental Well-Being

What you wear post surgery can define how you feel about yourself. Selecting outfits that fit your personality, bold hues, quirky prints, or classic neutrals, boosts your spirits. Experimenting with styles or the odd combination of pieces provides a feeling of control while recovering.

Most folks get it, and talking with friends and family about your needs when you are out there socializing can be a big help. By being open, you allow others to know your boundaries, so you can rest and concentrate on recovering.

If you’re self-conscious, remind yourself that recuperation is fleeting and your ease is paramount.

The Mental Wardrobe

To know what to wear after BBL surgery is about way more than grabbing some clothes from your drawer. It begins with comfort and support. Soft, stretchy clothes made of cotton or bamboo give your skin the opportunity to breathe and lower the likelihood of friction against healing wounds.

Flowy dresses, button-up shirts, and wide-leg pants make dressing effortless while relieving tension from tender areas. Compression garments your doc will probably suggest are a must. They reduce swelling, shape, and secure new curves. They should fit snug but not tight, and you may have to wear them night and day for weeks.

It’s nice if you have a couple of sets, two or three, so you can rotate them for laundry! Garments that support your recovery objectives and way of living can grease the wheels of everyday life. Sitting may be tricky in the beginning, so seek out apparel that enables you to stand or recline without pulling or gathering.

Flowy tunics, soft robes, and elastic waistbands back your light step. Shoes count, too; slip-ons or sandals prevent you from having to bend down too much. If you have to go out of the house, long cardigans or loose coats will disguise compression garments and still look fashionable. Others are layering lovers, opting for lightweight tops to veil their garments for modesty and warmth without added weight.

It’s critical that you stay patient and flexible during your transition back into your regular wardrobe! Swelling can fluctuate weekly, so your size might bounce around for a bit. Trying on clothes before you leave saves time and stress. It helps to keep your favorite soft clothes around on those days you just need more comfort.

Others shop for new clothes once the swelling breaks, so that they don’t waste money on items that may end up too small later. If you have to go back to work or social engagements, planning an outfit or two in advance will help you transition.

Flaunt your new shape as you heal and celebrate your progress. Selecting pieces that flatter and highlight your new curves can really boost confidence. Easy accents such as a new belt, wrap dress, or tighty whities can emphasize results without overwhelming them.

The snapshots or little milestones, fitting into your favorite skirt, help signify recovery. Nothing is like some good old-fashioned cheerleading from your loved ones, either in person or online, to grease the path and bolster spirits.

Conclusion

Soft loose clothes work best to heal well after BBL surgery. Avoid tight jeans or rugged material. Cotton pants, fuzzy shorts, and flowy dresses feel airy and help skin breathe. Keep it basic, switch sizes if you puff up, and change clothes if you perspire. Pressure marks delay healing, so inspect your skin daily. Out with old shapewear, in with new delicate pieces. Friend support is great, but take breaks when you need them. Dressing smart accelerates healing and reduces stress. For additional tips or stories, contact or inquire. Recovery is unique to each person, so figure out what suits your days. It’s most important that you feel comfortable.

Frequently Asked Questions

What is the best type of clothing to wear after BBL surgery?

Loose, soft clothing is best after a BBL surgery. Opt for baggy shirts, dresses, or sweatpants. Stay away from snug waistbands or anything that compresses your buttocks.

How long should I avoid tight clothes after BBL?

Most surgeons suggest avoiding tight clothes for a minimum of 6 weeks post-bbl surgery. This aids your body in recovering and maintains your results naturally.

Can I wear jeans after BBL surgery?

No jeans or tight pants until your surgeon gives you the green light. Jeans can put pressure on the healing area and impact your results.

Why is it important to avoid pressure on the buttocks after BBL?

Sitting or wearing tight clothes post BBL surgery can damage the transplanted fat cells. This can compromise your surgery and your final results.

What should I wear to social events during BBL recovery?

Wear loose, comfortable dresses or tunics while out. This clothing conceals swelling and does not compress your healing regions, so you can brave the world feeling secure and fabulous!

How can I support my mental well-being through clothing choices after BBL?

Slipping into ones that are comfortable and fit well will make you feel good and confident during recovery. Pick styles that make you feel good and support your healing body.

Is there special post-surgery clothing for BBL recovery?

Yes, most surgeons suggest a compression garment. This aids in decreasing swelling and promotes healing. Make sure you always listen to your doctors about when and how to wear it.

Targeting Stubborn Fat After GLP-1: Effective Non-Surgical Solutions

Key Takeaways

  • GLP-1 medications do a great job controlling your appetite, but they will likely do very little to target stubborn fat pockets or fat distribution because those are hormone and genetic related.

  • Visceral fat, or the fat that encases your organs, is less responsive and might necessitate lifestyle improvements or supplementary therapies on top of medication.

  • Hormonal imbalances and genetic predispositions can render some fat pockets resistant to loss. This underlines the importance of tailored approaches.

  • Fast weight loss leads to loose skin and change in shape, so we need to treat fat and volume loss for harmonious results.

  • Strategic nutrition, targeted exercise, and professional aesthetic treatments can help optimize results when addressing stubborn fat after GLP-1.

  • Working with healthcare professionals and having realistic expectations contribute to a positive and sustainable journey after weight loss.

Stubborn fat pockets after GLP-1 are areas of fat that persist even after GLP-1 medication induced weight loss. Most people using GLP-1 drugs, including semaglutide, notice some stubborn fat pockets after GLP-1 just don’t disappear as quickly as others.

These fat pockets can appear on the belly, thighs, or arms. To understand why and what can help, the following sections get into the details.

GLP-1 Limitations

GLP-1 receptor agonists are a type of drug commonly prescribed for weight management and glycemic regulation. They work by suppressing appetite, allowing individuals to consume fewer calories and shed pounds. That’s not what these medications are doing — they’re not directly dissolving fat, and there are still stubborn fat pockets that exist after weight fluctuations of all sizes.

These are because of how fat is stored by the body, hormonal shifts, and individual genetic factors.

Limitation

Feature/Impact

Appetite control only

Reduces overall intake, no direct action on fat cells

Hormonal impact

Changes in hormones may cause fat to stay in some areas

Fat distribution

Certain fat types (e.g., visceral, subcutaneous) react differently to weight loss

Side effects

Nausea, vomiting, diarrhea can limit use

Medical history

Not suitable for those with pancreatitis, thyroid cancer, or kidney problems

Antibodies

Some develop resistance, making drugs less effective over time

Injection required

Some people may find regular injections inconvenient

Weight regain

Risk of regaining weight once treatment stops

Allergic reactions

Not suitable for those with hypersensitivity

1. Visceral Fat

Visceral fat nestles deep in the abdomen, surrounding vital organs such as the liver and intestines. Unlike subcutaneous fat, which is located immediately beneath the skin, visceral fat has increased the risk of heart disease and diabetes, whereas subcutaneous fat is more cosmetic.

GLP-1 drugs are most effective at reducing body weight by decreasing caloric intake. Their impact on visceral fat can be variable. Visceral fat is stubborn because it is more sensitive to stress hormones and less sensitive to appetite.

After weight loss, individuals may still have visceral abdominal fat. When it comes to reducing visceral fat, lifestyle changes still matter most. Daily workouts, such as brisk walks or bike rides, and a high-fiber, lean protein-centric diet can do the trick.

For others, medicine, including liposuction or emerging therapies, may be necessary, but they have dangers.

2. Hormonal Factors

Hormones greatly impact how and where fat remains on the body. Even after weight loss, shifts in insulin, cortisol, and other hormones can cause certain areas to retain more fat. High insulin, for instance, can move the body to store fat, and low glucagon slows fat burning.

These hormonal swings can cause hunger or food cravings, which makes maintaining weight after discontinuing GLP-1 therapy difficult. Others could crumble under the reason that once their hormone balance shifts, they will suddenly experience increased cravings and regain the weight in a flash.

Make sure to check hormone health with your doctor, particularly after you’ve lost weight. Correcting hormonal imbalances can ensure fat stays off for good.

3. Genetic Blueprint

Genes determine how your body shapes up and stores fat. Some folks store more belly fat, others more in hips or thighs. This cycle is difficult to break, even with medications such as GLP-1. If there’s stubborn fat in the family, it’s more likely that it’ll be difficult to shed.

Certain populations are more genetically predisposed to having resistant fat. For instance, if a lot of members in a family suffer from type 2 diabetes or central obesity, then this can be inherited. This implies a one size fits all solution probably won’t crack it.

Receiving advice tailored to personal genetics, such as custom diet and exercise, can be more effective than a one-size-fits-all approach.

4. Cellular Resistance

Cellular resistance implies fat cells cease to release stored fat. Once you’ve had fat, the fat cells never leave; they just shrink after weight loss, primed to fill up once more. Over time, they can begin to resist signals from hormones too, making it even tougher to shed additional fat.

Other attempts to interrupt this cycle include cryolipolysis (fat freezing), ultrasound, or cell-pathway medications. It’s not a cure, but it might assist those of us who have to deal with stubborn post-bariatric surgery flab.

If we can understand these cell changes, we can come up with ways to keep fat off that don’t involve restricting calories. More work is needed for safe, permanent solutions.

The Volume Loss Effect

When you lose weight quickly after using GLP-1 meds such as semaglutide or tirzepatide, it can have a big impact on your body’s appearance. Such drugs assist most patients in losing significant weight, but the path fat exits the body is not necessarily uniform. Certain regions, like the stomach, thighs or arms, might cling to tenacious fat even after a significant weight loss.

This introduces a new array of challenges not only for health but for how the body looks and feels. Major weight loss can transform the shape of the body in directions that aren’t always desired. With the fat pad under the skin now deflating, stretch-marked skin that once covered a more ample frame can fail to bounce back.

This results in loose, sagging skin that folds and hangs. This is most commonly noticed in the belly, upper arms, and inner thighs. When your body’s healing and bounce back is slower with age or extended weight gain, the skin can still end up loose once the weight is gone.

Other patients have lost some muscle mass as well as fat, which can make the skin appear even more lax. Lower protein in weight loss can exacerbate this, but higher protein diets and strength training can help to slow the loss. When skin sags or fat exits some places but not others, we feel it in our souls.

Even once they have achieved a goal weight, they may still feel uncomfortable in the mirror or in clothing. This may cause irritation, diminished self-worth, or sadness. Body contouring addresses the reality that even when people can’t wait to enjoy their progress, body shape changes or residual loose skin can get in the way.

These emotions are real and require focus, just like the physical components of weight loss. Key is to consider both fat and volume loss for a balanced effect. Skin and muscle preservation during weight loss is just as crucial as shedding fat.

Others might opt for body contouring, like liposuction or a tummy tuck, to get rid of loose skin or hard-to-lose pockets of fat. These surgeries are typically done after someone has maintained a stable weight for six to twelve months, as this reduces surgical risk and provides the optimal result.

Certain risks from volume loss, like clots or anesthesia issues, are greater if the body is still developing rapidly. Waiting until weight is stable for a minimum of three to six months is typically recommended prior to any surgery.

Beyond The Medication

Even with GLP-1 meds, some folks have those pesky hard pockets of fat or loose skin that don’t disappear on their own. These can include the abdomen, upper arms, thighs, buttocks, and even the neck or lower face. Taking on these challenges requires more than just medication. Non-surgical solutions, lifestyle modifications, and continued support go a long way in defining body image and well-being post weight loss.

Strategic Nutrition

Nutrition is a foundation for sustainable body transformations post GLP-1. I recommend a balanced diet filled with whole foods like veggies, lean meats, fish, beans, and whole grains to support fat loss and keep you healthy. Limiting refined carbs and sugars will not only help keep blood sugar stable, it will reduce cravings, which is key after withdrawing from meds.

Foods rich in protein and good fats keep muscles lean and help to ignite metabolism and sculpt the figure. Some find it beneficial to have small, regular meals to avoid energy or mood crashes.

  • Go for whole, unprocessed foods instead of packaged or fast food.

  • Include protein with every meal to maintain muscle.

  • Consume good fats from nuts, seeds, and olive oil.

  • Limit added sugars and refined carbs.

  • Get plenty of water so you can flush your skin and your metabolism.

  • Add fiber-rich foods to help you feel full.

Targeted Exercise

Exercise should be tailored to individual needs and emphasize both cardiovascular and strength training. Cardiovascular training, such as brisk walking, swimming, or cycling, burns calories and supports fat loss. Strength training preserves and builds muscle, which is crucial for transforming body shape and increasing metabolic rate.

Specifically, exercises such as squats, lunges, and planks focus on typical trouble zones like the thighs and stomach. Exercise helps tighten skin and can make you feel more potent and confident. After a while, with consistent motion, your body becomes shredded and tough.

  • Cardiovascular exercises: walking, cycling, swimming, jump rope.

  • Strength training: squats, push-ups, lunges, resistance bands.

  • Core-focused moves: planks, crunches, leg raises.

  • Flexibility: yoga, stretching to improve range of motion.

Body contouring treatments such as radiofrequency, ultrasound, or injectable therapies can assist in smoothing loose skin or contouring trouble areas post weight loss. These tend to be superficial, with mild erythema or edema that resolves within a few days. Courses of treatment are required for optimal results, but hundreds of wrinklers experience clearer, brighter skin in as little as two weeks.

Continuous care at home and with the pros can help skin get stronger and more even as well. It’s crucial to have support from friends, groups, or health professionals. Realistic goals help guide the journey, and motivation keeps changes going strong.

Weight loss is almost never one-size-fits-all. What’s comfortable and confidence-building for your body and lifestyle is what sticks.

Aesthetic Solutions

Stubborn fat pockets can persist post GLP-1 medications for weight loss. These zones may be unresponsive to diet or exercise. A lot of us find ourselves seeking options for body contouring and skin toning following significant weight loss. For aesthetic solutions, there are options ranging from non-invasive to surgical, each with varying degrees of effectiveness, downtime, and results.

It’s important to know these choices and consult with an experienced provider who can direct the best fit for your needs.

Fat Reduction

Non-invasive fat reduction, such as cryolipolysis (CoolSculpting) and ultrasound treatment, aims at fat cells without surgical incisions. Cryolipolysis freezes fat cells, allowing the body to dispose of them. Results may take a couple of months to manifest and it is safe on most skin.

Ultrasound therapy employs sound waves to dissolve fat, usually around the belly or thighs. Both options are ideal for individuals who have small pockets of stubborn fat.

Conventional liposuction extracts fat via tiny incisions and suction. It’s more invasive and requires longer to heal. It’s effective for bigger pockets of fat. Non-surgical alternatives offer shorter downtime but less striking outcomes.

Liposuction recovery could be weeks, whereas non-invasive treatments have the majority of people back to normal the next day or two.

  1. Cryolipolysis: Freezes and destroys fat cells with no downtime.

  2. Ultrasound Fat Reduction breaks down fat using sound waves. It is best for mild to moderate fat.

  3. Laser Lipolysis melts fat with heat and can help tighten skin.

  4. Traditional Liposuction: Removes fat quickly, but needs longer healing.

Skin Tightening

Losing weight can cause loose skin. Procedures such as radiofrequency and ultrasound skin tightening deliver energy deep into the skin to encourage it to produce more collagen. This makes the skin appear more taut and smooth.

Radiofrequency is easy and operates on the face and body. Ultrasound skin tightening employs focused waves for deeper lift, typically with effects appearing in a few months.

Collagen remodeling is key to maintaining perkiness following weight loss. Many clinics provide combo treatments to accelerate collagen stimulation. Skincare and hydration daily assist skin recovery and help it remain strong.

Muscle Toning

Retaining muscle is key post-weight loss. Muscle toning exercises, such as resistance training, sculpt arms, legs, and core. Whether it’s lifting weights or using resistance bands, working against resistance builds muscle and boosts metabolism.

These workouts can help prevent sagging by bulking the skin from the inside. By incorporating adequate protein into meals, you’re aiding muscle repair. Foods such as beans, eggs, or lean meats are good options.

Checking in on your muscle tone or body shape every few weeks allows you to track what’s working and what’s not.

Treatment

Method

Recovery Time

Best For

Skin Impact

Cryolipolysis

Freezing fat cells

1–2 days

Small fat pockets

Mild

Ultrasound Therapy

Sound waves

1–2 days

Moderate fat areas

None

Laser Lipolysis

Heat from lasers

1–3 days

Mild fat, loose skin

Mild-Firm

Liposuction

Surgical suction

2–4 weeks

Large fat deposits

None

RF/Ultrasound Tighten

Energy for collagen

0–2 days

Loose or sagging skin

Firm

An Integrated Approach

Those stubborn fat pockets can linger even after GLP-1 big weight loss. These spots might not move with just medicine. An integrated approach is when you use more than one of the methods to achieve your body goals. This method is great for individuals looking for a sleeker appearance or those struggling with pockets that refuse to budge, even after a 15 to 20 percent weight loss.

A complete regimen typically combines pharmaceuticals, lifestyle adjustments, and occasionally cosmetic procedures. Weight loss drugs, such as GLP-1, have a big impact, but they can’t control where you lose fat. Non-invasive, for some, BBL HEROIC or MOXI can address sun damage, redness, or dark patches.

These therapies can combine synergistically to deliver more optimal results, particularly when pesky pockets don’t deflate with weight loss alone. Surgery is another possibility, but be sure to wait until your weight has stabilized, typically three to six months, before considering elective surgery. Those who maintain a stable weight for six to twelve months following initiation of therapy tend to do better if they opt for surgery.

Collaborating with a team of healthcare professionals is essential. This could include your general physician, a specialist, and possibly a surgeon or cosmetic professional. Everyone contributes their expertise, making your strategy more comprehensive.

For instance, your doctor can guide your medication and a surgeon can discuss if and when surgery is appropriate for you. Occasionally, you might need to discontinue GLP-1 medicine one or more weeks before surgery to reduce risks. Discussing the timing, half-life of your medicine, and how long you need to fast is a huge part of preparing for a safe and seamless process.

We are all different, so these plans should align with your own needs and goals. What works for us may not work for you! Some may need just a tweak with non-invasive treatments, while others may need surgery or a different medication regimen.

It pays to stay up on your options and keep educating yourself on the latest fat loss and body shaping approaches. That way, you are prepared to make decisions that suit your lifestyle and your well-being.

Choosing Your Path

Following GLP-1 therapy, most individuals have areas of stubborn fat that just won’t quit. Selecting your next steps is subject to your own objectives, your frame, and the manner in which your body stores fat. Some desire a touch of additional sculpting, others aspire to maintain results over the long haul. Understanding your body and desires directs your next direction.

For others, a more sporadic schedule and intermittent fasting is more effective. Research demonstrates that adherence to a reduced calorie diet promotes weight loss maintenance. It’s less important if you choose a high-fat, low-fat, or high-protein diet. Most plans lose seven percent at six months, but maintaining is the key. About one in three regain weight in the first year, so selecting steps that fit your life counts.

Considering alternatives, it’s wise to balance the risk and reward of each therapy. Surgery, like liposuction, delivers quick results but comes with greater risk and recovery. Non-surgical options like freezing fat (cryolipolysis) or ultrasound are less dangerous but might require more visits and end up more expensive in the long term. Certain therapies respond best to small, solid fat pockets, while others are ideal for bigger zones.

Every choice has side effects, healing times, and costs. The advantages of GLP-1 therapy can persist for years post-discontinuation, but staying active and maintaining a clean diet continues to be critical. Exercise is proving to aid in weight maintenance for up to 2 years. Plateaus may occur, but adhering to strong habits provides the highest likelihood of sustained achievement.

When picking between surgery and non-surgical steps, here are a few things to check:

  • Safety and side effects: Surgery has bigger risks, like infection. Non-surgical options can still cause swelling or skin changes.

  • Downtime: Some need weeks off. Others let you go back to daily life right away.

  • Cost: Surgical options often cost more upfront. Non-surgical options require return visits and can pile up.

  • Size and place of fat: Some methods target small areas while others cover bigger spots.

  • Lasting change: Surgery may remove fat for good, but weight can still return with lifestyle changes. Non-surgical methods work best with consistent habits.

  • Your health: Some medical conditions may rule out certain treatments.

Conclusion

Pockets of stubborn fat can linger long after the GLP-1 meds have done their work. They are there. Some spots just hold on, no matter the diet or steps taken. Skin could appear saggy, or spots feel slightly lumpy. A lot of folks assist with things like body contouring, skin lifts, or other easy remedies. These alternatives provide real results and suit a range of needs. Your best shot is to combine medicine with habit and sometimes a little professional assistance. There is no one path, so take your time and weigh your options. A chat with a trusted expert can clear up next steps. For more advice or candid facts, contact or visit reliable resources. Keep it simple and stay real with your goals.

Frequently Asked Questions

Why do some people have stubborn fat pockets after GLP-1 treatment?

GLP-1 stubborn fat pockets. There will still be some fat pockets left due to genetics or body type.

Can GLP-1 medications cause volume loss in the face or body?

Yup, fast weight loss induced by GLP-1 drugs can cause volume loss in the face and body, which makes some people look hollow or saggy.

Are there ways to remove localized fat after GLP-1 treatment?

Yes, body contouring, liposuction, or non-invasive fat reduction can address those pesky stubborn fat pockets left behind after medication.

Is it normal to have uneven fat loss after GLP-1 therapy?

Yep, uneven fat loss is normal. There could be areas that are more stubborn due to genetics, age, or your individual metabolism.

What should I do if I am unhappy with my appearance after GLP-1 weight loss?

See a doctor or aesthetician. They can advise you on safe and effective answers to your issues.

Can a healthy lifestyle help with remaining stubborn fat?

Sure, consistent exercise and balanced nutrition can help to continue reducing fat and strengthen overall body contour post GLP-1.

Are aesthetic treatments safe after GLP-1 medication use?

While most aesthetic treatments are safe post-GLP1, it is always best to talk to a qualified provider about your choices and safety.